Sugar cookie frosting transforms plain cookies into showstoppers, and the right recipe makes all the difference. Whether you’re decorating for holidays or special occasions, a smooth, spreadable frosting that holds its shape is essential.
This frosting strikes the perfect balance between buttercream richness and royal icing stability, letting you pipe details or flood cookies with ease. Let’s dive into what makes this frosting work and how to master it in your kitchen.
Why You’ll Love This Recipe
This sugar cookie frosting delivers professional results without requiring special equipment or intimidating techniques. It’s forgiving, versatile, and tastes genuinely delicious.
- Smooth, pipeable texture that holds crisp edges for decorating
- Tastes like real butter and vanilla, not overly sweet
- Works for piping borders, flooding, or simple spreading
- Sets firm enough to stack cookies without smudging
- Colors beautifully without affecting flavor or texture
My Experience Making This Recipe
I’ve tested this frosting dozens of times, and every batch surprises me with how reliable it is. The moment I added the first swirl to a cookie, I knew I’d found something special.
My kids actually ask me to make decorated cookies now, which tells you everything about the flavor. The frosting stays creamy on the inside while setting to a slight crust on the outside, giving you that textural contrast that makes every bite satisfying.
Whether I’m rushing through holiday prep or taking my time with summer decorating, this recipe adapts to my pace and skill level. That kind of flexibility is rare and honestly invaluable.
Recipe Overview
- Recipe Name: Sugar Cookie Frosting
- Servings: Makes enough frosting for 24 cookies
- Prep Time: 5 minutes
- Cook Time: 0 minutes
- Total Time: 5 minutes
- Course: Dessert Topping
- Cuisine: American
- Calories per Serving: 45 calories
Equipment You Will Need
- Electric mixer or whisk
- Medium mixing bowl
- Measuring cups and spoons
- Rubber spatula
- Piping bag with tips (optional but recommended)
- Small bowl for food coloring
- Sifter or fine-mesh strainer
Ingredients for Sugar Cookie Frosting
- Unsalted butter, 1/2 cup, softened to room temperature
- Powdered sugar, 2 cups, sifted
- Vanilla extract, 1 teaspoon
- Heavy cream or whole milk, 1 to 2 tablespoons
- Salt, pinch
- Food coloring, as desired (optional)
Ingredient Notes and Substitutions
- Unsalted butter provides a clean, neutral base that lets you control the final salt level. Use salted butter if you prefer, but reduce the added salt to a pinch.
- Powdered sugar creates the smooth, spreadable texture you need for decorating. Granulated sugar won’t work here; powdered sugar dissolves into the frosting for silky coverage.
- Vanilla extract adds warmth and depth. Almond extract or clear vanilla both work beautifully if you want a different flavor profile.
- Heavy cream or milk adjusts consistency based on humidity and piping needs. Start with 1 tablespoon and add more by the half-teaspoon if needed.
- Food coloring should be gel or liquid-based for vibrant colors without thinning the frosting. Gel coloring requires less liquid, keeping your frosting thicker.
How to Make Sugar Cookie Frosting
Step 1: Sift Your Powdered Sugar
Sifting removes lumps and aerates the sugar, which prevents grainy frosting. Even if the bag looks fine, lumps hide inside and will sabotage your final texture.
Step 2: Cream the Butter
Beat softened butter on medium speed for about 2 minutes until it’s pale and fluffy. This process incorporates air, making your frosting light and spreadable instead of dense.
Step 3: Add Powdered Sugar Gradually
Add the sifted powdered sugar one cup at a time, beating on low speed after each addition. Going slow prevents a cloud of sugar from escaping your bowl and lets you control the mixing properly.
Step 4: Add Vanilla Extract
Pour in the vanilla extract and beat for 30 seconds until it’s fully incorporated. This distributes the flavor evenly throughout the frosting.
Step 5: Add a Pinch of Salt
A pinch of salt rounds out the sweetness and enhances the vanilla flavor without making the frosting taste salty. Don’t skip this step; it makes a real difference.
Step 6: Adjust Consistency with Cream
Add 1 tablespoon of heavy cream and beat until smooth, then add more by half-teaspoons if needed. The frosting should spread smoothly but hold its shape when piped; it should not be runny.
Step 7: Test the Consistency
Dip a knife into the frosting and lift it; it should hold a peak but not be stiff like royal icing. If it’s too thick, add milk by the half-teaspoon; if too thin, add more powdered sugar.
Step 8: Add Color if Desired
Use gel food coloring for the most vibrant results without thinning your frosting. Start with one drop and mix thoroughly, adding more until you reach your desired shade.
Pro Tip: Make sure your butter is truly softened to room temperature; cold butter won’t cream properly and lumpy frosting will result.
Tips for the Best Sugar Cookie Frosting
- Sift your powdered sugar even if it looks fine; invisible lumps ruin the smooth texture you’re after. This single step is the difference between frosting that pipes beautifully and frosting that jams in your piping bag.
- Use room-temperature butter exclusively; it creams properly and mixes smoothly with sugar. Cold butter refuses to incorporate air, and your frosting stays dense and grainy.
- Beat longer than you think necessary during the creaming step; this incorporates air and lightens the frosting. Three to four minutes of beating on medium speed is the sweet spot.
- Add cream in tiny amounts to avoid overshooting the right consistency. Fixing frosting that’s too thin requires adding more sugar, which throws off the entire batch.
- Let your frosting sit for 15 minutes after making it; the flavors meld and any air bubbles settle. This waiting period actually improves the final result.
- Use gel food coloring instead of liquid; it won’t thin out your frosting and delivers more vibrant colors. One drop of gel goes farther than you’d expect.
Common Mistakes to Avoid
- Using cold butter straight from the fridge is the number one culprit for grainy, lumpy frosting. Room temperature butter creams smoothly and incorporates air properly.
- Skipping the sifting step invites lumps that catch on your piping tips and ruin decorating. Those invisible lumps in unsifted powdered sugar will sabotage your work.
- Adding too much liquid at once creates runny frosting that won’t hold a shape. Liquid adjustments should happen one half-teaspoon at a time.
- Using liquid food coloring in large amounts thins your frosting to the point of unusability. Gel coloring is stronger, more vibrant, and won’t thin your batch.
- Mixing on high speed incorporates too much air and creates a foamy, unstable frosting. Medium speed is the right setting for smooth, creamy results.
Serving Suggestions
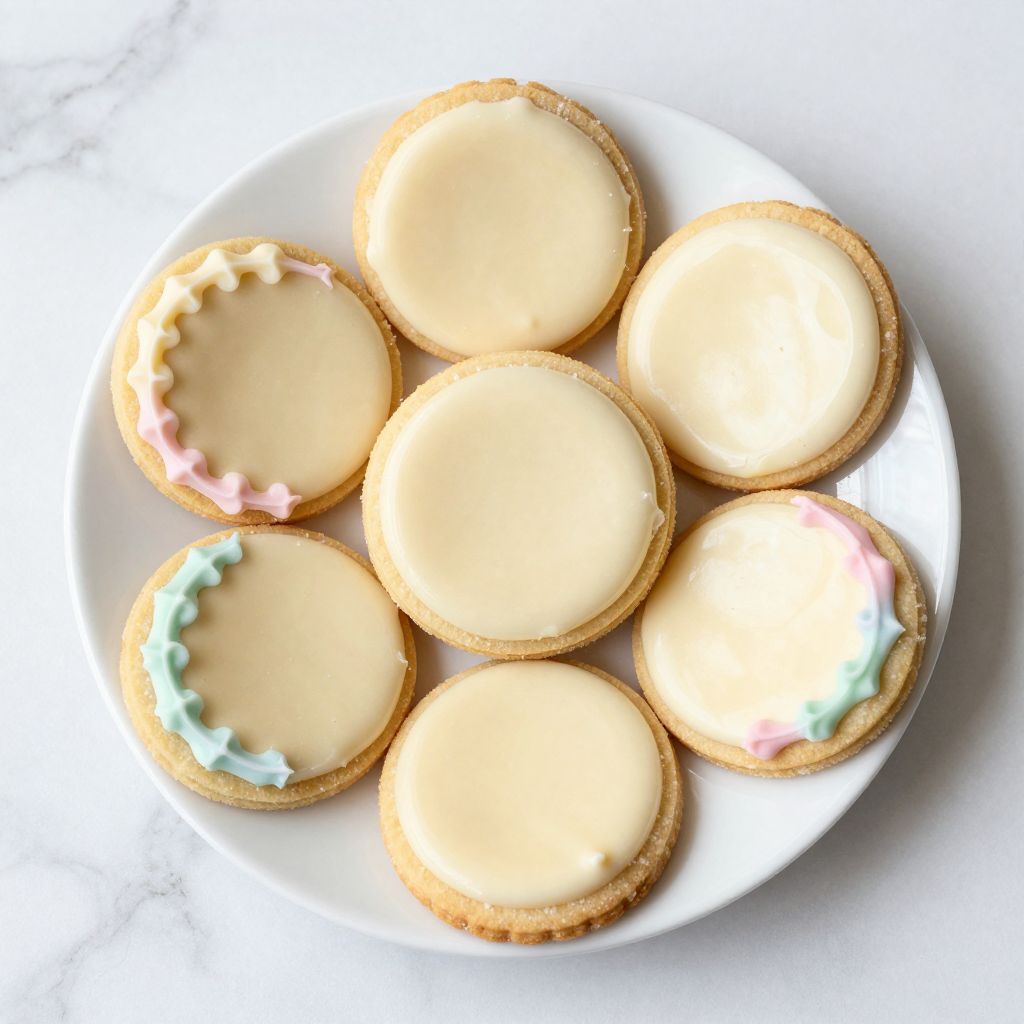
This frosting works beautifully on sugar cookies, shortbread, gingerbread, and even simple vanilla cupcakes. Pair it with your favorite decorating style, from simple spreads to intricate piped designs.
- Spread smoothly on cookies with an offset spatula for a clean, modern look
- Pipe borders and details on pre-flooded cookies for dimensional designs
- Thin with a little more cream and flood cookies for that glassy, smooth finish
- Dust with sanding sugar or sprinkles immediately after piping while the frosting is still soft
- Sandwich two frosted cookies together for a luxurious treat
Variations to Try
- Almond frosting: Replace vanilla extract with 1 teaspoon almond extract for a different flavor profile that pairs beautifully with sugar cookies. The switch is simple but transforms the entire taste experience.
- Cream cheese frosting: Replace 2 tablespoons of butter with 2 ounces softened cream cheese for a tangier, slightly less sweet version. This works wonderfully on gingerbread or spiced cookies.
- Lemon frosting: Replace vanilla with 1 tablespoon fresh lemon juice and add 1 teaspoon lemon zest for bright, citrusy flavor. Use gel food coloring to maintain thickness since you’re adding liquid.
- Cinnamon frosting: Add 1 teaspoon ground cinnamon and reduce vanilla to half a teaspoon for warm spice notes. This pairs perfectly with snickerdoodle or gingerbread cookies.
- Peppermint frosting: Add 1/2 teaspoon peppermint extract and replace vanilla with 1/2 teaspoon vanilla for holiday flavor. Color it pale pink or green for festive appeal.
Dietary Adaptations
- Gluten-free: This frosting is naturally gluten-free as written; just verify your food coloring and vanilla extract labels. No ingredient swaps needed.
- Dairy-free: Replace butter with vegan butter in a 1:1 ratio and use plant-based milk instead of cream. The frosting will be slightly less rich but still delicious and spreadable.
- Vegan: Use vegan butter and unsweetened plant milk, following the dairy-free substitutions above. The texture and flavor stay consistent with proper ingredient ratios.
- Low-carb or keto: Replace powdered sugar with powdered erythritol or monk fruit sweetener in a 1:1 ratio. These alternatives work beautifully, though some people detect a slight aftertaste.
Storage and Reheating
Refrigerator
Covered frosting lasts up to 2 weeks in the fridge in an airtight container. Frosted cookies keep for 5 days in the fridge without drying out.
- Store in an airtight container on a flat surface
- Let frosting come to room temperature before piping again
- Stir briefly if it separates slightly during storage
Freezer
Frosting freezes beautifully for up to 3 months in an airtight container or freezer bag. Frosted cookies also freeze well if stored carefully to prevent damage.
- Freeze unfrosted cookies on a tray first, then layer them in containers
- Thaw at room temperature for 2 hours before decorating if using frozen frosting
- Frosted cookies thaw at room temperature for 30 minutes
Reheating
Frosting doesn’t need reheating; simply let it come to room temperature and stir gently. If it’s too stiff, whisk in a few drops of cream until you reach the right consistency.
- Never microwave frosting; it will separate and become unusable
- Room temperature frosting is best for spreading and piping
- If refrigerated frosting is too thick, let it sit for 10 minutes before using
Nutrition Information
| Nutrient | Amount |
|---|---|
| Calories | 45 |
| Total Fat | 2g |
| Saturated Fat | 1.5g |
| Carbohydrates | 6g |
| Fiber | 0g |
| Sugar | 6g |
| Protein | 0g |
| Sodium | 25mg |
| Cholesterol | 5mg |
Nutritional values are estimates based on standard ingredients and one serving as approximately 1 tablespoon of frosting. Actual values vary based on specific brands and preparation methods.
Frequently Asked Questions
Can I make this frosting ahead of time?
Absolutely, you can make this frosting up to 5 days ahead and refrigerate it in an airtight container. Let it come to room temperature and stir gently before using, adding a splash of milk if needed to restore the right consistency.
Why is my frosting grainy?
Grainy frosting usually means your butter was too cold or your powdered sugar wasn’t sifted. Both issues are preventable; use room-temperature butter and always sift your powdered sugar, even if it looks fine.
Can I use salted butter instead of unsalted?
Yes, but omit the pinch of salt from the recipe to avoid over-salting. Salted butter adds convenience but gives you less control over the final flavor.
How do I get the frosting to pipe smoothly without air bubbles?
After making your frosting, let it rest for 15 minutes to allow air bubbles to settle naturally. Tap your piping bag gently on the counter before piping to release any remaining trapped air.
What’s the difference between this frosting and royal icing?
This butter-based frosting is softer and tastes richer, while royal icing made with egg whites sets hard and glossy. Choose this frosting for a creamy texture and delicious taste; use royal icing if you need a hard, candy-like finish.
Can I use this frosting on cupcakes?
Yes, this frosting works beautifully on cupcakes and tastes fantastic. It pipes smoothly for decorative swirls and provides better flavor than most cupcake frostings.
How thick should the frosting be for piping?
The frosting should hold a firm peak when you lift a spoon but spread smoothly when applied. If it’s too stiff, whisk in a few drops of cream; if too soft, add more powdered sugar by the tablespoon.
Final Thoughts
This sugar cookie frosting recipe delivers reliable, delicious results every single time you make it. The techniques are straightforward, the ingredients are simple, and the payoff is absolutely worth the five minutes of work.
Stop settling for frosting that doesn’t taste good or pipes poorly, and start making batches of this instead. Your cookies deserve better, and honestly, so do you.
Sugar Cookie Frosting
Ingredients
Equipment
Method
- Sift the powdered sugar through a fine-mesh strainer to remove any lumps.
- In a medium bowl, beat the softened butter with an electric mixer on medium speed for 2 minutes until pale and fluffy.
- Gradually add the sifted powdered sugar, one cup at a time, mixing on low speed after each addition until combined.
- Beat in the vanilla extract until evenly incorporated, about 30 seconds.
- Add a pinch of salt, then mix.
- Pour in 1 tablespoon of heavy cream or milk and beat until the frosting is smooth and spreadable; add additional cream by the 1/2 teaspoon if needed to reach a pipeable consistency.
- If using, divide frosting into bowls and blend in gel food coloring a drop at a time until the desired shade is reached.
- Transfer to a piping bag or use immediately to frost cooled sugar cookies. Let decorated cookies sit for at least 30 minutes so the frosting can set.