Lemon glaze recipe transforms ordinary cakes, cookies, and pastries into something truly special with minimal effort. This bright, tangy coating takes just five minutes to whip together and delivers professional bakery results that make people wonder if you spent hours in the kitchen.
Whether you’re finishing a pound cake, topping donuts, or drizzling over scones, this simple glaze works beautifully for any occasion. Let me show you how to make it perfectly every single time.
Why You’ll Love This Recipe
This glaze offers restaurant-quality results with pantry staples you probably already have at home.
- Takes five minutes from start to finish with zero cooking required
- Works on cakes, cookies, donuts, pastries, and even fruit desserts
- Bright lemon flavor that tastes fresh and never artificial
- Smooth, pourable consistency that sets beautifully without cracking
- Costs pennies to make compared to store-bought versions
My Experience Making This Recipe
I discovered the magic of a proper lemon glaze when a batch of my butter cookies came out looking disappointingly plain. A quick drizzle completely changed their appearance and added the perfect tartness that balanced the sweetness.
My family now requests lemon-glazed treats constantly, and honestly, I love that this recipe lets me deliver impressive results without fussing over multiple components. The glaze sets up firm enough to hold toppings but stays tender enough that it doesn’t crack when you bite into it.
What surprised me most was how the flavor develops as it sits. After just an hour, the lemon taste becomes more pronounced and the glaze firms up to the ideal consistency for slicing and serving.
Recipe Overview
- Recipe Name: Lemon Glaze
- Servings: Makes enough to glaze 12 to 18 pieces
- Prep Time: 5 minutes
- Cook Time: 0 minutes
- Total Time: 5 minutes plus 30 minutes setting time
- Course: Topping or Icing
- Cuisine: American Baking
- Calories per Serving: 35 calories per tablespoon
Equipment You Will Need
- Small mixing bowl
- Measuring cups and spoons
- Whisk or fork
- Microplane zester or box grater
- Small spoon or offset spatula for application
- Shallow dish for dipping (optional)
Ingredients for Lemon Glaze Recipe
- Powdered sugar: 1 and 1/2 cups, sifted
- Fresh lemon juice: 2 to 3 tablespoons
- Lemon zest: 1/2 teaspoon, finely grated
- Butter: 1 tablespoon, melted
- Vanilla extract: 1/4 teaspoon
- Pinch of salt: to balance sweetness
Ingredient Notes and Substitutions
- Powdered sugar creates the smooth, pourable base that firms up without being stiff. You can substitute with coconut powdered sugar for a subtle coconut note, though it may brown slightly faster in sunlight.
- Fresh lemon juice delivers bright flavor that bottled juice cannot match because it contains natural aromatics that cook away during bottling. Bottled lemon juice works in a pinch but tastes noticeably flatter and more chemical.
- Lemon zest adds visual appeal and concentrated citrus flavor that juice alone cannot provide. You can omit it entirely if you prefer a smoother appearance, though you lose some complexity.
- Melted butter adds richness and helps the glaze set to the right consistency. Coconut oil creates a slightly thinner glaze that stays softer longer, which works well for dipping.
- Vanilla extract rounds out the flavor profile and adds warmth that balances tartness. Almond extract creates a delicate flavor shift that pairs beautifully with lemon.
How to Make Lemon Glaze Recipe
Step 1: Sift Your Powdered Sugar
Sift your powdered sugar into a small bowl to eliminate lumps that would create a grainy texture. This step takes thirty seconds and makes the difference between a silky glaze and one with an unpleasant sandy finish.
Step 2: Zest Your Lemon
Use a microplane zester to grate the bright yellow outer layer of your lemon directly into the powdered sugar. Avoid the white pith underneath, which tastes bitter and will compromise your glaze.
Step 3: Measure Your Lemon Juice
Cut your lemon in half and squeeze out 2 to 3 tablespoons of fresh juice into a separate small container. Start with 2 tablespoons since you can always add more, but you cannot remove excess liquid.
Step 4: Melt Your Butter
Place 1 tablespoon of butter in a small microwave-safe container and heat for 15 to 20 seconds until completely melted. Melted butter incorporates more smoothly than cold butter and prevents lumps from forming.
Step 5: Combine Wet Ingredients
Add your lemon juice, melted butter, vanilla extract, and salt to a small bowl and whisk together briefly. This step takes just ten seconds and ensures even distribution when you mix in the sugar.
Step 6: Mix Wet and Dry Ingredients
Pour your wet ingredients into the bowl with powdered sugar and whisk vigorously until smooth and completely combined. If you notice small lumps, press them against the side of the bowl with the back of your spoon.
Step 7: Adjust Consistency
Check your glaze consistency by lifting the whisk out of the bowl. The glaze should drip slowly from the whisk, not pour like water and not sit in thick peaks like frosting.
If your glaze is too thick, add lemon juice one teaspoon at a time and whisk between additions. If it is too thin, add a bit more powdered sugar and mix well.
Step 8: Apply to Your Baked Goods
Dip the top of each cooled baked item into the glaze and let the excess drip off, or spoon the glaze over the top and spread with an offset spatula. For donuts and pastries, dipping works fastest and creates an even coating.
For cakes and cookies, spooning allows you to control the amount of glaze more precisely. Place glazed items on a wire rack set over parchment paper to catch drips.
Pro Tip: Let your glaze sit for 30 minutes after applying it before serving or packaging, as it will set firm enough to handle without smudging but still tender enough to taste light.
Tips for the Best Lemon Glaze Recipe
- Use a microplane zester instead of a box grater for lemon zest that distributes evenly throughout the glaze without creating visible chunks.
- Make sure your baked goods are completely cool before glazing, as warm items cause the glaze to melt and slide off before it can set.
- Start with 2 tablespoons of lemon juice and add more gradually, since you can taste and adjust but cannot undo too much liquid.
- Store unused glaze in an airtight container in the refrigerator for up to one week, then whisk in a few drops of water or lemon juice to restore the proper consistency.
- For a thicker glaze that holds toppings better, add an extra 1/4 cup of powdered sugar and reduce the lemon juice to 1 and 1/2 tablespoons.
- Room temperature ingredients mix more smoothly than cold ingredients, so let your butter cool for a minute if it is piping hot from the microwave.
Common Mistakes to Avoid
- Using bottled lemon juice results in a flat, slightly bitter taste that lacks the bright freshness of real lemon. Fresh juice makes an enormous difference in flavor.
- Glazing warm baked goods causes the glaze to slide off before it sets and creates an uneven coating. Always wait until items cool completely.
- Adding too much liquid at once creates a glaze that pours like thin icing and takes hours to set properly. Add liquid gradually and taste as you go.
- Skipping the sifting step leaves powdered sugar lumps that create a gritty, unpleasant texture that nobody wants in their glaze.
- Using butter that is too hot causes the glaze to break or separate slightly, resulting in a grainy appearance. Let melted butter cool for a minute or two before adding it.
Serving Suggestions
This glaze pairs beautifully with tender crumb cakes, crispy sugar cookies, and fluffy donuts. The bright lemon flavor cuts through richness and adds freshness to almost any dessert.
- Drizzle over a classic pound cake and serve with fresh berries and whipped cream
- Top sugar cookies for elegant afternoon tea or special occasions
- Glaze yeast donuts for a bakery-style treat that tastes homemade
- Use on lemon scones alongside clotted cream and jam
- Drizzle over shortbread cookies for a sweet and tart contrast
Variations to Try
- Lavender Lemon Glaze: Add 1/4 teaspoon of dried culinary lavender steeped in the lemon juice for five minutes, then strain before mixing. This creates a sophisticated floral flavor that works beautifully on sugar cookies and donuts.
- Thicker Frosting Version: Double the powdered sugar and reduce lemon juice to 1 tablespoon, plus 2 tablespoons of heavy cream for a consistency that pipes and holds swirls. This works wonderfully on cupcakes and filled pastries.
- Almond Lemon Glaze: Replace vanilla with almond extract and add a tiny pinch of ground almonds for depth. This combination feels more sophisticated and pairs beautifully with delicate tea cakes.
- Coconut Lemon Glaze: Replace milk or cream with coconut milk and add 1/4 teaspoon of coconut extract for a tropical twist. This works particularly well on angel food cake and light sponge cakes.
- Elderflower Lemon Glaze: Add 1/2 teaspoon of elderflower cordial to create a delicate floral flavor that feels fancy without being obvious. This transforms simple cookies into something special.
Dietary Adaptations
- Gluten-free: This glaze is naturally gluten-free and works on any gluten-free baked good without modification or concern.
- Dairy-free: Replace melted butter with coconut oil or vegan butter in equal amounts, and the glaze remains completely dairy-free with virtually no flavor change.
- Vegan: This recipe is vegan as written, since the only animal product is the butter, which you can swap for vegan butter or coconut oil. Vanilla extract may contain alcohol, so use alcohol-free vanilla if needed.
- Low-carb/Keto: Replace powdered sugar with powdered erythritol or monk fruit sweetener in equal amounts, adjusting liquid slightly since some sweeteners absorb moisture differently. This reduces carbs to under 5 grams per tablespoon.
Storage and Reheating
Refrigerator
Store leftover glaze in an airtight container in the refrigerator for up to one week. The glaze will thicken as it cools, so you may need to whisk in a few drops of water or lemon juice before using it again.
- Check consistency before applying to new baked goods
- Whisk in water or lemon juice one teaspoon at a time until it reaches the correct thickness
Freezer
Freeze glaze in ice cube trays for up to three months, then pop out cubes and store in a freezer bag. This works well if you make glazed desserts frequently and want portions ready to thaw.
- Thaw cubes in the refrigerator overnight before using
- Whisk well before applying since separation may occur during freezing
Reheating
Never heat this glaze in the microwave, as the powdered sugar can scorch. Simply whisk in water or lemon juice to reach the desired consistency.
- Add liquid gradually one teaspoon at a time
- Whisk vigorously until the consistency matches your original glaze
Nutrition Information
| Nutrient | Amount |
|---|---|
| Calories | 35 |
| Total Fat | 1 g |
| Saturated Fat | 0.5 g |
| Carbohydrates | 7 g |
| Fiber | 0 g |
| Sugar | 7 g |
| Protein | 0 g |
| Sodium | 10 mg |
| Cholesterol | 2 mg |
Nutritional values are estimated per tablespoon of finished glaze and may vary based on specific ingredients used.
Frequently Asked Questions
Can I make this glaze ahead of time?
Yes, you can make this glaze up to three days in advance and store it in an airtight container in the refrigerator. Whisk in a few drops of water before using if the glaze has thickened during storage.
How long does it take for the glaze to set?
The glaze typically sets firm enough to handle within 30 minutes at room temperature. Complete hardening takes about one hour, depending on humidity and how thickly you applied it.
What if my glaze is too thick to pour?
Add lemon juice or water one teaspoon at a time and whisk until you reach the desired consistency. Start conservative since thinning is easier than thickening.
Can I use lime or orange instead of lemon?
Absolutely, you can substitute lime juice and zest for lemon with virtually identical results and a different flavor profile. Orange creates a milder, sweeter version that works beautifully on vanilla cakes and delicate pastries.
Why does my glaze have a grainy texture?
Graininess typically results from unsifted powdered sugar, butter that was too hot, or mixing too slowly. Sift your sugar, let hot butter cool slightly, and whisk vigorously until completely smooth.
Can I pipe this glaze like frosting?
This basic recipe is too thin for piping, but you can make a thicker version by doubling the powdered sugar and reducing lemon juice to one tablespoon. The thicker version pipes beautifully through round and open tips.
Final Thoughts
This lemon glaze recipe has saved my baked goods more times than I can count, transforming plain cakes into something that looks like I spent hours fussing over them. The combination of simplicity, speed, and impressive results makes it one of my most-used recipes year-round.
Mix up a batch today and see how it completely changes the appearance and flavor of your favorite desserts. I promise you will find yourself making it again and again.
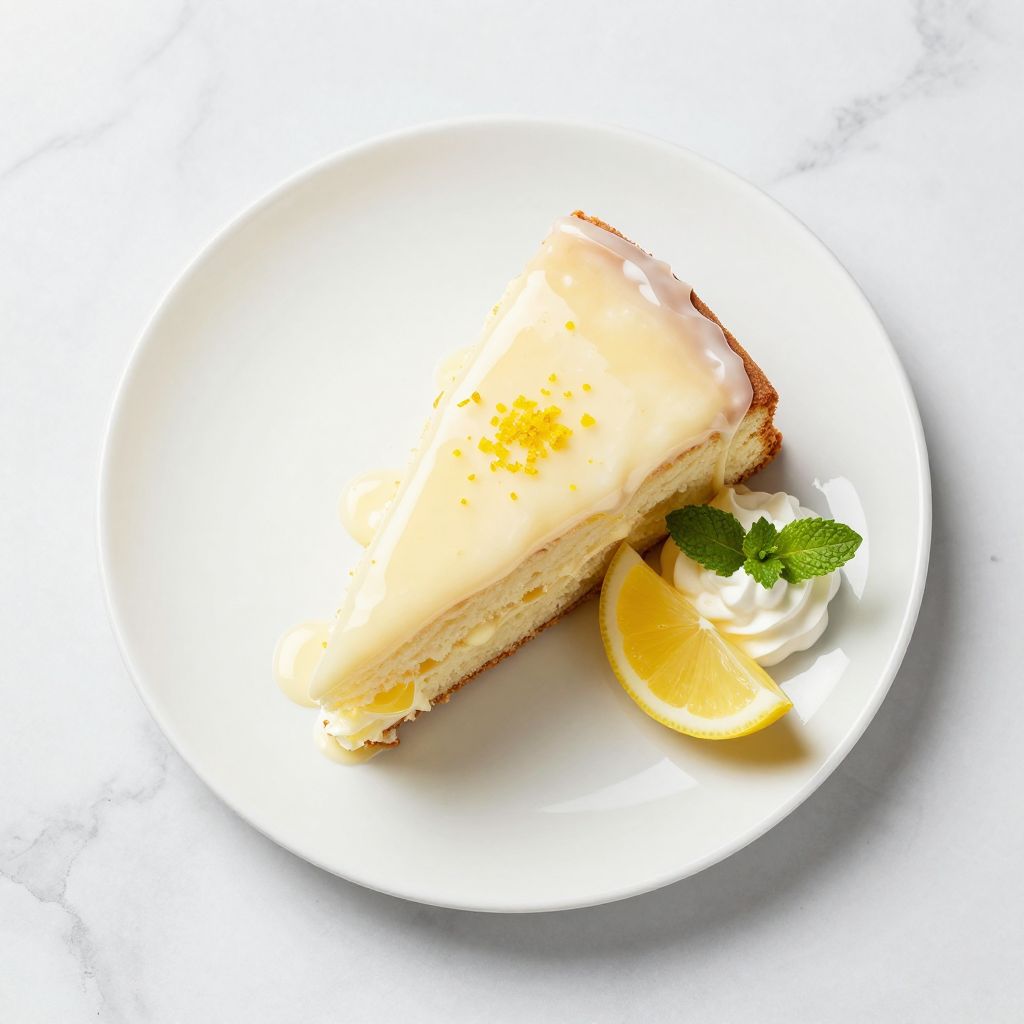
Lemon Glaze
Ingredients
Equipment
Method
- Sift the powdered sugar into a small mixing bowl to remove any lumps.
- Zest the lemon directly over the sugar, avoiding the bitter white pith.
- Juice the lemon and measure out 2 tablespoons, reserving the extra tablespoon for consistency adjustments.
- In a separate small bowl, whisk together the measured lemon juice, melted butter, vanilla extract, and a pinch of salt.
- Pour the wet mixture into the powdered sugar and whisk vigorously until completely smooth and glossy.
- Check the consistency: the glaze should drip slowly from the whisk. If too thick, add lemon juice 1 teaspoon at a time; if too thin, whisk in a bit more powdered sugar.
- Dip or spoon the glaze over fully cooled baked goods, allowing excess to drip off.
- Place glazed items on a wire rack set over parchment paper and let stand for at least 30 minutes to set.