A glaze recipe transforms ordinary baked goods, roasted meats, and vegetables into something truly special with just a few simple ingredients and a little technique.
Whether you’re topping a ham, coating donuts, or brushing gloss onto roasted carrots, mastering a basic glaze opens up endless possibilities in your kitchen. Let me walk you through everything you need to know to create a glaze that sticks perfectly and tastes incredible every time.
Why You’ll Love This Recipe
A homemade glaze beats store-bought versions every single time, and you control exactly what goes into it. It takes less than five minutes to whip up, works on sweet and savory dishes, and elevates your cooking without much effort.
- Super quick to make with pantry staples you likely already own
- Works beautifully on baked goods, roasted meats, and vegetables
- Endlessly customizable based on what you’re coating
- Creates a professional-looking glossy finish that impresses every time
- Costs a fraction of what you’d pay for specialty versions
My Experience Making This Recipe
I started making glazes from scratch about ten years ago when a batch of homemade donuts kept sliding off my plate because the store-bought glaze was too thin. That failure sparked an obsession with understanding how the right ratio of liquid to sugar actually sticks and sets properly.
The first time I nailed a perfect glaze, I remember brushing it onto warm ham and watching it set into this beautiful amber shell that crackled slightly when you cut into it. My family asked what fancy bakery I’d used, and I got to tell them it came straight from my own kitchen.
Now I make glazes constantly, sometimes three or four times a week depending on what I’m cooking. The best part is realizing how many dishes taste even better with that little touch of shine and sweetness.
Recipe Overview
- Recipe Name: Basic Glaze Recipe
- Servings: Makes approximately 1 cup of glaze
- Prep Time: 5 minutes
- Cook Time: 0 minutes (no cooking required)
- Total Time: 5 minutes
- Course: Topping/Finishing sauce
- Cuisine: American/Universal
- Calories per Serving: Approximately 45 calories per tablespoon
Equipment You Will Need
- Medium mixing bowl
- Whisk or fork
- Measuring cups and spoons
- Small saucepan (optional, for warming)
- Pastry brush or small spoon for application
- Microwave or stove for heating liquid
Ingredients for Glaze Recipe
- 2 cups powdered sugar, sifted
- 3 to 4 tablespoons milk or cream, warmed slightly
- 1 tablespoon butter, melted
- 1 teaspoon vanilla extract
- Pinch of salt
Optional Flavor Additions
- 1 tablespoon lemon juice for brightness and tang
- 1 tablespoon maple syrup for depth and warmth
- 1/2 teaspoon almond extract for a subtle nutty flavor
- 1/4 teaspoon cinnamon for warmth and spice
Ingredient Notes and Substitutions
- Powdered sugar forms the base and creates a smooth, spreadable texture that sets quickly. You can substitute with granulated sugar mixed with cornstarch at a 1:1 ratio, though the texture will be slightly grainier.
- Milk or cream adds moisture and helps you reach the right consistency. Heavy cream makes a richer glaze, while almond or oat milk works beautifully for dairy-free versions.
- Butter adds richness and helps the glaze coat smoothly. You can skip it entirely for a lighter glaze or swap in coconut oil for a subtle flavor shift.
- Vanilla extract provides subtle depth and complexity. Almond extract, rum extract, or maple extract all work wonderfully as direct swaps with the same measurement.
- Salt balances sweetness and prevents the glaze from tasting one-dimensional. This small amount is crucial and should not be skipped.
How to Make Glaze Recipe
Step 1: Sift Your Powdered Sugar
Pour 2 cups of powdered sugar into a fine-mesh sieve and tap it gently over your mixing bowl. Sifting removes any lumps that would create a grainy, uneven texture in your finished glaze and ensures a smooth consistency.
Step 2: Warm Your Liquid
Heat 3 to 4 tablespoons of milk or cream in the microwave for about 20 to 30 seconds until it’s warm but not hot. Warm liquid dissolves the sugar more evenly and helps you achieve a smoother, lump-free glaze without over-mixing.
Step 3: Melt the Butter
In a small bowl or measuring cup, melt 1 tablespoon of butter in the microwave for about 15 seconds. The melted butter blends more easily into the glaze and creates a silkier texture that spreads without dragging.
Step 4: Combine Wet Ingredients
Pour the warm milk and melted butter into a medium mixing bowl together. Stir them gently with a whisk to combine before you add the sugar.
Step 5: Add the Sugar Gradually
Sprinkle the sifted powdered sugar over the wet ingredients a little at a time, whisking after each addition. Gradual incorporation prevents lumps from forming and keeps you from making the glaze too thick too quickly.
Step 6: Add Flavoring
Stir in 1 teaspoon of vanilla extract and a tiny pinch of salt, whisking until everything is fully combined and smooth. These ingredients add depth without being obvious, making your glaze taste more intentional and professional.
Step 7: Reach the Perfect Consistency
Your glaze should flow slowly off a spoon but still coat the back evenly. If it’s too thick, add milk one teaspoon at a time; if it’s too thin, whisk in a bit more powdered sugar.
Step 8: Apply Your Glaze
Brush or spoon the glaze generously onto your warm or room-temperature baked goods or roasted items. Apply it while your base is still warm so it sets into a shiny, stable coating that clings to every surface.
Pro Tip: Apply glaze to baked goods while they’re still warm, as the heat helps the glaze set faster and creates a more even, glossy finish that looks bakery-quality.
Tips for the Best Glaze Recipe
- Always sift your powdered sugar first, not after mixing, to prevent lumps that can’t be smoothed out once the liquid is added.
- Use warm liquid and melted butter, not cold, since they mix into the sugar far more smoothly and create fewer lumps.
- Taste your glaze before applying it and adjust sweetness or flavor to match what you’re coating. A glaze for ham tastes very different from one for cinnamon rolls.
- Make your glaze just before using it for the best consistency and appearance. It thickens as it sits and cools, so remix with a tiny splash of milk if needed.
- Apply glaze with a pastry brush for precision or a small spoon for a rustic look. Both methods work beautifully depending on the final effect you want.
- Work quickly once you’ve applied glaze, since it sets within a few minutes on most surfaces and hardens further as it cools completely.
Common Mistakes to Avoid
- Skipping the sifting step leads to a grainy glaze that looks amateur and feels unpleasant on your tongue. Take the extra 30 seconds and sift.
- Using cold milk or butter creates a grainy mixture that won’t combine smoothly no matter how hard you whisk. Warm your liquids before mixing.
- Adding all the sugar at once creates lumps that can’t be whisked out without overdoing it and incorporating too much air. Add it gradually and whisk between additions.
- Applying glaze to completely cold items means it won’t adhere well and will slide right off or look blotchy. Always apply to warm surfaces for the best results.
- Making glaze too far in advance causes it to thicken and become unusable by the time you need it. Mix it right before you’re ready to apply.
Serving Suggestions
This glaze pairs beautifully with everything from sweet baked goods to savory roasted meats and vegetables. A simple glaze transforms ordinary dishes into something restaurant-quality.
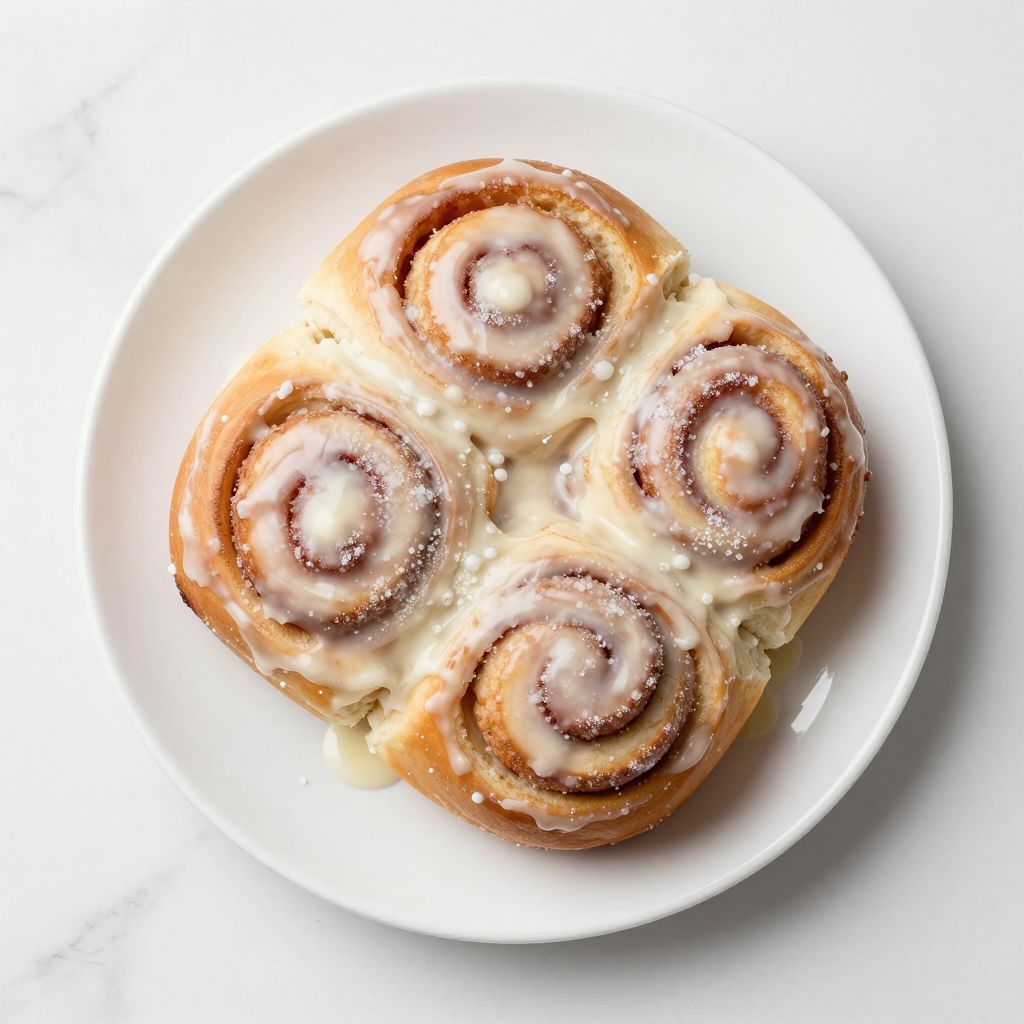
- Spread generously over warm cinnamon rolls or soft donuts for a classic bakery finish
- Brush onto roasted ham for a shiny, slightly sweet coating that caramelizes beautifully
- Drizzle over roasted vegetables like carrots or Brussels sprouts for shine and subtle sweetness
- Coat lemon or vanilla pound cake for an elegant finish with minimal effort
- Top biscotti or shortbread cookies for a professional-looking treat that tastes homemade
Variations to Try
- Citrus Glaze: Replace vanilla with 1 tablespoon of fresh lemon or orange juice and add the zest of half the fruit for brightness and complexity without changing the base recipe.
- Maple Glaze: Swap 1 tablespoon of the milk for pure maple syrup to create a deeper, more savory-sweet flavor perfect for ham and roasted root vegetables.
- Chocolate Glaze: Mix in 1 to 2 tablespoons of cocoa powder and reduce the milk slightly to keep the consistency smooth. This transforms the glaze into something perfect for donuts and pastries.
- Spiced Glaze: Add 1/4 teaspoon each of ground cinnamon, ginger, and nutmeg for warmth and holiday flavor that works beautifully on baked goods and roasted meats.
- Salted Caramel Glaze: Mix in 1 tablespoon of caramel sauce and top the finished glaze with a pinch of fleur de sel for sweet, salty sophistication.
Dietary Adaptations
- Gluten-Free: This recipe is naturally gluten-free, though always verify that your powdered sugar is certified gluten-free if you have celiac disease.
- Dairy-Free: Replace milk with unsweetened almond, oat, or coconut milk and use dairy-free butter or coconut oil instead of regular butter with no flavor change.
- Vegan: Use non-dairy milk and vegan butter in place of regular dairy products, and make sure your powdered sugar is certified vegan, though most are.
- Low-Carb/Keto: Substitute powdered sugar with erythritol or monk fruit sweetener, though you may need slightly less since these are often sweeter and have different textures.
Storage and Reheating
Refrigerator
Store leftover glaze in an airtight container for up to one week. Let it come to room temperature and whisk in a tiny splash of milk to return it to the right consistency before reusing.
- Keep in an airtight glass container on the shelf, not exposed to the air
- The glaze will thicken as it chills, so plan to thin it slightly when you’re ready to use it again
Freezer
Glaze doesn’t freeze particularly well since the texture changes when thawed. It’s best to make fresh glaze each time you need it rather than relying on frozen batches.
- If you must freeze, use an ice cube tray to freeze in small portions for easier thawing
- Thawed glaze may separate or become grainy, so only refreeze if you’re willing to remake it from scratch
Reheating
To restore chilled glaze, place it in a microwave-safe bowl and heat in 10-second bursts, stirring between each, until it reaches the right consistency. Alternatively, whisk in milk one teaspoon at a time until it’s smooth and pourable again.
- Don’t overheat or the glaze can break and become oily
- Whisking in milk is often gentler and gives you better control over the final consistency
Nutrition Information
| Nutrient | Amount |
|---|---|
| Calories | 45 |
| Total Fat | 1g |
| Saturated Fat | 0.5g |
| Carbohydrates | 9g |
| Fiber | 0g |
| Sugar | 9g |
| Protein | 0g |
| Sodium | 15mg |
| Cholesterol | 3mg |
These values are approximate and based on one tablespoon of glaze. Nutritional content varies depending on which substitutions or variations you choose to make.
Frequently Asked Questions
Can I make this glaze ahead of time?
You can make it up to a few hours ahead, but it thickens as it sits. Whisk in a touch of milk right before applying to restore the correct consistency.
Why is my glaze grainy or lumpy?
Lumps form when cold liquid or unsifted powdered sugar is used. Always sift the sugar first and use warm milk and melted butter to prevent this issue.
How thick should my glaze be?
It should flow slowly off a spoon and coat the back evenly without pooling. If it’s too thick, whisk in milk; if too thin, add more powdered sugar.
Can I use this glaze on savory dishes?
Absolutely. Skip the vanilla and reduce the amount of liquid slightly for a less sweet coating that works beautifully on roasted meats and vegetables.
What’s the difference between a glaze and a frosting?
Glaze is thinner and more pourable, setting into a thin shiny coat, while frosting is thick enough to hold peaks. This recipe makes a glaze by design.
Can I use regular sugar instead of powdered?
Regular granulated sugar won’t dissolve smoothly and will create a gritty texture. Powdered sugar or a powdered sugar substitute is essential for this recipe.
Final Thoughts
Mastering a simple glaze recipe is one of those small skills that makes everything you bake or roast look and taste noticeably better. Once you understand how the ratios work, you can tweak it endlessly for different dishes and flavor profiles.
The next time you’re tempted to skip the glaze because it seems like an extra step, push through and do it anyway. That shiny, professional-looking finish and subtle sweetness are exactly what turns a good dish into one people actually remember eating.
Basic Glaze Recipe
Ingredients
Equipment
Method
- Sift the powdered sugar into a mixing bowl to remove any lumps.
- Warm the milk or cream for 20–30 seconds until just warm, not hot.
- Melt the butter in the microwave for about 15 seconds.
- Combine the warm milk and melted butter in the mixing bowl and whisk together.
- Gradually whisk the sifted powdered sugar into the wet mixture until smooth.
- Whisk in the vanilla extract and a pinch of salt until fully incorporated.
- Adjust consistency: add milk 1 teaspoon at a time if too thick, or powdered sugar if too thin, until the glaze flows slowly off a spoon.
- Brush or spoon the glaze over warm baked goods or roasted items and let it set for a few minutes before serving.