Peanut butter fudge is the kind of treat that disappears from the plate before you can even snap a photo. With its creamy texture and rich, nutty flavor, this no-bake dessert takes just minutes to prepare and delivers pure indulgence every single time.
Whether you need a quick homemade gift, a crowd-pleasing party treat, or just want to satisfy that sweet tooth, this recipe has you covered. Let me walk you through everything you need to know to make the most irresistible peanut butter fudge you have ever tasted.
Why You’ll Love This Recipe
This peanut butter fudge recipe hits all the right notes for both beginner bakers and seasoned kitchen pros. Here is what makes it special.
- Ready in under 30 minutes with zero baking required
- Uses simple pantry staples you probably already have
- Melt in your mouth texture that is smooth and creamy
- Perfect for gifting during holidays or special occasions
- Easily customizable with mix ins and flavor variations
My Experience Making This Recipe
I have made this peanut butter fudge more times than I can count, and it never fails to impress. The first time I pulled a perfect batch from the fridge, I honestly could not believe something so simple tasted so decadent.
The aroma of warm peanut butter filling my kitchen is something I look forward to every time. My family now requests this fudge for every holiday gathering, and it vanishes within hours.
What I love most is the texture. It is firm enough to hold its shape yet melts on your tongue with that signature peanut butter richness that keeps you reaching for just one more piece.
Recipe Overview
- Recipe Name: Peanut Butter Fudge
- Servings: 36 pieces
- Prep Time: 10 minutes
- Cook Time: 5 minutes
- Total Time: 2 hours 15 minutes (including setting time)
- Course: Dessert, Confection
- Cuisine: American
- Calories per Serving: 145 calories
Equipment You Will Need
- 8×8 inch or 9×9 inch square baking pan
- Parchment paper or aluminum foil
- Medium heavy bottomed saucepan
- Wooden spoon or silicone spatula
- Measuring cups and spoons
- Sharp knife for cutting
- Candy thermometer (optional but helpful)
Ingredients for Peanut Butter Fudge
- 2 cups creamy peanut butter (16 oz)
- 1 cup unsalted butter (2 sticks)
- 4 cups powdered sugar (sifted)
- 1 tablespoon pure vanilla extract
- 1/4 teaspoon fine sea salt
Ingredient Notes and Substitutions
- Peanut butter: Regular creamy peanut butter works best because of its stable oils. Natural peanut butter can be used but may result in a slightly softer, oilier fudge.
- Butter: Unsalted butter lets you control the salt level precisely. Salted butter works fine if you skip the added salt.
- Powdered sugar: This creates the smooth, melt in your mouth texture. Sifting prevents lumps and ensures a silky finish.
- Vanilla extract: Pure vanilla adds depth and rounds out the sweetness. Imitation vanilla works in a pinch but lacks complexity.
- Salt: A touch of salt amplifies the peanut butter flavor dramatically. Skip it if using salted butter or salted peanut butter.
How to Make Peanut Butter Fudge
Step 1: Prepare Your Pan
Line your 8×8 or 9×9 inch baking pan with parchment paper, leaving overhang on two sides for easy removal. This step saves you from wrestling with stuck fudge later, and trust me, you will thank yourself.
Step 2: Sift the Powdered Sugar
Measure and sift your powdered sugar into a large bowl to remove any clumps. Lumpy sugar leads to grainy fudge, and nobody wants that.
Step 3: Melt the Butter
Place the butter in a medium saucepan over medium low heat. Stir occasionally until completely melted, which takes about 2 to 3 minutes.
Step 4: Add the Peanut Butter
Add the peanut butter to the melted butter and stir continuously until the mixture is completely smooth and combined. The low heat prevents the oils from separating and keeps everything silky.
Step 5: Remove from Heat and Add Vanilla
Take the saucepan off the heat immediately once smooth. Stir in the vanilla extract and salt until evenly distributed throughout the mixture.
Step 6: Incorporate the Powdered Sugar
Pour the warm peanut butter mixture over the sifted powdered sugar. Stir vigorously with a wooden spoon until no streaks of sugar remain and the fudge is thick and glossy.
Step 7: Transfer to the Prepared Pan
Scrape the fudge into your lined pan and spread it evenly with a spatula. Press down firmly and smooth the top for a professional looking finish.
Step 8: Chill Until Set
Refrigerate the fudge for at least 2 hours or until completely firm. For faster results, pop it in the freezer for 45 minutes to an hour.
Step 9: Cut and Serve
Lift the fudge out using the parchment paper overhang. Use a sharp knife to cut into 36 squares, wiping the blade between cuts for clean edges.
Pro Tip: Let the fudge sit at room temperature for 5 minutes before cutting to prevent cracking and achieve those perfectly smooth edges.
Tips for the Best Peanut Butter Fudge
- Use room temperature peanut butter for easier mixing and smoother texture.
- Do not overheat the peanut butter mixture or the oils will separate and create a greasy result.
- Sifting the powdered sugar is not optional if you want professional results.
- Press the fudge firmly into the pan to eliminate air pockets that cause crumbling.
- Chill completely before cutting or you will end up with messy, squished pieces.
- A hot knife makes cleaner cuts. Run the blade under hot water and dry before slicing.
Common Mistakes to Avoid
- Using natural peanut butter without adjusting expectations: The oils separate differently and create a softer, sometimes greasy fudge.
- Skipping the sifting step: Those tiny sugar lumps become crunchy bits that ruin the smooth texture.
- Overheating the mixture: High heat causes oil separation and a grainy, broken final product.
- Cutting too soon: Impatience leads to smeared, misshapen pieces that fall apart.
- Not lining the pan: Without parchment paper, removing the fudge becomes a frustrating, messy battle.
Serving Suggestions
This peanut butter fudge shines on its own but also pairs beautifully with other treats. Here are some ideas to take your serving game up a notch.
- Arrange on a holiday cookie platter alongside chocolate truffles
- Chop into bits and sprinkle over vanilla ice cream
- Stack in small gift boxes with tissue paper for homemade presents
- Serve alongside fresh strawberries and apple slices for dipping
- Crumble over brownies for an extra layer of peanut butter goodness
Variations to Try
- Chocolate swirl fudge: Melt 1/2 cup chocolate chips and swirl into the top before chilling for a stunning marbled effect.
- Crunchy peanut butter fudge: Swap creamy for chunky peanut butter or fold in 1/2 cup chopped roasted peanuts.
- Maple peanut butter fudge: Replace vanilla with 1 tablespoon pure maple syrup for a warm, autumn inspired flavor.
- Chocolate dipped fudge: Dip the cut squares halfway into melted chocolate and let set on parchment paper.
- Salted caramel peanut butter fudge: Drizzle caramel sauce over the top and sprinkle with flaky sea salt before chilling.
Dietary Adaptations
- Gluten free: This recipe is naturally gluten free, but always verify your peanut butter brand has no gluten containing additives.
- Dairy free: Replace butter with refined coconut oil or vegan butter sticks for a dairy free version with similar texture.
- Vegan: Use vegan butter and confirm your powdered sugar is processed without bone char for a fully plant based treat.
- Low carb and keto: Substitute powdered sugar with a powdered monk fruit or erythritol blend, though texture may be slightly different.
Storage and Reheating
Refrigerator
Properly stored fudge stays fresh and delicious for up to two weeks.
- Place cut pieces in a single layer in an airtight container
- Separate layers with parchment paper to prevent sticking
- Keep in the coldest part of your refrigerator
Freezer
Peanut butter fudge freezes beautifully for up to three months.
- Wrap individual pieces in plastic wrap for grab and go convenience
- Place wrapped pieces in a freezer safe container or bag
- Label with the date so you remember when you made it
Reheating
This fudge does not need reheating but does benefit from a few minutes at room temperature before eating.
- Remove from refrigerator 10 minutes before serving for the creamiest texture
- Frozen fudge thaws in about 30 minutes on the counter
- Never microwave as it will melt into an oily puddle
Nutrition Information
| Nutrient | Amount |
|---|---|
| Calories | 145 |
| Total Fat | 10g |
| Saturated Fat | 4g |
| Carbohydrates | 13g |
| Fiber | 1g |
| Sugar | 11g |
| Protein | 3g |
| Sodium | 65mg |
| Cholesterol | 14mg |
Nutritional values are estimates based on standard ingredients and may vary depending on specific brands and substitutions used.
Frequently Asked Questions
Can I use crunchy peanut butter instead of creamy?
Absolutely. Crunchy peanut butter creates a fudge with a pleasant textured bite throughout.
Can I make this fudge ahead of time?
Yes, and it actually improves after a day or two in the refrigerator as the flavors meld together. Make it up to a week ahead for parties.
Why did my fudge turn out grainy?
Grainy fudge usually results from unsifted powdered sugar or overheated peanut butter. Sift carefully and keep the heat low.
How do I know when the fudge is set enough to cut?
The fudge should feel completely firm when pressed gently in the center. If it dents easily, give it more time in the refrigerator.
Can I add chocolate chips or other mix ins?
You bet. Fold in up to 1 cup of chocolate chips, chopped nuts, or mini marshmallows right before transferring to the pan.
Final Thoughts
This peanut butter fudge recipe proves that incredible homemade candy does not require fancy equipment or complicated techniques. With just five ingredients and minimal hands on time, you can create a treat that tastes like it came from a gourmet confectionery shop.
Give this recipe a try for your next gathering, holiday gift, or random Tuesday when you deserve something sweet. Once you see how easy and delicious it is, peanut butter fudge will become a regular part of your dessert rotation.
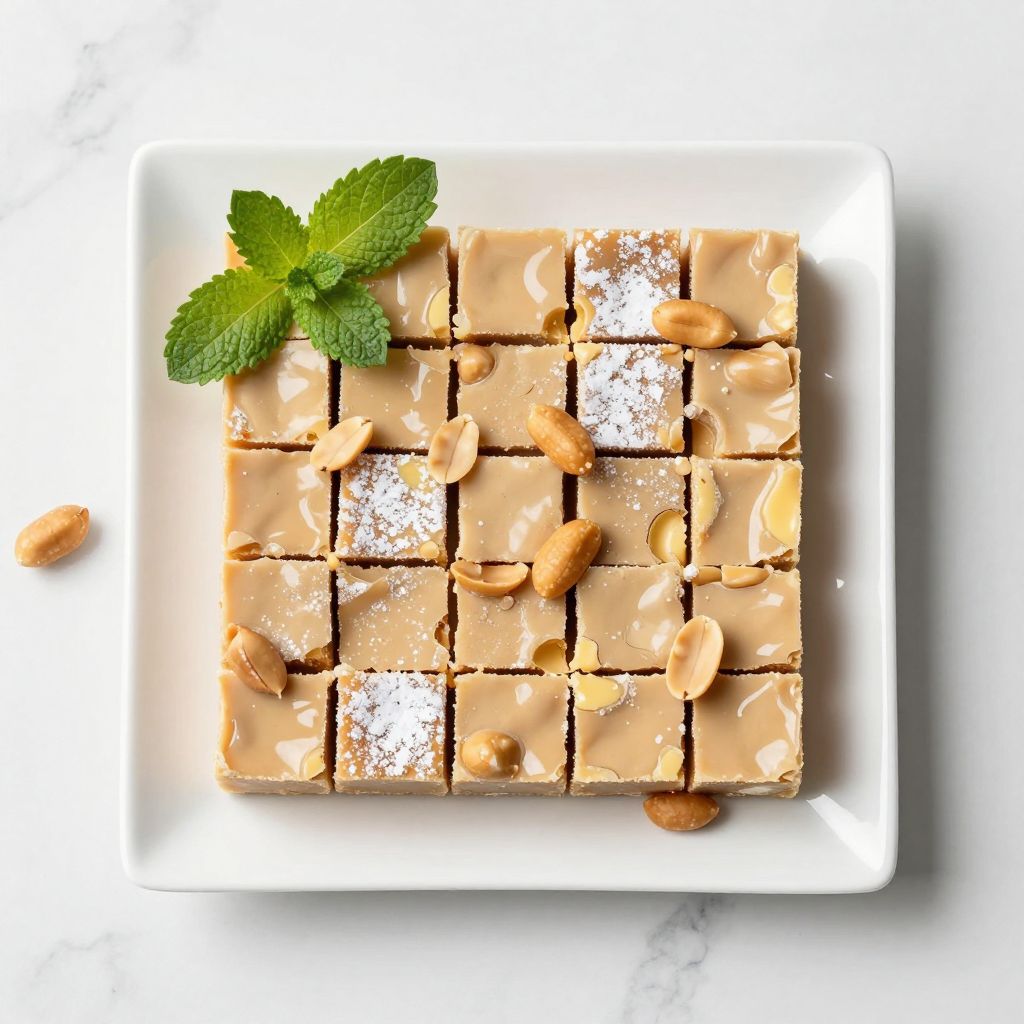
Peanut Butter Fudge
Ingredients
Equipment
Method
- Line your 8x8 or 9x9 inch baking pan with parchment paper, leaving overhang on two sides for easy removal.
- Measure and sift your powdered sugar into a large bowl to remove any clumps.
- Place the butter in a medium saucepan over medium-low heat. Stir occasionally until completely melted, about 2 to 3 minutes.
- Add the peanut butter to the melted butter and stir continuously until the mixture is completely smooth and combined.
- Remove the saucepan from heat immediately once smooth. Stir in the vanilla extract and salt until evenly distributed throughout the mixture.
- Pour the warm peanut butter mixture over the sifted powdered sugar. Stir vigorously with a wooden spoon until no streaks of sugar remain and the fudge is thick and glossy.
- Scrape the fudge into your lined pan and spread it evenly with a spatula. Press down firmly and smooth the top for a professional looking finish.
- Refrigerate the fudge for at least 2 hours or until completely firm. For faster results, pop it in the freezer for 45 minutes to an hour.
- Lift the fudge out using the parchment paper overhang. Use a sharp knife to cut into 36 squares, wiping the blade between cuts for clean edges.