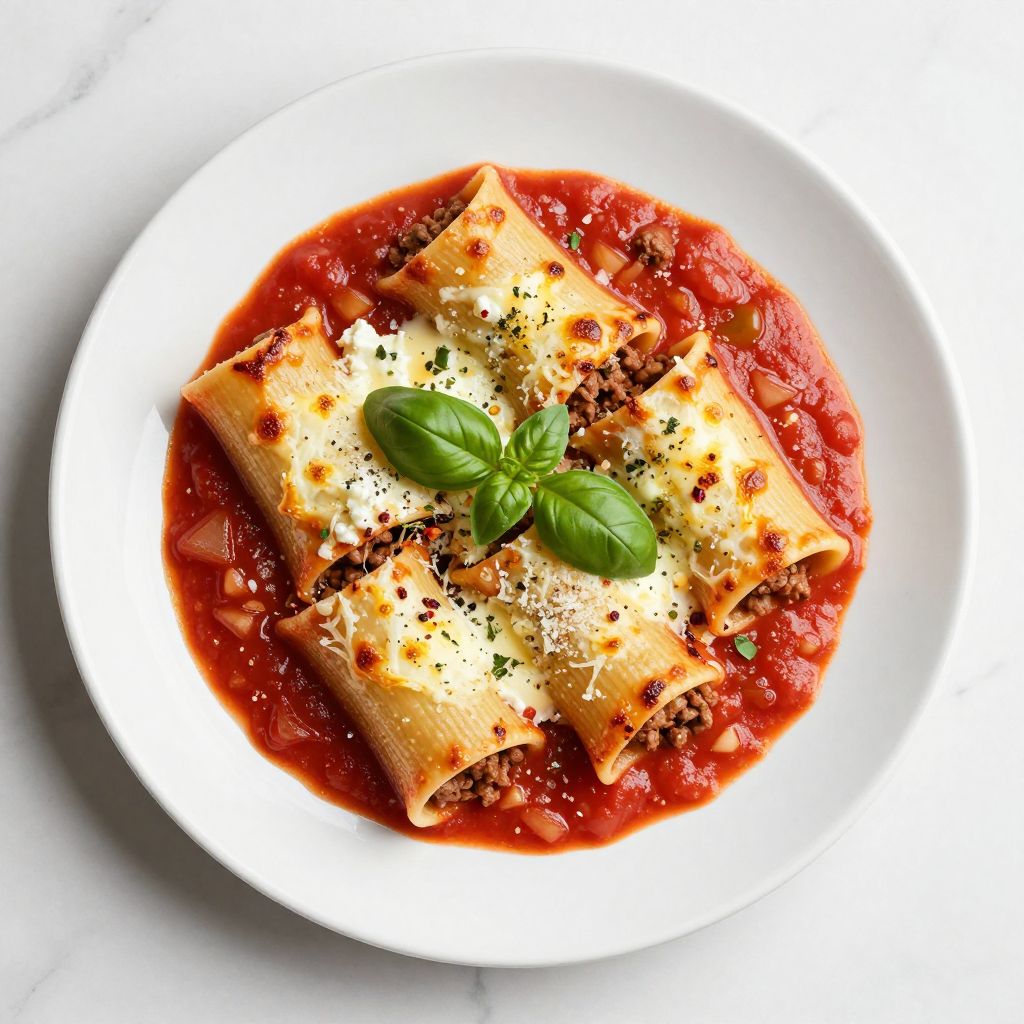
Manicotti with meat is a showstopping Italian-American classic that delivers homemade comfort in every bite. These tender pasta tubes stuffed with seasoned ground beef, ricotta, and cheese bake in a rich tomato sauce until bubbly and golden.
This dish feels fancy enough for dinner guests but comes together with straightforward techniques and pantry staples. Let me walk you through making a version that tastes like it took hours, not just one evening in the kitchen.
Why You’ll Love This Recipe
This manicotti hits all the marks for a memorable meal. The combination of creamy filling and savory meat sauce creates layers of flavor that keep people coming back for seconds.
- Stuffed pasta tubes stay tender and flavorful without falling apart during baking
- Ground beef adds rich umami depth to the traditional ricotta filling
- Makes 2 to 3 complete meals or serves a crowd of 8 to 10 people
- Freezes beautifully unbaked, letting you prep ahead for busy weeknights
- Minimal hands-on time once assembled, mostly passive oven time
My Experience Making This Recipe
I first made this dish years ago after my Italian grandmother shared her approach over the phone. She told me the secret was browning the meat properly and not skimping on the ricotta mixture, which I initially thought was odd but now completely understand.
My kitchen filled with aromas of tomato, garlic, and melting mozzarella as it baked. When I pulled it from the oven, the sauce bubbled at the edges and the cheese had turned golden brown in spots.
My family devoured it in minutes, and I watched my skeptical teenager ask for thirds. That moment sold me completely, and this recipe has been in regular rotation ever since.
Recipe Overview
- Recipe Name: Manicotti with Meat
- Servings: 8 to 10 people
- Prep Time: 30 minutes
- Cook Time: 45 minutes
- Total Time: 1 hour 15 minutes
- Course: Main Dish
- Cuisine: Italian-American
- Calories per Serving: 385
Equipment You Will Need
- Large pot for boiling water and cooking pasta
- 9 by 13 inch baking dish
- Large skillet for browning ground beef
- Medium mixing bowls (2 to 3)
- Wooden spoon for stirring
- Colander for draining pasta
- Small spoon for stuffing pasta tubes
- Cheese grater if using block cheese
- Aluminum foil for covering during baking
Ingredients for Manicotti with Meat
For the Meat and Ricotta Filling
- 1 pound ground beef
- 15 ounces ricotta cheese
- 1 cup shredded mozzarella cheese
- 1/2 cup grated Parmesan cheese
- 1 large egg
- 2 cloves garlic, minced
- 1/2 teaspoon salt
- 1/4 teaspoon black pepper
- 1 teaspoon dried Italian seasoning
- 1/4 teaspoon red pepper flakes, optional
For the Pasta and Sauce
- 1 pound manicotti pasta (about 20 to 24 tubes)
- Salt for pasta water
- 24 ounces marinara sauce or tomato sauce
- 2 tablespoons olive oil
- 1 small onion, finely diced
- 3 cloves garlic, minced
- 1/2 cup shredded mozzarella cheese for topping
Ingredient Notes and Substitutions
- Ground beef: The foundation of the filling, providing savory depth and binding the ricotta together. Substitute with ground Italian sausage, ground lamb, or a 50/50 blend of beef and pork for different flavor profiles.
- Ricotta cheese: Delivers a creamy, mild texture that balances the meat and cheese flavors. Use cottage cheese mixed with a little cream for a slightly different texture, though the result will be slightly wetter.
- Mozzarella cheese: Melts smoothly and creates those gorgeous stretchy strands everyone loves. Replace with provolone for a slightly sharper bite, or use a mix of mozzarella and fontina for deeper flavor.
- Manicotti pasta: Large tubes designed to hold filling without breaking during cooking. If you cannot find manicotti, jumbo shells or even large rigatoni work as backup options.
- Marinara sauce: The backdrop that keeps everything moist and flavorful during baking. Use homemade tomato sauce, a richer meat sauce, or even pesto mixed with cream for variation.
How to Make Manicotti with Meat
Step 1: Brown the Ground Beef
Heat 2 tablespoons olive oil in a large skillet over medium-high heat until shimmering. Add 1 pound ground beef, breaking it into small pieces as it cooks for 5 to 7 minutes until no pink remains and the meat browns nicely.
Breaking the meat into small pieces allows it to brown evenly and cook faster, rather than clumping together in large chunks that cook unevenly. This step builds the foundational flavor for your filling.
Step 2: Add Aromatics to the Meat
Add the minced garlic and diced onion to the browned beef, stirring constantly for 2 to 3 minutes until the onion softens and releases its sweetness. The aroma will be irresistible at this point.
Cooking the garlic and onion with the meat allows their flavors to meld together instead of just sitting on top of the ricotta filling. Remove the skillet from heat and let it cool for 5 minutes.
Step 3: Prepare the Ricotta Mixture
In a medium mixing bowl, combine 15 ounces ricotta cheese, 1 cup shredded mozzarella, 1/2 cup Parmesan, 1 large egg, 1/2 teaspoon salt, 1/4 teaspoon black pepper, and 1 teaspoon dried Italian seasoning. Stir gently until just combined, being careful not to overmix.
The egg acts as a binder, holding all the cheese and meat together so your filling stays intact inside the pasta tubes. Overmixing develops gluten in the egg and can make the filling dense instead of creamy.
Step 4: Combine Meat and Cheese
Once the meat mixture cools slightly, add it to the ricotta bowl and fold everything together using a spatula or wooden spoon. Make sure the meat is distributed evenly throughout the filling with no large clumps.
Folding instead of aggressive stirring keeps the filling light and fluffy rather than dense. Add red pepper flakes now if you want a subtle heat.
Step 5: Cook and Drain the Manicotti Pasta
Bring a large pot of salted water to a rolling boil and add 1 pound manicotti pasta. Cook for 2 minutes less than the package directions, aiming for tender but still slightly firm pasta.
Undercooking the pasta slightly prevents it from splitting or tearing when you stuff it, and it finishes cooking perfectly in the oven where it absorbs sauce. Drain the pasta in a colander and rinse gently with cool water so the tubes do not stick together.
Step 6: Prepare the Baking Dish
Spread a thin layer of marinara sauce across the bottom of a 9 by 13 inch baking dish. This layer prevents the manicotti from sticking to the bottom and ensures every pasta tube gets contact with sauce.
Use about 1/2 cup of your sauce for this base layer. The remaining sauce will go around and on top of the stuffed pasta.
Step 7: Stuff the Manicotti Tubes
Lay a manicotti tube on a clean surface and use a small spoon to carefully pack the ricotta and meat filling into each end, filling it three-quarters full. This takes patience, but rushing leads to torn pasta.
Do not overstuff the tubes, as the filling needs room to move and stay contained during cooking. Aim for about 3 tablespoons of filling per tube.
Step 8: Arrange Stuffed Pasta in the Baking Dish
Place each stuffed manicotti seam-side up in a single layer in the prepared baking dish, nestling them close together but not overlapping. You should fit about 20 to 24 tubes depending on their size.
Arranging them seam-side up helps keep the filling from spilling out during baking. The close arrangement also creates a stable structure so nothing shifts during cooking.
Step 9: Cover with Sauce and Cheese
Pour the remaining marinara sauce over the manicotti tubes, making sure all visible pasta is coated. Sprinkle 1/2 cup shredded mozzarella cheese evenly across the top.
The sauce keeps the pasta from drying out in the oven, and the cheese on top creates a golden, bubbly crust. Every pasta tube should have sauce contact to ensure even cooking.
Step 10: Bake Until Golden and Bubbly
Cover the baking dish tightly with aluminum foil and bake at 375 degrees Fahrenheit for 35 minutes. Remove the foil and bake an additional 10 to 12 minutes until the cheese on top turns golden and the sauce bubbles around the edges.
Covering with foil prevents the sauce from reducing too quickly, and the final uncovered minutes allow the cheese to brown. Let the dish rest for 5 minutes before serving so everything sets slightly.
Pro Tip: If you are making this ahead, assemble the entire dish without baking, cover it tightly with foil, and freeze for up to 3 months. Bake straight from the freezer, adding 15 to 20 minutes to the covered baking time.
Tips for the Best Manicotti with Meat
- Brown the beef properly over medium-high heat until deeply golden, not just cooked through. The caramelized meat adds incredible depth that raw or barely cooked meat cannot match.
- Do not boil the manicotti all the way through. The tubes continue cooking in the oven, and fully cooked pasta becomes mushy by the end.
- Mix the ricotta filling by hand rather than with an electric mixer. A mixer overworks the cheese and creates a grainy, separated texture instead of creamy.
- Let the meat cool before mixing with the ricotta so the heat does not scramble the egg in your filling. A 5-minute rest is plenty.
- Fill the tubes with a small spoon rather than a piping bag, which can burst delicate pasta. Your fingers work too if you want direct control.
- Make sure every tube has sauce around it in the pan, as dry spots lead to cracked pasta during cooking.
Common Mistakes to Avoid
- Overstuffing the tubes causes them to burst or leak during cooking, making your dish look messy and losing filling into the sauce. Aim for three-quarters full at most.
- Skipping the meat browning step and just mixing raw beef into the ricotta results in a grainy texture and missing caramelized depth. Always brown it first.
- Cooking the manicotti too far ahead of time before stuffing causes them to stick together into one clump. Cook and immediately cool them in the colander with a gentle rinse.
- Baking uncovered from the start dries out the sauce and can leave the exposed pasta tough. Always cover with foil for the first portion of baking.
- Not resting the dish after baking causes it to fall apart when plating because everything is still too hot. Five minutes makes a huge difference in structure.
Serving Suggestions
Manicotti with meat is hearty enough to stand alone, but a few simple sides elevate the whole meal. Pair it with something fresh and bright to balance the richness of the cheese and meat.
- Simple green salad tossed with lemon vinaigrette and fresh basil cuts through the richness perfectly
- Garlic bread or toasted Italian bread rounds out the meal and helps soak up extra sauce
- Roasted vegetables like broccoli, zucchini, or bell peppers add color and nutrition alongside the pasta
- Steamed asparagus with garlic and olive oil provides a lighter, slightly bitter contrast to the cheese and meat
- A glass of medium-bodied red wine like Chianti or Sangiovese complements the tomato sauce and beef beautifully
Variations to Try
- Swap ground beef for ground Italian sausage to add fennel and herb notes that shift the flavor profile toward more traditional Italian cooking. The sausage also brings extra fat that keeps the filling moist.
- Add 1 cup of finely chopped mushrooms to the meat as it browns, creating a deeper, earthier filling that adds texture. Mushrooms also pair beautifully with beef and cheese.
- Mix 1/2 cup fresh spinach into the ricotta filling for a lighter variation that adds iron and a subtle earthiness. Squeeze the spinach dry first so it does not add excess moisture.
- Layer the baking dish with half the manicotti, then a layer of bolognese sauce, then the remaining manicotti for a more complex meat sauce experience. This requires a deeper baking dish but creates incredible flavor layering.
- Top the assembled manicotti with a béchamel sauce instead of just mozzarella for a creamier, more decadent version. This Italian-French hybrid is restaurant-quality impressive.
Dietary Adaptations
- Gluten-free: Use gluten-free manicotti pasta, which cooks slightly faster and can break more easily, so handle with extra care. The rest of the recipe stays exactly the same.
- Dairy-free: Replace ricotta with dairy-free ricotta alternative, mozzarella with dairy-free mozzarella, and Parmesan with nutritional yeast for umami depth. The texture will be slightly different but still satisfying.
- Vegetarian: Omit the ground beef and increase the ricotta to 20 ounces, add 1 cup finely chopped mushrooms, and include 1/2 cup chopped walnuts for texture and protein. The dish loses none of its heartiness.
- Low-carb/keto: Replace manicotti with thinly sliced zucchini or eggplant sheets, layering them with filling and sauce instead of tubes. The carb count drops dramatically while the flavors stay intact.
Storage and Reheating
Refrigerator
Let the manicotti cool completely, then transfer it to an airtight container where it keeps for 3 to 4 days. The flavors actually improve after a day as everything melds together.
- Cool completely before storing to avoid condensation that makes pasta soggy
- Store in the original baking dish with plastic wrap for easiest reheating
- Individual portions can also be frozen in smaller containers for grab-and-go meals
Freezer
Freeze unbaked manicotti for up to 3 months, or baked manicotti for up to 2 months in an airtight container with plastic wrap directly on the surface. Unbaked versions taste fresher after thawing and reheating.
- Label with the date so you remember when you made it
- Unbaked manicotti can go straight from freezer to oven
- Thaw baked manicotti in the refrigerator overnight before reheating for best results
Reheating
Cover the manicotti with foil and reheat at 375 degrees Fahrenheit for 20 to 30 minutes if thawed, or 35 to 40 minutes if frozen. The foil prevents the top from burning while the insides warm through.
- Add a splash of water or broth to the pan if the sauce seems dry
- Remove foil in the last few minutes if you want to crisp the cheese top
- Microwave individual portions for 2 to 3 minutes if you are in a hurry, though oven reheating produces better texture
Nutrition Information
| Nutrient | Amount |
|---|---|
| Calories | 385 |
| Total Fat | 18 grams |
| Saturated Fat | 9 grams |
| Carbohydrates | 32 grams |
| Fiber | 2 grams |
| Sugar | 4 grams |
| Protein | 24 grams |
| Sodium | 710 milligrams |
| Cholesterol | 68 milligrams |
These values are estimates based on standard ingredient brands and may vary depending on your specific choices. Homemade versions typically contain less sodium than restaurant versions since you control the salt level throughout.
Frequently Asked Questions
Can I prepare manicotti with meat the day before baking?
Manicotti with Meat
Ingredients
Equipment
Method
- Preheat the oven to 375°F (190°C). Spread 1/2 cup of marinara sauce in the bottom of a 9 x 13 inch baking dish and set aside.
- Bring a large pot of salted water to a boil. Add the manicotti and cook 2 minutes less than package directions, about 6–7 minutes. Drain and rinse gently under cool water.
- While the pasta cooks, heat olive oil in a large skillet over medium-high heat. Add ground beef and cook 5–7 minutes, breaking it up, until browned.
- Stir in diced onion and minced garlic; cook 2–3 minutes until the onion softens. Remove from heat and let the mixture cool for 5 minutes.
- In a medium bowl combine ricotta, 1 cup mozzarella, Parmesan, egg, salt, pepper, Italian seasoning and red pepper flakes. Mix gently until just combined.
- Fold the cooled beef mixture into the ricotta mixture until evenly distributed.
- Using a small spoon, fill each manicotti tube about three-quarters full with the meat and cheese filling.
- Arrange the stuffed manicotti seam-side up in the prepared baking dish in a single layer.
- Pour the remaining marinara sauce evenly over the pasta, making sure all tubes are coated. Sprinkle the remaining 1/2 cup mozzarella over the top.
- Cover the dish tightly with aluminum foil and bake for 35 minutes. Remove the foil and bake an additional 10–12 minutes until the cheese is golden and the sauce is bubbly. Let rest 5 minutes before serving.