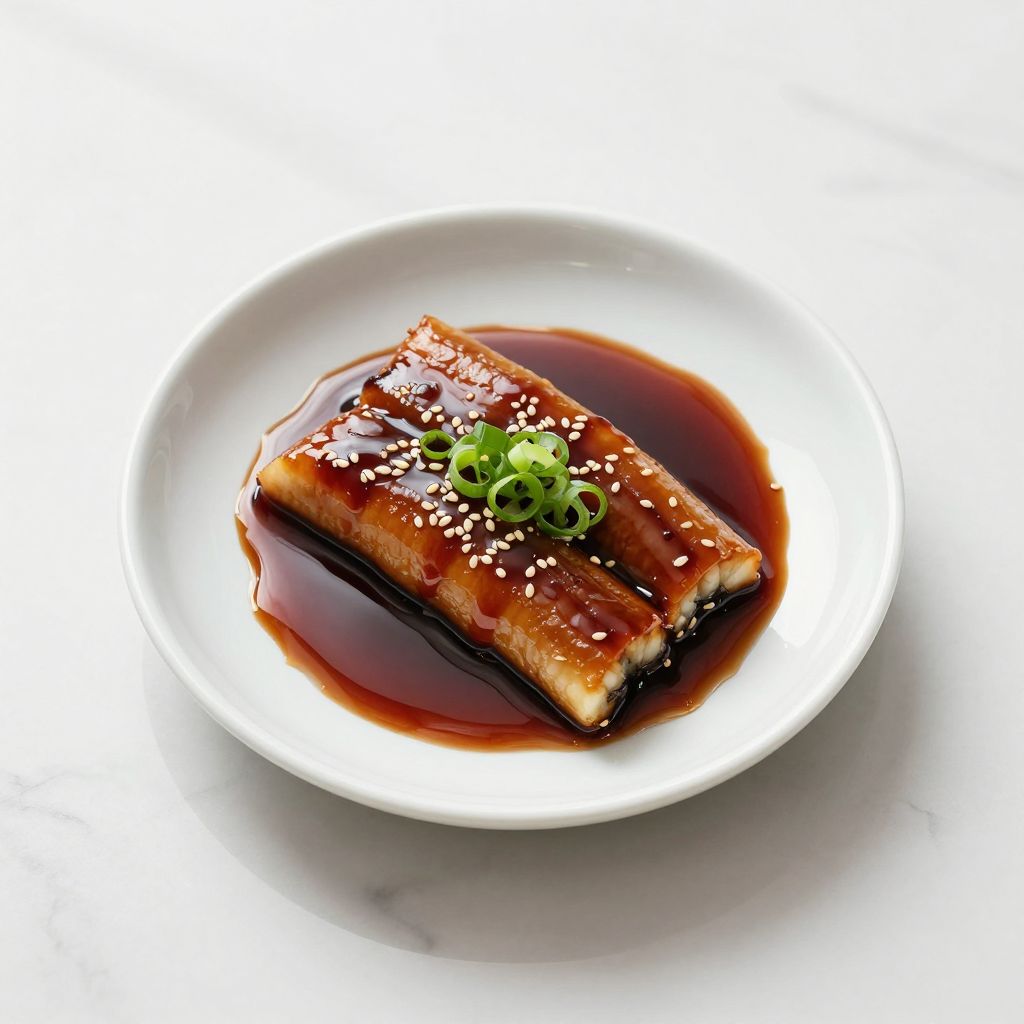
Eel sauce is a sweet and savory Japanese condiment that transforms any dish with its glossy, caramelized richness. This sticky glaze, also called unagi sauce, uses just a handful of pantry staples to create a restaurant-quality topping for sushi, grilled vegetables, chicken, and more. Once you master this simple recipe, you’ll find yourself drizzling it on everything.
The magic lies in balancing soy sauce, mirin, and a touch of sugar to create that signature sticky-sweet profile that makes eel sauce so addictive. Whether you’re building homemade sushi or want to elevate weeknight proteins, this recipe delivers authentic flavor without any fuss.
Why You’ll Love This Recipe
This eel sauce checks every box: it’s quick to make, uses ingredients you likely already have, and tastes identical to the version served in sushi restaurants.
- Ready in under 10 minutes with zero special equipment needed.
- Makes enough sauce to store in your fridge for weeks.
- Works beautifully on sushi, grilled fish, roasted vegetables, rice bowls, and even chicken wings.
- Far cheaper than buying pre-made versions at the grocery store.
- Naturally glossy finish that looks professional and appetizing.
My Experience Making This Recipe
I first made eel sauce at home after ordering sushi repeatedly and thinking, “Why am I paying eight dollars for what’s essentially a sauce?” The moment it hit the stove and started reducing, filling my kitchen with that caramelized soy aroma, I knew I’d cracked something special.
My family devoured the first batch on top of grilled salmon, and suddenly I was making triple quantities weekly. The sauce has become a staple I reach for when I want to add restaurant-quality flavor to otherwise simple meals.
What surprised me most was how forgiving the recipe is; even slight variations in ratios still yield delicious results. It’s the kind of recipe that builds confidence in the kitchen because you’ll taste success on your first try.
Recipe Overview
- Recipe Name: Eel Sauce (Unagi Sauce)
- Servings: Makes about 1 cup
- Prep Time: 5 minutes
- Cook Time: 5 minutes
- Total Time: 10 minutes
- Course: Condiment
- Cuisine: Japanese
- Calories per Serving: 45 (per tablespoon)
Equipment You Will Need
- Small saucepan
- Measuring cups and spoons
- Wooden spoon or silicone spatula
- Glass jar for storage
- Fine-mesh strainer (optional, for ultra-smooth texture)
Ingredients for Eel Sauce
- 1/2 cup soy sauce
- 1/4 cup mirin (sweet rice wine)
- 2 tablespoons sugar
- 1 tablespoon water
- 1/2 teaspoon cornstarch (optional, for extra thickness)
Ingredient Notes and Substitutions
- Soy sauce: The backbone of this sauce, providing deep umami and saltiness. If unavailable, tamari works as a gluten-free swap, though it will taste slightly less salty, so reduce water by a tablespoon.
- Mirin: This sweet rice wine gives eel sauce its signature caramel notes and sticky texture. Substitute with 2 tablespoons honey plus 1 tablespoon water for a deeper, less delicate sweetness.
- Sugar: Balances the salty soy with brightness and helps the sauce caramelize. Honey or brown sugar work here, though brown sugar will darken the final color slightly.
- Cornstarch: Creates a thicker, glossier sauce that clings better to food. Skip it if you prefer a lighter pour-over consistency.
How to Make Eel Sauce
Step 1: Combine Your Base Ingredients
Pour the soy sauce, mirin, sugar, and water into a small saucepan. Stir everything together with a wooden spoon until the sugar begins to dissolve, which takes about 30 seconds.
Step 2: Place Over Medium-High Heat
Set the saucepan over medium-high heat and bring the mixture to a gentle boil. You’ll notice small bubbles starting to form around the edges within 1 to 2 minutes.
Step 3: Watch for the First Signs of Thickening
Once boiling, reduce the heat to medium and let the sauce simmer steadily. The liquid will begin to reduce and darken slightly as it concentrates, which is exactly what you want.
Step 4: Time the Reduction Carefully
Simmer for 3 to 5 minutes, depending on your stove’s intensity and how thick you like your sauce. The longer you simmer, the thicker and more intensely flavored the sauce becomes, so start checking at the 3-minute mark.
Step 5: Test the Consistency
Dip a spoon into the sauce and lift it out; the sauce should coat the back of the spoon and slowly drip off. If it’s too thin, simmer for another minute and test again.
Step 6: Add Cornstarch Slurry for Extra Thickness (Optional)
If you want a glossier, thicker finish, mix cornstarch with 1 teaspoon of water to create a slurry. Pour the slurry into the simmering sauce while stirring constantly for 30 seconds until it thickens.
Step 7: Remove from Heat and Cool
Take the saucepan off the heat and let the sauce cool for 2 to 3 minutes. The sauce will continue to thicken slightly as it cools, so don’t worry if it seems thin at first.
Step 8: Transfer to a Storage Jar
Pour the finished eel sauce into a clean glass jar once it reaches room temperature. Store it in the refrigerator, where it will keep for up to 3 weeks and will continue to thicken over time.
Pro Tip: The sauce thickens more as it cools and sits in the fridge, so it’s better to undercook it slightly on the stove than to overdo it.
Tips for the Best Eel Sauce
- Use a good-quality soy sauce; it’s the star ingredient and makes a noticeable difference in flavor depth and smoothness.
- Don’t skip the mirin if you can find it, as it’s what gives eel sauce its authentic caramel sweetness and glossy finish.
- Keep the heat at medium once boiling to avoid the sauce reducing too quickly or burning at the edges.
- Make a double batch since you’ll use it constantly on rice bowls, sushi, grilled proteins, and roasted vegetables.
- Strain the cooled sauce through a fine-mesh strainer if you want a completely smooth texture without any sediment.
Common Mistakes to Avoid
- Cooking at too high a heat causes the sugar to burn and creates a bitter, dark sauce instead of a glossy caramel finish.
- Adding cornstarch directly without making a slurry first creates lumps throughout the sauce that won’t blend smoothly.
- Reducing the sauce too much turns it into a hard, candy-like substance that won’t pour or spread properly once cooled.
- Using table salt instead of soy sauce misses the umami depth that makes eel sauce distinctive and restaurant-quality.
- Skipping the cooling time and using hot sauce on cold sushi or rice causes uneven distribution and can make rice soggy.
Serving Suggestions
Eel sauce deserves more than just sushi; this versatile glaze elevates everything it touches. Drizzle it over warm rice, brush it on grilled proteins, or use it as a dipping sauce for appetizers.
- Drizzle generously over nigiri sushi, California rolls, and sushi bowls for authentic Japanese flavor.
- Brush onto grilled salmon, sea bass, or chicken during the last 2 minutes of cooking for a glossy, caramelized crust.
- Spoon over warm jasmine or sushi rice in bowls topped with grilled vegetables, soft-boiled eggs, and pickled ginger.
- Mix into cooked quinoa or rice with sesame seeds and sliced scallions for a simple side dish.
- Serve alongside chicken wings, shrimp tempura, or vegetable tempura as a dipping sauce.
Variations to Try
- Spicy Eel Sauce: Add 1/2 to 1 teaspoon of sriracha or 1/4 teaspoon of cayenne pepper to the sauce during simmering for a kick that pairs beautifully with grilled fish or chicken.
- Ginger Eel Sauce: Stir in 1 tablespoon of fresh grated ginger during the initial mix for a warming, aromatic twist that enhances seafood bowls.
- Garlic Eel Sauce: Add 2 minced garlic cloves simmered with the sauce for an extra savory depth, perfect for grilled vegetables and rice.
- Sesame Eel Sauce: Whisk in 1 teaspoon of sesame oil after cooling for a nutty undertone that works wonderfully with grilled proteins.
- Thinner Pour Version: Skip the cornstarch and reduce simmering time to 2 minutes for a thinner sauce that flows freely over sushi without pooling.
Dietary Adaptations
- Gluten-Free: Substitute soy sauce with tamari, which contains no wheat, though you may need to adjust salt levels slightly since tamari varies by brand.
- Dairy-Free: This recipe is already dairy-free; simply confirm your soy sauce and mirin labels are free of added dairy.
- Vegan/Vegetarian: The recipe is naturally vegan; just verify that your mirin doesn’t contain fish-derived ingredients by checking the label.
- Low-Carb/Keto: Replace sugar and mirin with 2 tablespoons of monk fruit sweetener or erythritol, though this reduces the traditional caramel depth slightly.
Storage and Reheating
Refrigerator
Store eel sauce in an airtight glass jar on a shelf in your refrigerator, where it will keep for up to 3 weeks. The sauce will thicken further over time, so it’s perfectly normal if it becomes more gel-like after a few days.
- If the sauce becomes too thick, warm it gently over low heat for 30 seconds and stir in a teaspoon of water.
- Always use a clean spoon when scooping sauce to prevent contamination.
Freezer
Eel sauce freezes beautifully for up to 3 months in an airtight container or ice cube tray for portion control. Freeze in tablespoon-sized portions in an ice cube tray, then pop them into a freezer bag once solid.
- Thaw frozen sauce overnight in the refrigerator before using.
- Frozen cubes thaw quickly and are perfect for meal prepping.
Reheating
Eel sauce doesn’t require reheating in most cases; serve it at room temperature or straight from the fridge. If you need to warm it, use a microwave in 10-second bursts or gently heat it in a small saucepan over low heat, stirring constantly.
- Don’t boil reheated sauce; it may caramelize too much and become bitter.
- Room temperature sauce tastes fresher and distributes more evenly over sushi and rice.
Nutrition Information
| Nutrient | Amount |
|---|---|
| Calories | 45 |
| Total Fat | 0g |
| Saturated Fat | 0g |
| Carbohydrates | 10g |
| Fiber | 0g |
| Sugar | 8g |
| Protein | 1g |
| Sodium | 880mg |
| Cholesterol | 0mg |
Nutrition values are calculated per tablespoon serving. Values are approximate and may vary based on specific brand ingredients used.
Frequently Asked Questions
Can I make eel sauce without mirin?
Yes, you can substitute 2 tablespoons of honey plus 1 tablespoon of water for the mirin, though the sauce will taste deeper and less delicate. The substitution works well, but authentic eel sauce relies on mirin’s specific sweetness, so hunt for it if possible in the Asian section of most grocery stores.
How long does homemade eel sauce last?
Stored properly in an airtight glass jar in the refrigerator, eel sauce keeps for up to 3 weeks. Freezing extends its life to 3 months, making it smart to batch-make for meal prep.
Why did my eel sauce turn out too thick?
Sauce becomes thicker as it cools, and simmering longer than 5 minutes intensifies this effect. If you overcooked it, simply warm it gently and stir in a teaspoon of water at a time until it reaches your desired consistency.
Can I use this sauce on non-Japanese foods?
Absolutely, and it’s delicious that way; the sauce works beautifully on grilled vegetables, roasted chicken, pork, beef, and even pizza. Think of it as a sweet-savory glaze that enhances any protein or grain.
Is eel sauce spicy?
Traditional eel sauce contains no spice, though you can easily add sriracha or cayenne pepper to create a spicy version. The original version is purely sweet and savory without heat.
What’s the difference between eel sauce and teriyaki sauce?
Eel sauce is sweeter and thicker with a stronger soy flavor, while teriyaki uses more mirin and is often thickened with cornstarch from the start. Both are Japanese glazes, but eel sauce carries a distinct caramel depth that teriyaki doesn’t quite match.
Final Thoughts
Making eel sauce at home is one of those small kitchen wins that pays dividends repeatedly throughout your cooking week. Once you taste the difference between homemade and store-bought, you’ll never go back, and your family will wonder why everything suddenly tastes like your favorite sushi restaurant.
This recipe works because it respects the simplicity of its ingredients while building layers of flavor through careful reduction and balance. Try it this week on your next sushi night or grain bowl, and watch how a simple tablespoon of glossy sauce transforms an ordinary meal into something memorable.
Eel Sauce (Unagi Sauce)
Ingredients
Equipment
Method
- Combine soy sauce, mirin, sugar, and water in a small saucepan; stir until the sugar begins to dissolve, about 30 seconds.
- Set the saucepan over medium-high heat and bring the mixture to a gentle boil, 1–2 minutes.
- Reduce heat to medium and simmer, stirring occasionally, until slightly thickened and darkened, 3–5 minutes.
- Test consistency by coating the back of a spoon; if too thin, continue simmering for 1 additional minute.
- For extra thickness, whisk cornstarch with 1 teaspoon water, then stir the slurry into the sauce for 30 seconds while it simmers.
- Remove from heat and let the sauce cool for 2–3 minutes; it will thicken further as it cools.
- Strain through a fine-mesh strainer for an ultra-smooth texture, if desired.
- Transfer the cooled sauce to a clean glass jar, let it reach room temperature, then refrigerate for up to 3 weeks.