Chicken stock recipe transforms humble bones and vegetable scraps into liquid gold for your kitchen. This foundational ingredient elevates soups, sauces, risottos, and countless other dishes with rich, savory depth that store bought versions simply cannot match.
Making homemade chicken stock feels like a kitchen superpower once you nail it. The aroma alone will have your neighbors knocking on your door, wondering what magic you are creating.
Let me walk you through everything you need to know to make restaurant quality stock at home. From selecting the right bones to extracting maximum flavor, this guide covers it all.
Why You Will Love This Recipe
Homemade chicken stock rewards you with superior flavor and complete control over what goes into your cooking. Once you taste the difference, that boxed stuff will collect dust in your pantry forever.
- Incredible depth of flavor that transforms ordinary dishes into something special
- Zero artificial preservatives, excess sodium, or mysterious additives
- Practically free when made from scraps you would otherwise throw away
- Freezes beautifully for up to six months of cooking convenience
- Your house will smell absolutely amazing for hours
My Experience Making This Recipe
I started making chicken stock years ago after a particularly disappointing batch of soup made with store bought broth. The thin, overly salty liquid ruined what should have been a comforting meal.
That first batch of homemade stock changed everything. The golden color, the way it gelled in the refrigerator, the rich body it added to my cooking made me a convert for life.
Now I keep a bag in my freezer specifically for collecting bones and vegetable trimmings. Stock day has become a satisfying ritual in my kitchen, usually happening every few weeks when the scrap bag gets full.
Recipe Overview
- Recipe Name: Homemade Chicken Stock
- Servings: Approximately 3 quarts
- Prep Time: 20 minutes
- Cook Time: 4 hours
- Total Time: 4 hours 20 minutes
- Course: Base, Soup Component
- Cuisine: Universal
- Calories per Serving: 15 per cup
Equipment You Will Need
- Large stockpot (at least 8 quart capacity)
- Fine mesh strainer
- Cheesecloth or clean kitchen towel
- Large heat safe bowl or container
- Ladle
- Sharp knife and cutting board
- Storage containers or freezer bags
- Fat separator (optional but helpful)
Ingredients for Chicken Stock
- 4 pounds chicken bones (backs, necks, wings, or carcass from roasted chicken)
- 2 large onions, quartered (skin on adds color)
- 3 large carrots, roughly chopped
- 4 celery stalks, roughly chopped including leaves
- 1 head garlic, halved crosswise
- 2 bay leaves
- 1 tablespoon whole black peppercorns
- 6 to 8 fresh thyme sprigs
- 1 small bunch fresh parsley with stems
- 4 quarts cold water (approximately)
- 1 tablespoon apple cider vinegar
Ingredient Notes and Substitutions
- Chicken bones: Raw bones create cleaner flavor while roasted bones add deeper color and richness. Mix both for the best of both worlds.
- Onions: Yellow onions provide the most balanced flavor. Red onions work but may tint your stock pink.
- Carrots: These add subtle sweetness and golden color. Skip them if you want a completely neutral stock.
- Celery: Contributes savory depth and aromatic backbone. Celery root makes an excellent substitute.
- Bay leaves: Dried bay leaves impart subtle herbal notes. Use one less if using fresh, as they pack more punch.
- Apple cider vinegar: The acid helps extract minerals from bones. Any mild vinegar works identically.
How to Make Chicken Stock
Step 1: Prepare Your Bones
If using raw bones, rinse them under cold water to remove any blood or debris. This step prevents cloudiness and off flavors in your finished stock.
For deeper flavor, roast raw bones at 400 degrees Fahrenheit for 30 to 40 minutes until golden. This caramelization creates that gorgeous amber color and complex taste.
Step 2: Prep the Aromatics
Roughly chop your onions, carrots, and celery into large chunks. Precision does not matter here since everything gets strained out later.
Cut the head of garlic in half horizontally to expose all those cloves. The cut surface releases maximum flavor during the long simmer.
Step 3: Load the Stockpot
Place all the bones in your largest stockpot and add the chopped vegetables. Toss in the garlic, bay leaves, peppercorns, thyme, and parsley.
Add the apple cider vinegar and let everything sit for about 20 minutes before adding water. This gives the acid time to start working on those bones.
Step 4: Add Cold Water
Pour cold water over everything until the bones and vegetables sit about two inches below the surface. Starting with cold water helps proteins release gradually, producing clearer stock.
Never use hot water to start your stock. It causes proteins to seize quickly and creates a murky, cloudy result that no amount of straining will fix.
Step 5: Bring to a Gentle Simmer
Place the pot over medium high heat and bring it slowly to a simmer. Watch carefully because you want lazy bubbles, not a rolling boil.
Boiling agitates the fat and proteins, creating emulsification that makes stock greasy and cloudy. Patience here rewards you with crystal clear results.
Step 6: Skim the Surface
As the stock heats, foam and impurities will rise to the surface. Use a ladle or large spoon to skim this gunk off every 15 to 20 minutes during the first hour.
This step separates good stock from great stock. The cleaner you keep that surface, the purer your final product will taste.
Step 7: Simmer Low and Slow
Reduce heat to maintain the gentlest simmer possible. You want occasional bubbles breaking the surface, nothing more aggressive.
Let the stock simmer uncovered for 3 to 4 hours. The long cooking time extracts collagen from bones, creating that silky body and satisfying mouthfeel.
Step 8: Strain and Cool
Set a fine mesh strainer lined with cheesecloth over a large bowl. Carefully ladle the stock through, pressing gently on solids to extract liquid without forcing through sediment.
Cool the stock quickly by placing the bowl in an ice bath, stirring occasionally. Rapid cooling prevents bacterial growth and keeps your stock safe.
Step 9: Defat the Stock
For immediate use, skim the fat from the surface with a ladle or use a fat separator. The easier method involves refrigerating overnight and peeling off the solidified fat cap.
Save that chicken fat in the freezer for cooking. It makes incredible roasted potatoes and adds authentic flavor to many dishes.
Pro Tip: A properly made chicken stock will gel like jello when refrigerated. This wobble indicates high collagen extraction and guarantees rich, silky body in your finished dishes.
Tips for the Best Chicken Stock
- Use a mix of meaty bones and joints for the best balance of flavor and gelatin. Wings and backs are particularly collagen rich.
- Keep the heat low throughout simmering. If you can hear your stock bubbling from across the kitchen, it is too hot.
- Leave the onion skins on for beautiful golden color. They contribute no flavor but add appealing warmth to the stock.
- Avoid adding salt during cooking. Season later when using the stock, giving you maximum flexibility in recipes.
- Freeze stock in various sizes, from ice cube trays for small amounts to quart containers for soups. Different portions suit different needs.
- Add a parmesan rind during simmering for extra umami depth. It melts away but leaves incredible savoriness behind.
Common Mistakes to Avoid
- Boiling instead of simmering: High heat creates cloudy, greasy stock with muddled flavors.
- Overcrowding the pot: Too many bones without enough water means diluted flavor and uneven extraction.
- Skipping the skimming: That foam contains impurities that make stock taste dull and look unappealing.
- Adding salt too early: Stock reduces as it cooks, concentrating any salt to potentially inedible levels.
- Using old, freezer burned bones: Off flavors in bones transfer directly to your stock. Start with quality ingredients.
Serving Suggestions
Fresh chicken stock serves as the foundation for countless dishes, from simple broths to complex sauces. Its versatility makes it the hardest working ingredient in any kitchen.
- Sip it warm from a mug with a pinch of salt for a nourishing snack
- Use as the base for classic chicken noodle soup
- Braise vegetables or grains for added depth
- Deglaze pans to create quick pan sauces
- Cook risotto or rice pilaf for incredible flavor absorption
Variations to Try
- Asian Style Stock: Add ginger, star anise, and green onions while omitting thyme and parsley. Perfect for pho or ramen bases.
- Roasted Chicken Stock: Brown all bones and vegetables before simmering for deeper, more caramelized flavors.
- White Stock: Blanch bones in boiling water first, then proceed with fresh cold water. Creates a very clean, neutral base.
- Herb Forward Stock: Double the thyme and add rosemary and sage. Ideal for holiday gravy and stuffing.
- Quick Pressure Cooker Version: Use an Instant Pot for 90 minutes on high pressure. Faster results with comparable quality.
Dietary Adaptations
- Gluten Free: This recipe contains no gluten naturally. Just verify your vinegar has no added ingredients.
- Dairy Free: Chicken stock is inherently dairy free. Skip the parmesan rind variation if strictly avoiding dairy.
- Low Carb and Keto: With virtually zero carbohydrates, this stock fits perfectly into ketogenic eating plans.
- Whole30 Compliant: Homemade stock with no added sugar or preservatives meets all Whole30 requirements.
Storage and Reheating
Refrigerator
Properly cooled chicken stock keeps refrigerated for up to one week. The fat cap that forms on top actually helps preserve it longer.
- Store in airtight containers
- Keep at 40 degrees Fahrenheit or below
- Remove fat cap just before using
Freezer
Frozen stock maintains quality for up to six months. Leave headspace in containers to allow for expansion during freezing.
- Freeze in various portion sizes for flexibility
- Ice cube trays work great for small amounts needed in recipes
- Label containers with the date for proper rotation
Reheating
Thaw frozen stock overnight in the refrigerator or use the defrost function on your microwave. For immediate use, place the frozen block directly in a saucepan over low heat.
- Heat gently to maintain clarity
- Bring to a boil briefly if stock has been stored more than a few days
- Season only after reheating to taste
Nutrition Information
| Nutrient | Amount |
|---|---|
| Calories | 15 |
| Total Fat | 0.5g |
| Saturated Fat | 0g |
| Carbohydrates | 1g |
| Fiber | 0g |
| Sugar | 0g |
| Protein | 2g |
| Sodium | 15mg |
| Cholesterol | 0mg |
Nutritional values are estimates based on defatted stock. Actual values may vary depending on bone type and cooking time.
Frequently Asked Questions
Can I use chicken breast bones or only dark meat bones?
Any chicken bones work, but dark meat bones and joints contain more collagen. A mix of bone types produces the most well rounded stock.
Can I make chicken stock ahead of time?
Absolutely. Stock improves after a day in the refrigerator as flavors meld. Make it on the weekend and use it all week long.
How do I know if my stock has gone bad?
Spoiled stock develops an off smell, slimy texture, or visible mold. When in doubt, throw it out rather than risk foodborne illness.
Why did my stock not gel in the refrigerator?
Lack of gelatin usually means insufficient bones, too much water, or not enough cooking time. Add more joints like wings next time for better results.
Can I reuse bones to make a second batch of stock?
You can make a weaker “remouillage” or second washing from used bones. It works for cooking grains or as a base for your next primary batch.
Final Thoughts
Making your own chicken stock transforms kitchen scraps into something genuinely valuable. The process requires minimal effort but delivers maximum reward in flavor and satisfaction.
Start saving those bones and vegetable trimmings today. Once you experience the difference homemade stock makes in your cooking, you will wonder why you ever bought the boxed stuff.
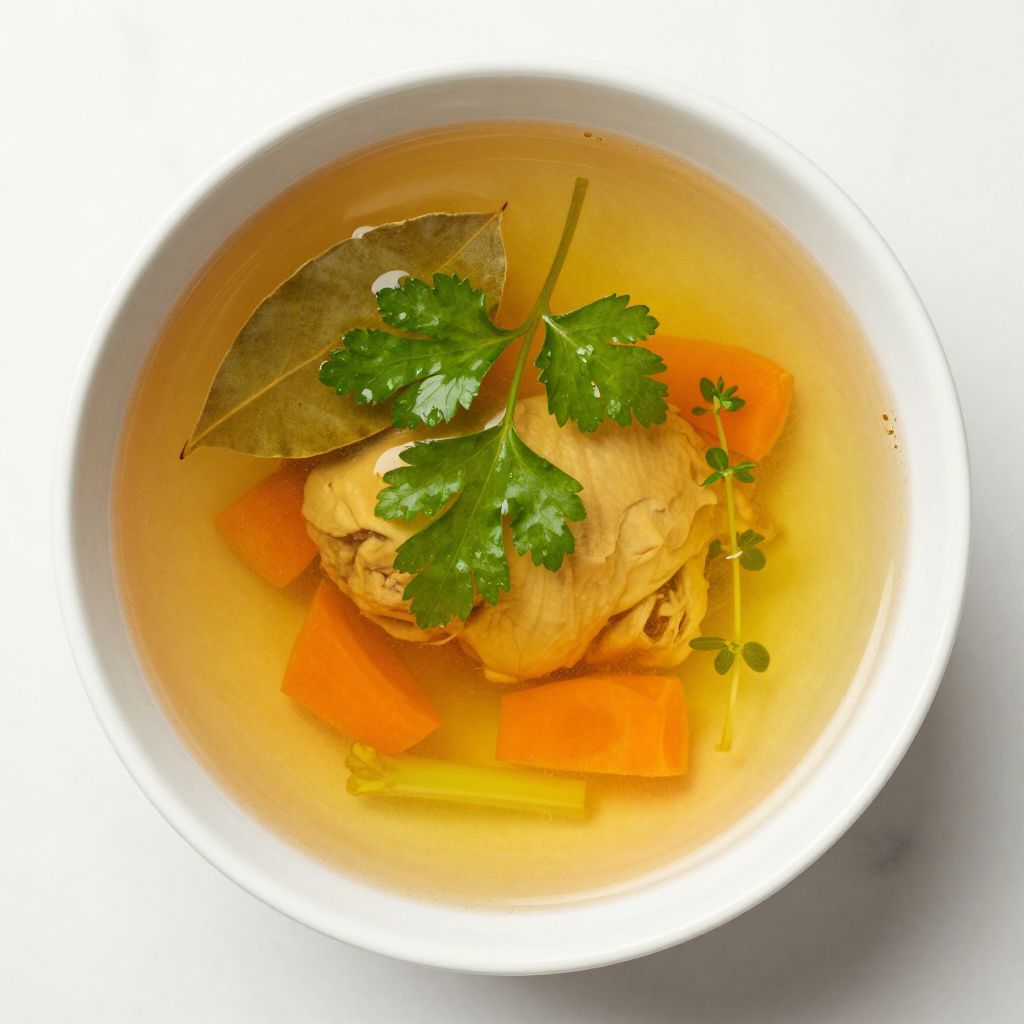
Homemade Chicken Stock
Ingredients
Equipment
Method
- Prepare Your Bones: If using raw bones, rinse them under cold water to remove any blood or debris. For deeper flavor, roast raw bones at 400 degrees Fahrenheit for 30 to 40 minutes until golden.
- Prep the Aromatics: Roughly chop your onions, carrots, and celery into large chunks. Cut the head of garlic in half horizontally to expose all the cloves.
- Load the Stockpot: Place all the bones in your largest stockpot and add the chopped vegetables. Add the garlic, bay leaves, peppercorns, thyme, and parsley.
- Add the apple cider vinegar and let everything sit for about 20 minutes before adding water. This gives the acid time to start working on the bones.
- Add Cold Water: Pour cold water over everything until the bones and vegetables sit about two inches below the surface. Starting with cold water helps proteins release gradually, producing clearer stock.
- Bring to a Gentle Simmer: Place the pot over medium high heat and bring it slowly to a simmer. Watch carefully for lazy bubbles, not a rolling boil.
- Skim the Surface: As the stock heats, foam and impurities will rise to the surface. Use a ladle or large spoon to skim this off every 15 to 20 minutes during the first hour.
- Simmer Low and Slow: Reduce heat to maintain the gentlest simmer possible. Let the stock simmer uncovered for 3 to 4 hours.
- Strain and Cool: Set a fine mesh strainer lined with cheesecloth over a large bowl. Carefully ladle the stock through, pressing gently on solids to extract liquid.
- Cool the stock quickly by placing the bowl in an ice bath, stirring occasionally.
- Defat the Stock: Skim the fat from the surface with a ladle or refrigerate overnight and peel off the solidified fat cap.