Chicken cutlet recipe delivers crispy, golden perfection every single time. This classic dish uses simple pantry staples to transform boneless chicken breasts into tender, crunchy cutlets that your whole family will request on repeat.
Whether you’re meal prepping for the week or need a quick weeknight dinner, these homemade chicken cutlets hit the spot. Let me walk you through everything you need to know to nail this recipe.
Why You’ll Love This Recipe
This chicken cutlet recipe earns its spot in your regular rotation for good reason. Here’s what makes it a winner:
- Ready in under 30 minutes from start to finish
- Uses basic ingredients you probably already have
- Incredibly versatile for sandwiches, salads, or standalone dinners
- Kids and picky eaters devour these without complaint
- Freezer friendly for easy meal prep
My Experience Making This Recipe
I’ve made these chicken cutlets more times than I can count, and they never disappoint. The sound of that first sizzle when the breaded chicken hits the hot oil? Pure kitchen magic.
My family fights over the last cutlet every single time. The coating stays remarkably crispy even after sitting for a few minutes, which rarely happens with breaded chicken.
The secret is getting that oil temperature just right and not overcrowding the pan. Trust me, patience pays off with an audibly crunchy exterior and juicy interior.
Recipe Overview
- Recipe Name: Classic Chicken Cutlets
- Servings: 4
- Prep Time: 15 minutes
- Cook Time: 12 minutes
- Total Time: 27 minutes
- Course: Main Dish
- Cuisine: American, Italian American
- Calories per Serving: 385
Equipment You Will Need
- Large cast iron or stainless steel skillet
- Three shallow dishes or bowls for breading station
- Meat mallet or rolling pin
- Plastic wrap or parchment paper
- Wire cooling rack set over a baking sheet
- Instant read thermometer
- Tongs
- Sharp knife and cutting board
Ingredients for Chicken Cutlets
For the Chicken
- Boneless, skinless chicken breasts : 2 large (about 1.5 pounds total)
- Kosher salt : 1 teaspoon
- Black pepper : 1/2 teaspoon, freshly ground
For the Breading Station
- All purpose flour : 1 cup
- Eggs : 3 large, beaten
- Panko breadcrumbs : 2 cups
- Garlic powder : 1 teaspoon
- Paprika : 1 teaspoon
- Dried oregano : 1/2 teaspoon
- Parmesan cheese : 1/4 cup, finely grated
For Frying
- Vegetable oil or canola oil : 1 cup for shallow frying
Ingredient Notes and Substitutions
- Chicken breasts: Large breasts work best for even cutlets. Substitute chicken thighs for a richer flavor and more forgiving cook time.
- Panko breadcrumbs: These Japanese breadcrumbs create superior crunch. Regular Italian breadcrumbs work but produce a denser coating.
- Parmesan cheese: Adds savory depth to the breading. Skip it for dairy free or use nutritional yeast instead.
- Eggs: Act as the glue for the breading. Use buttermilk or a flax egg mixture for egg free versions.
- Vegetable oil: Any neutral high heat oil works perfectly. Avocado oil offers a healthier alternative with a similar smoke point.
How to Make Chicken Cutlets
Step 1: Prepare Your Chicken Breasts
Place one chicken breast on a cutting board and hold your knife parallel to the board. Slice the breast horizontally through the middle to create two thinner pieces.
This technique, called butterflying, gives you even pieces that cook at the same rate. Repeat with the remaining chicken breast.
Step 2: Pound the Chicken to Even Thickness
Place one chicken piece between two sheets of plastic wrap. Use a meat mallet or rolling pin to pound the chicken to about 1/4 inch thickness.
Even thickness means even cooking, which prevents dry edges and raw centers. Work from the center outward using firm but controlled strokes.
Step 3: Season the Chicken
Remove the plastic wrap and season both sides of each cutlet generously with salt and pepper. Let them rest at room temperature for 5 minutes while you set up the breading station.
Seasoning the chicken directly ensures flavor in every bite, not just on the coating. Room temperature meat also cooks more evenly than cold meat.
Step 4: Set Up Your Breading Station
Arrange three shallow dishes in a row. Place flour in the first dish, beaten eggs in the second, and combine panko, garlic powder, paprika, oregano, and Parmesan in the third.
This assembly line approach keeps one hand dry and one hand wet, minimizing messy clumps. Mix the seasonings into the panko thoroughly for consistent flavor.
Step 5: Bread the Cutlets
Dredge each cutlet in flour, shaking off excess. Dip into the egg, letting excess drip off, then press firmly into the panko mixture on both sides.
Really press that panko into the chicken for maximum adhesion. A thin, even flour coat prevents the egg from sliding right off the meat.
Step 6: Heat the Oil Properly
Pour oil into your skillet to about 1/4 inch depth. Heat over medium high until the oil reaches 350 to 375 degrees Fahrenheit.
Test readiness by dropping a small pinch of panko into the oil; it should sizzle immediately and float. Oil temperature is the single biggest factor in achieving crispy, not greasy, cutlets.
Step 7: Fry the Cutlets
Carefully place 1 to 2 cutlets in the hot oil, leaving space between them. Fry for 3 to 4 minutes per side until deeply golden brown and the internal temperature reaches 165 degrees Fahrenheit.
Resist the urge to move them around; let them develop a crust before flipping. Overcrowding drops the oil temperature and creates soggy, steamed breading instead of crispy fried goodness.
Step 8: Rest and Serve
Transfer cooked cutlets to a wire rack set over a baking sheet. Let them rest for 2 minutes before serving.
The wire rack allows air circulation underneath, keeping the bottom crispy. A paper towel lined plate traps steam and makes the bottom soggy almost immediately.
Pro Tip: Keep finished cutlets warm in a 200 degree oven while frying the remaining batches, placing them directly on the oven rack for maximum crispness.
Tips for the Best Chicken Cutlets
- Pat your chicken completely dry before seasoning; moisture is the enemy of a good sear.
- Let breaded cutlets rest on a wire rack for 5 minutes before frying to help the coating set.
- Maintain your oil temperature by adjusting heat between batches; it drops when you add cold food.
- Add a tablespoon of butter to the oil for the last batch for extra richness and browning.
- Season your flour with a pinch of salt and pepper for flavor in every layer.
- Use one hand for dry ingredients and one for wet to avoid clumpy breading fingers.
Common Mistakes to Avoid
- Skipping the pounding step: Uneven thickness causes overcooked thin spots and undercooked thick areas.
- Oil temperature too low: The breading absorbs oil instead of crisping, resulting in greasy cutlets.
- Overcrowding the pan: This drops oil temperature dramatically and steams the chicken instead of frying it.
- Flipping too early: The crust needs time to set; premature flipping tears the breading right off.
- Draining on paper towels: Trapped steam makes the bottom coating turn soggy within minutes.
Serving Suggestions
These versatile cutlets pair beautifully with almost anything. Here are my favorite combinations:
- Slice over mixed greens with lemon vinaigrette for a satisfying salad
- Serve on toasted brioche with lettuce, tomato, and garlic aioli
- Top with marinara and melted mozzarella for chicken Parmesan
- Pair with mashed potatoes and roasted vegetables for a comfort food dinner
- Cut into strips for kid friendly chicken tenders with honey mustard
Variations to Try
- Lemon Herb Cutlets: Add lemon zest and fresh thyme to the breadcrumb mixture for bright, aromatic flavor.
- Spicy Cutlets: Mix cayenne pepper and crushed red pepper flakes into the panko for a nice kick.
- Everything Bagel Cutlets: Replace half the panko with everything bagel seasoning for a fun twist.
- Japanese Style Katsu: Use traditional tonkatsu panko and serve with katsu sauce and shredded cabbage.
- Cornflake Crusted: Substitute crushed cornflakes for panko to create an extra crunchy, slightly sweet coating.
Dietary Adaptations
- Gluten Free: Use gluten free flour and gluten free panko or crushed rice cereal; results are nearly identical to the original.
- Dairy Free: Simply omit the Parmesan or use dairy free Parmesan; the cutlets remain delicious.
- Keto/Low Carb: Replace flour with almond flour and panko with crushed pork rinds; expect a slightly different but satisfying texture.
- Egg Free: Use 1/2 cup buttermilk or unsweetened plant milk mixed with 1 tablespoon mustard as the binder.
Storage and Reheating
Refrigerator
Store cooled cutlets in an airtight container for up to 4 days.
- Place parchment paper between cutlets to prevent sticking
- Let them come to room temperature before reheating for best results
Freezer
Freeze uncooked breaded cutlets for up to 3 months or cooked cutlets for up to 2 months.
- Flash freeze on a baking sheet before transferring to freezer bags
- Fry uncooked frozen cutlets directly; add 2 to 3 minutes per side
- Label bags with the date for easy tracking
Reheating
The oven method restores crispness far better than the microwave.
- Oven: 400 degrees for 10 to 12 minutes, flipping halfway through
- Air fryer: 375 degrees for 5 to 6 minutes for the crispiest results
- Avoid microwaving; it makes the breading rubbery and sad
Nutrition Information
| Nutrient | Amount |
|---|---|
| Calories | 385 |
| Total Fat | 18g |
| Saturated Fat | 3g |
| Carbohydrates | 24g |
| Fiber | 1g |
| Sugar | 1g |
| Protein | 32g |
| Sodium | 580mg |
| Cholesterol | 145mg |
Nutritional values are estimates based on standard ingredients and may vary based on specific products used and cooking methods.
Frequently Asked Questions
Can I bake chicken cutlets instead of frying them?
Yes, bake at 425 degrees for 15 to 18 minutes, flipping halfway. Spray the tops with cooking oil before baking for better browning.
Why does my breading fall off during cooking?
The chicken was likely too wet, or you skipped letting the breaded cutlets rest before frying. That 5 minute rest helps the coating adhere properly.
Can I prepare these ahead of time?
Absolutely. Bread the cutlets up to 24 hours in advance and store them uncovered in the refrigerator. The slight drying actually helps the crust crisp better.
What oil temperature is best for frying?
Aim for 350 to 375 degrees Fahrenheit. Lower temperatures cause greasiness; higher temperatures burn the outside before the inside cooks through.
How do I know when chicken cutlets are fully cooked?
Use an instant read thermometer to check for 165 degrees Fahrenheit at the thickest point. The golden brown color is a good indicator, but temperature is the only guarantee.
Final Thoughts
This chicken cutlet recipe proves that simple techniques and quality ingredients create extraordinary results. Once you master the breading and frying process, you’ll wonder why you ever bought frozen cutlets.
Give this recipe a try this week and watch it become a household favorite. Your family will thank you, and your dinner rotation will never be boring again.
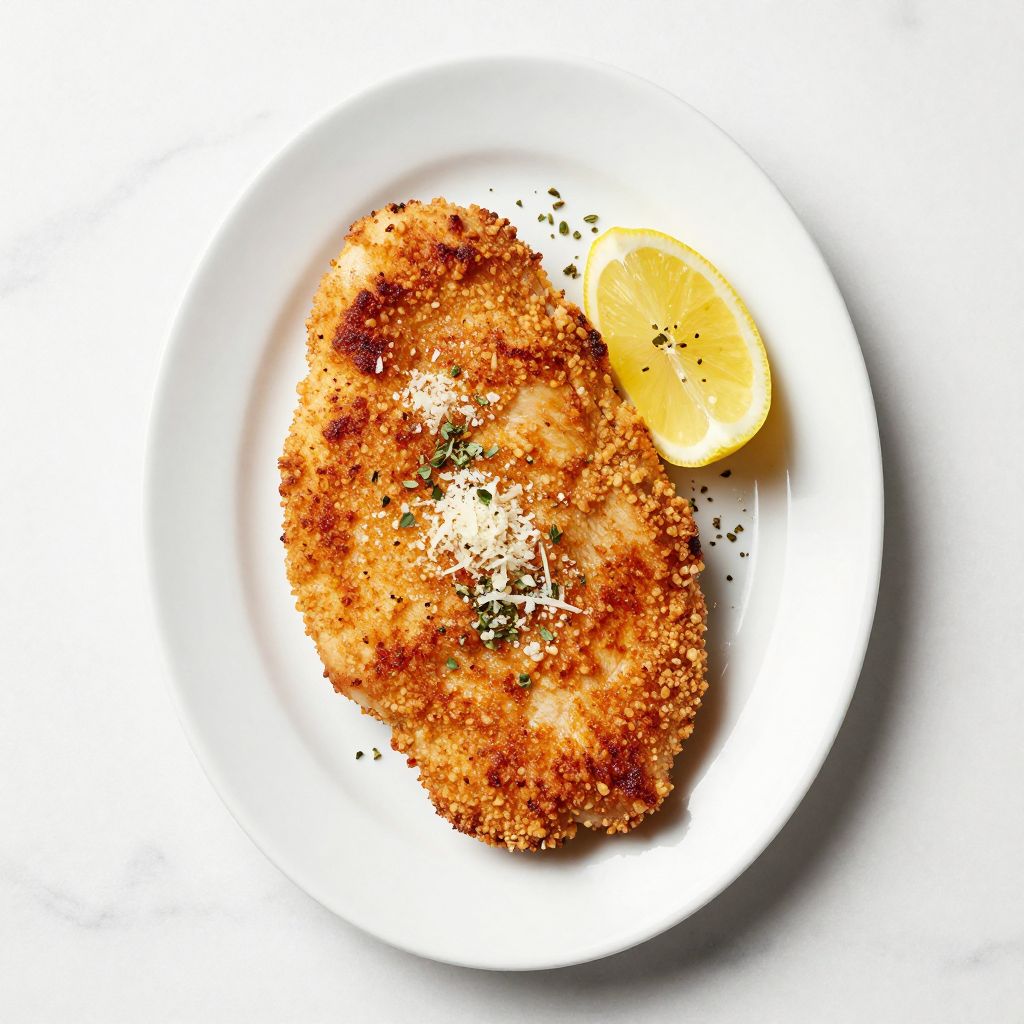
Classic Chicken Cutlets
Ingredients
Equipment
Method
- Place one chicken breast on a cutting board and hold your knife parallel to the board. Slice the breast horizontally through the middle to create two thinner pieces. Repeat with the remaining chicken breast.
- Place one chicken piece between two sheets of plastic wrap. Use a meat mallet or rolling pin to pound the chicken to about 1/4 inch thickness. Work from the center outward using firm but controlled strokes. Repeat with remaining pieces.
- Remove the plastic wrap and season both sides of each cutlet generously with salt and pepper. Let them rest at room temperature for 5 minutes while you set up the breading station.
- Arrange three shallow dishes in a row. Place flour in the first dish, beaten eggs in the second, and combine panko, garlic powder, paprika, oregano, and Parmesan in the third. Mix the seasonings into the panko thoroughly.
- Dredge each cutlet in flour, shaking off excess. Dip into the egg, letting excess drip off, then press firmly into the panko mixture on both sides.
- Pour oil into your skillet to about 1/4 inch depth. Heat over medium high until the oil reaches 350 to 375 degrees Fahrenheit. Test readiness by dropping a small pinch of panko into the oil; it should sizzle immediately and float.
- Carefully place 1 to 2 cutlets in the hot oil, leaving space between them. Fry for 3 to 4 minutes per side until deeply golden brown and the internal temperature reaches 165 degrees Fahrenheit.
- Transfer cooked cutlets to a wire rack set over a baking sheet. Let them rest for 2 minutes before serving. Keep finished cutlets warm in a 200 degree oven while frying the remaining batches.