Beer Can Chicken is a backyard grilling masterpiece that delivers juicy, flavorful meat with crispy skin every single time. This iconic recipe uses a can of beer inside the chicken cavity to steam the meat from the inside while the outside gets a gorgeous golden crust on the grill.
The result is impossibly tender chicken infused with subtle beer and spice notes that’ll have your guests asking for your secret. Whether you’re feeding a crowd or just want an impressive weeknight dinner, this method transforms ordinary poultry into something truly memorable.
Why You’ll Love This Recipe
Beer Can Chicken offers the kind of impressive results that make you look like a backyard grilling genius. The technique is foolproof once you understand the basics, and the flavor payoff is absolutely worth the minimal effort.
- Juicy, tender chicken with a crispy, burnished skin every time
- Infused with subtle beer and spice flavors that regular roasted chicken can’t match
- Hands-off cooking means you can relax while dinner cooks itself
- Looks spectacular when you present it at the table
- Works for weeknight dinners and impressive dinner parties alike
My Experience Making This Recipe
I’ll admit I was skeptical the first time I tried this method. Balancing a whole bird on a beer can sounded gimmicky, but the moment I pulled that first chicken off the grill, I became a believer for life.
The meat was impossibly moist with this incredible smoky crust that shattered when you bit into it. My family devoured it in minutes, and now Beer Can Chicken is my go-to move whenever I want to impress without spending hours in the kitchen.
The best part? You spend maybe 15 minutes prepping, then you’re free to chat with guests or prep sides while the grill does all the heavy lifting. That’s the kind of cooking I can get behind.
Recipe Overview
- Recipe Name: Beer Can Chicken
- Servings: 4
- Prep Time: 15 minutes
- Cook Time: 1 hour 15 minutes
- Total Time: 1 hour 30 minutes
- Course: Main Course
- Cuisine: American
- Calories per Serving: 520
Equipment You Will Need
- Charcoal or gas grill
- Beer can chicken holder or heavy-duty aluminum foil
- Instant-read meat thermometer
- Tongs (long-handled)
- Cutting board
- Sharp knife
- Small bowl for spice rub
- Paper towels
Ingredients for Beer Can Chicken
- 1 whole chicken (4 to 5 pounds), patted dry
- 1 can (12 ounces) beer, any style
- 3 tablespoons paprika
- 2 tablespoons brown sugar
- 2 tablespoons garlic powder
- 1 tablespoon onion powder
- 1 tablespoon cayenne pepper
- 2 teaspoons black pepper
- 2 teaspoons salt
- 1 teaspoon dried thyme
- 1/2 teaspoon dried oregano
- 2 tablespoons vegetable oil
- 1 lemon, halved
- 4 garlic cloves, smashed
Ingredient Notes and Substitutions
- Beer: Any style works, but lighter beers stay subtle while darker ales add richer notes. Swap for chicken broth or apple juice if you prefer alcohol-free cooking.
- Paprika: This is your color and mild flavor foundation. Use smoked paprika for deeper, woodsy notes if you want extra depth.
- Brown sugar: Adds sweetness that caramelizes beautifully on the skin. Replace with white sugar, honey, or skip it entirely if you prefer less sweetness.
- Cayenne pepper: Brings the heat and creates that spicy kick. Cut it in half for milder chicken or omit completely for zero heat.
- Dried herbs: Thyme and oregano provide classic poultry flavor. Fresh herbs work too, just use triple the amount and add them to the cavity.
How to Make Beer Can Chicken
Step 1: Prepare Your Grill
Set up your grill for indirect heat by turning on only one side for gas grills or pushing coals to one side for charcoal. You want a grill temperature around 350 to 375 degrees Fahrenheit for steady, even cooking without burning the chicken.
Step 2: Mix Your Spice Rub
Combine paprika, brown sugar, garlic powder, onion powder, cayenne, black pepper, salt, thyme, and oregano in a small bowl. This rub creates the flavorful crust that makes Beer Can Chicken so addictive, so don’t skip this step.
Step 3: Prepare the Beer Can
Open your beer can and take a few sips (the chef’s privilege) to create a little headroom. This prevents the can from boiling over during cooking and lets the beer steam the chicken more evenly.
Step 4: Season the Chicken Inside and Out
Pat your chicken completely dry with paper towels because dry skin gets crispy while wet skin steams. Rub the outside of the bird with vegetable oil, then coat generously with your spice rub, working the seasonings under the skin on the breasts and thighs.
Step 5: Stuff the Cavity
Place the lemon halves and smashed garlic inside the chicken cavity, then stand the bird upright on the beer can. Use a beer can holder for stability, or create a foil tripod by crumpling heavy-duty foil into legs if your can gets wobbly.
Step 6: Position on the Grill
Carefully place the beer-can chicken on the cool side of your grill, making sure it’s stable and upright. The indirect heat prevents flare-ups and allows the chicken to cook gently and evenly without the exterior burning.
Step 7: Monitor and Cook
Close the lid and let the chicken cook undisturbed for about 1 hour and 15 minutes for a 4 to 5 pound bird. Maintain your grill temperature around 350 to 375 degrees throughout cooking by adjusting vents or burner controls as needed.
Step 8: Check for Doneness
Insert an instant-read thermometer into the thickest part of the thigh without touching bone. The chicken is done when it reads 165 degrees Fahrenheit, which guarantees food safety and juicy, cooked-through meat.
Step 9: Rest Before Serving
Let the chicken rest for 10 minutes after removing from the grill so the juices redistribute throughout the meat. This resting period is what separates juicy, tender chicken from dry, stringy results.
Pro Tip: The key to perfect Beer Can Chicken is keeping your grill temperature steady around 350 to 375 degrees. Use an oven thermometer placed on the grill grate to monitor accurately, since built-in gauges are often unreliable.
Tips for the Best Beer Can Chicken
- Choose a chicken that’s 4 to 5 pounds for even cooking. Smaller chickens cook too fast and dry out, while larger birds take longer and risk burning on the outside.
- Pat the chicken completely dry before seasoning for maximum crispiness. Moisture is the enemy of crispy skin, so don’t skip this step no matter how tempting.
- Use an instant-read thermometer for foolproof doneness. Guessing by appearance or cooking time leads to either dry or undercooked chicken.
- Let your chicken rest at room temperature for 30 minutes before grilling. This promotes more even cooking and juicier results throughout the bird.
- Don’t peek constantly. Open the lid too often and you’ll lose heat and extend cooking time significantly.
- Have your grill already at temperature before you place the chicken on it. Starting with a cold grill leads to uneven cooking and longer overall time.
Common Mistakes to Avoid
- Using a wet chicken: Moisture steams the skin instead of crisping it. Always pat your bird completely dry with paper towels before seasoning.
- Cooking over direct heat: This causes the bottom and sides to burn while the inside stays undercooked. Set up your grill for indirect heat with the chicken on the cool side.
- Not seasoning the cavity: The inside of the chicken is just as bland as the outside without seasoning. Don’t neglect the interior surfaces when applying your spice rub.
- Skipping the rest period: Cutting into the chicken immediately releases all those precious juices onto the plate instead of staying in the meat.
- Using an unstable beer can setup: A wobbly chicken tips over mid-cook and spills everywhere. Invest in a proper holder or make a sturdy foil tripod.
Serving Suggestions
Beer Can Chicken is a complete meal on its own, but smart sides take it from great to unforgettable. Pair it with something to soak up those incredible pan juices and round out your plate.
- Grilled corn on the cob with herb butter melting into every kernel
- Creamy coleslaw that provides cool contrast to the smoky chicken
- Garlic mashed potatoes or crispy roasted potatoes to catch the drippings
- Grilled vegetables like zucchini, bell peppers, and asparagus cooked alongside the chicken
- A fresh green salad with tangy vinaigrette to cut through the richness
Variations to Try
- Spicy Chipotle Version: Replace cayenne with 2 tablespoons of chipotle powder and add 1 tablespoon of smoked paprika for deep, smoky heat that’s not just hot but flavorful.
- Asian-Inspired: Swap your spice rub for garlic powder, ginger powder, soy sauce mixed into the oil, and fill the cavity with green onions and ginger slices for a completely different flavor profile.
- Mediterranean Style: Use lemon pepper seasoning, oregano, and basil in your rub, then stuff the cavity with fresh herbs, olives, and feta for bright, herbaceous notes.
- Citrus-Glazed: After 45 minutes of cooking, brush the chicken with a glaze made from honey, Dijon mustard, and orange juice for a glossy, slightly sweet finish.
- Herb Butter Injection: Create a marinade of melted butter, fresh herbs, and garlic, then inject it throughout the chicken before grilling for extra moisture and flavor in every bite.
Dietary Adaptations
- Gluten-Free: All ingredients are naturally gluten-free, so Beer Can Chicken works perfectly as-is. Just verify your spice blend containers aren’t contaminated.
- Dairy-Free: This recipe contains no dairy, so it’s automatically dairy-free without any modifications needed.
- Lower Sodium: Reduce salt in the rub to 1 teaspoon and use low-sodium beer if you’re watching sodium intake. You’ll lose some seasoning depth but still get excellent flavor.
- Paleo/Whole30: Skip the brown sugar in your rub and use coconut aminos instead of regular seasoning blends to stay compliant. The chicken itself is fully compliant with both diets.
Storage and Reheating
Refrigerator
Store leftover chicken in an airtight container for up to 3 days. The meat stays moist and flavorful when properly sealed away from air.
- Keep the skin on for maximum flavor and moisture retention
- Store any pan drippings separately to use as sauce when reheating
Freezer
Wrap cooled chicken tightly in plastic wrap then foil, and freeze for up to 2 months. The meat freezes beautifully and thaws without any quality loss.
- Remove skin before freezing if you prefer easier thawing
- Label with the date so you remember when you froze it
Reheating
Reheat chicken gently at 350 degrees Fahrenheit for 15 to 20 minutes in a covered pan to prevent drying. Low and slow is the key to restoring juiciness in leftover chicken.
- Add a splash of broth or pan drippings while reheating for extra moisture
- Shred the meat and use it in tacos, salads, or grain bowls for variety
Nutrition Information
| Nutrient | Amount |
|---|---|
| Calories | 520 |
| Total Fat | 28g |
| Saturated Fat | 8g |
| Carbohydrates | 4g |
| Fiber | 0g |
| Sugar | 2g |
| Protein | 62g |
| Sodium | 620mg |
| Cholesterol | 185mg |
These values are approximate and based on USDA data for a standard 4 to 5 pound chicken with the skin on. Actual nutrition varies based on your specific ingredients and cooking method.
Frequently Asked Questions
Can I use a different type of beer?
Absolutely, any beer works perfectly from light lagers to dark stouts. Lighter beers stay subtle while darker ales add richer, maltier flavors, so choose based on your taste preference.
What if I don’t want to use beer?
Swap the beer for chicken broth, apple juice, or even cola for similar steaming results. The beer isn’t essential to the cooking method, just one flavorful option among many.
How do I know when the chicken is done?
Use an instant-read thermometer inserted into the thickest part of the thigh without touching bone. It should read 165 degrees Fahrenheit for safe, juicy, cooked-through chicken.
Can I make Beer Can Chicken in the oven?
Yes, it works in a 375-degree oven for about 1 hour and 15 minutes, though you’ll miss the smoky grill flavor. The chicken will still be juicy and tender using the same basic method.
Is the chicken from the can safe to eat?
The beer only steams the chicken without making contact with the meat since it stays inside the can. There’s no risk from the can itself, and any coating inside food-grade cans is completely safe for cooking.
How far in advance can I prep the chicken?
You can season the chicken and let it refrigerate for up to 8 hours before grilling. This actually improves flavor as the seasonings penetrate the meat more deeply.
What if my chicken tips over on the grill?
The chicken will still cook fine if it tips, but you’ll lose the beer which prevents some steaming from inside. Using a proper beer can holder or a sturdy foil tripod prevents this disaster from happening.
Final Thoughts
Beer Can Chicken is the kind of recipe that looks impressive but actually demands almost nothing from you. Spend 15 minutes prepping, put it on the grill, and walk away to enjoy your guests while a spectacular dinner cooks itself.
Give this recipe a try at your next cookout or weeknight dinner and watch it become your go-to move for juicy, flavorful chicken. Once you taste the difference this method makes, you’ll never go back to ordinary roasted chicken again.
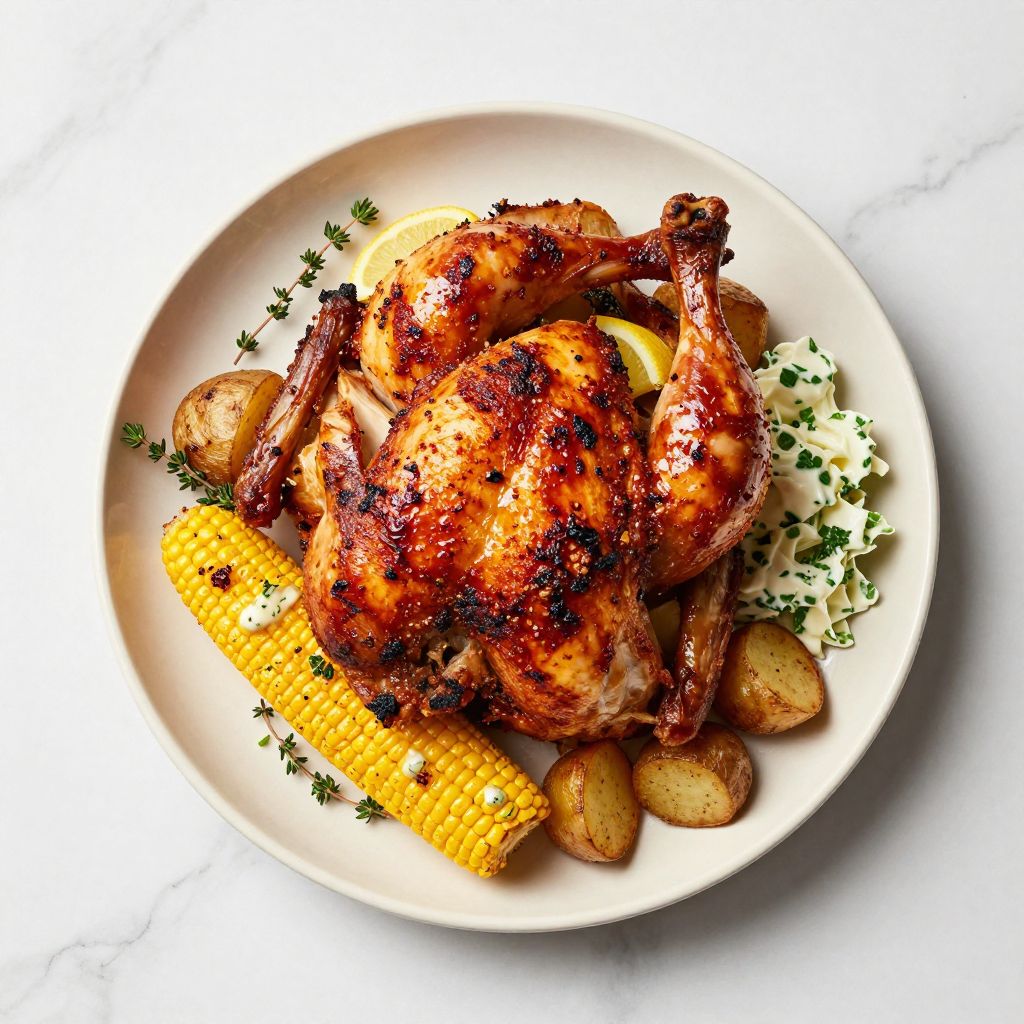
Beer Can Chicken
Ingredients
Equipment
Method
- Preheat and set up the grill for indirect heat, stabilizing the temperature between 350°F and 375°F (175°C–190°C).
- In a small bowl, mix paprika, brown sugar, garlic powder, onion powder, cayenne pepper, black pepper, salt, dried thyme, and dried oregano to create the spice rub.
- Open the beer can and pour out (or drink) about 1/4 cup to create headspace for steaming.
- Pat the chicken completely dry with paper towels. Rub the skin with vegetable oil, then coat the bird inside and out with the prepared spice rub, working some rub under the skin where possible.
- Stuff the chicken cavity with the lemon halves and smashed garlic cloves.
- Slide the chicken cavity over the beer can and stand the bird upright on a beer can holder or a sturdy foil tripod.
- Place the upright chicken on the cool side of the grill (indirect heat), close the lid, and cook for about 1 hour 15 minutes, maintaining 350°F–375°F (175°C–190°C).
- Check doneness by inserting an instant-read thermometer into the thickest part of the thigh without touching bone; the chicken is ready when it reaches 165°F (74°C).
- Carefully remove the chicken from the grill, tent loosely with foil, and let it rest for 10 minutes before carving and serving.