A chicken brine recipe transforms ordinary poultry into juicy, flavorful meat that stays moist long after cooking. The magic happens when salt, sugar, and aromatics penetrate the chicken’s muscle fibers, locking in moisture and seasoning from the inside out.
Whether you’re roasting a whole bird for Sunday dinner or preparing chicken breasts for a weeknight meal, brining takes just minutes of prep work and delivers restaurant-quality results that taste like you spent hours in the kitchen. Let me walk you through the process so your next chicken dish becomes unforgettable.
Why You’ll Love This Recipe
Brining removes the guesswork from chicken cookery and guarantees tender, succulent meat every single time. Your guests will ask what your secret is, and you’ll smile knowing it’s this simple technique.
- Chicken stays moist even if slightly overcooked, giving you a wider window for perfect doneness.
- Salt in the brine seasons the meat thoroughly, not just the surface, for balanced flavor throughout.
- Aromatics like herbs, garlic, and spices infuse deep, complex tastes without extra effort.
- Works for whole chickens, breasts, thighs, drumsticks, and wings with minimal time investment.
- Brined chicken browns beautifully and develops incredible crispy skin when roasted or grilled.
My Experience Making This Recipe
The first time I brined a chicken, I was skeptical that salt water could make that much difference. I pulled the bird from the brine, patted it dry, and roasted it alongside an unbrined control bird to compare.
The difference was shocking: the brined chicken was impossibly tender with juicy thighs and breasts that stayed moist for hours, while the regular bird dried out quickly. My family devoured it, and someone actually asked if I’d splurged on a premium bird from the butcher.
Now I brine every chicken I cook, and it’s become my secret weapon for stress-free entertaining. The process takes maybe five minutes of active work, and the payoff is absolutely worth it.
Recipe Overview
- Recipe Name: Basic Chicken Brine
- Servings: Enough for one 4-6 pound whole chicken or 4-6 chicken pieces
- Prep Time: 10 minutes
- Brine Time: 8-24 hours
- Total Time: 8 hours 10 minutes to 24 hours 10 minutes (mostly hands-off)
- Course: Main Dish
- Cuisine: American
- Calories per Serving: 0 (brine is discarded before cooking)
Equipment You Will Need
- Large stainless steel pot or food-grade plastic container
- Measuring cups and spoons
- Wooden spoon or whisk for stirring
- Meat thermometer (optional but helpful)
- Paper towels or clean kitchen towels
- Shallow baking dish or roasting pan
- Refrigerator with adequate space
Ingredients for Basic Chicken Brine
For the Brine
- 1/2 cup kosher salt
- 1/4 cup granulated sugar
- 2 quarts cold water
- 1 tablespoon black peppercorns
- 4 fresh thyme sprigs or 1 teaspoon dried thyme
- 4 fresh rosemary sprigs or 1 teaspoon dried rosemary
- 3 bay leaves
- 4 cloves garlic, smashed
- 1/2 teaspoon red pepper flakes (optional, for heat)
- Zest of 1 lemon
For the Chicken
- 1 whole chicken (4-6 pounds) or 4-6 chicken pieces
Ingredient Notes and Substitutions
- Kosher salt: Kosher salt dissolves evenly and has larger crystals that make measuring easier and more accurate than table salt. If you only have table salt, use 1/4 cup instead of 1/2 cup, as table salt is denser and saltier by volume.
- Sugar: Sugar balances the salt’s intensity and helps skin brown beautifully during cooking. You can swap it for honey or maple syrup in equal amounts for added depth of flavor.
- Fresh herbs: Fresh thyme and rosemary deliver bright, aromatic flavor that defines a classic brine. Dried herbs work fine in a pinch and should be used at half the amount or about 1/2 teaspoon each.
- Garlic: Smashed garlic releases allicin and infuses the brine with savory notes. Minced garlic works equally well, though smashing it bruises the cloves and releases more flavor.
- Peppercorns: Whole peppercorns provide subtle spice without overwhelming the brine and won’t make the liquid cloudy. Cracked pepper works too but may settle and create uneven seasoning.
How to Make Basic Chicken Brine
Step 1: Combine Water and Salt
Pour 2 quarts of cold water into a large pot or container and add 1/2 cup kosher salt. Stir vigorously for about 2 minutes until the salt fully dissolves, which helps it penetrate the chicken’s cells efficiently.
Step 2: Add the Sugar
Stir in 1/4 cup granulated sugar until it dissolves completely into the brine. The sugar dissolves faster than salt, so a minute or two of stirring does the trick.
Step 3: Build Flavor with Aromatics
Add 1 tablespoon black peppercorns, 4 fresh thyme sprigs, 4 fresh rosemary sprigs, 3 bay leaves, 4 smashed garlic cloves, 1/2 teaspoon red pepper flakes (if using), and zest from 1 lemon to the brine. These ingredients infuse the liquid with complex flavors that penetrate deep into the meat.
Step 4: Chill the Brine Completely
Let the brine cool to room temperature, then refrigerate it for at least 30 minutes until it’s completely cold. A cold brine prevents the chicken’s outer layers from starting to cook while the inside stays raw.
Step 5: Submerge the Chicken
Place your whole chicken or chicken pieces into the cold brine, making sure the meat is fully submerged under the liquid. If pieces float above the surface, weight them down with a small plate or use a plastic bag filled with brine to hold them down.
Step 6: Refrigerate for 8 to 24 Hours
Cover the container and place it in the refrigerator where it will stay cold and undisturbed. Eight hours is the bare minimum for noticeable improvement, but 12 to 24 hours delivers the most dramatic transformation in moisture retention and flavor.
Step 7: Remove Chicken from Brine
Take the chicken out of the brine and discard the liquid entirely, as it’s done its job and won’t be reused. Rinse the chicken under cold running water for about 30 seconds to remove excess salt and aromatics from the surface.
Step 8: Pat Dry and Prepare for Cooking
Use paper towels or a clean kitchen towel to thoroughly pat the chicken completely dry, paying special attention to the skin. Dry skin crisps beautifully when roasted, grilled, or pan-seared, so don’t skip this step.
Step 9: Cook as Desired
Proceed with your chosen cooking method, whether roasting, grilling, pan-searing, or poaching. The chicken will cook slightly faster than an unbrined bird, so watch your internal temperature closely; poultry is safe at 165 degrees Fahrenheit in the thickest part of the thigh.
Pro Tip: Always pat the brined chicken dry before cooking; moisture on the skin prevents browning and crispy texture, so take those extra 30 seconds to do it right.
Tips for the Best Chicken Brine
- Make your brine the night before you plan to brine the chicken so it’s fully chilled and ready to go in the morning.
- Use a clean, food-safe container that fits your refrigerator; a large zip-top bag works great for chicken pieces and takes up minimal space.
- Don’t skip the rinsing step after brining; excess salt left on the surface can make the final dish overly salty.
- Let brined chicken sit at room temperature for 30 to 45 minutes before cooking so it cooks evenly from inside to outside.
- Double or triple the brine recipe if you’re brining multiple birds for a gathering, keeping the salt-to-water ratio consistent.
- Taste a tiny sip of your brine before adding the chicken; it should taste pleasantly salty, almost like a soup broth.
Common Mistakes to Avoid
- Using hot or warm brine instead of cold: hot brine starts cooking the outer meat while the inside stays raw, creating an uneven, mushy texture.
- Oversalting the brine in hopes of extra flavor: too much salt makes the chicken unpleasantly salty and can actually draw out moisture instead of retaining it.
- Brining for longer than 24 hours: the meat becomes mushy and overly salt-cured as the brine continues to break down muscle fibers past the optimal point.
- Failing to pat the chicken dry before cooking: wet skin steams instead of crisps, ruining the texture and browning you worked hard to achieve.
- Reusing old brine: bacteria from raw chicken contaminates the liquid, making it unsafe for any future use regardless of storage time.
Serving Suggestions
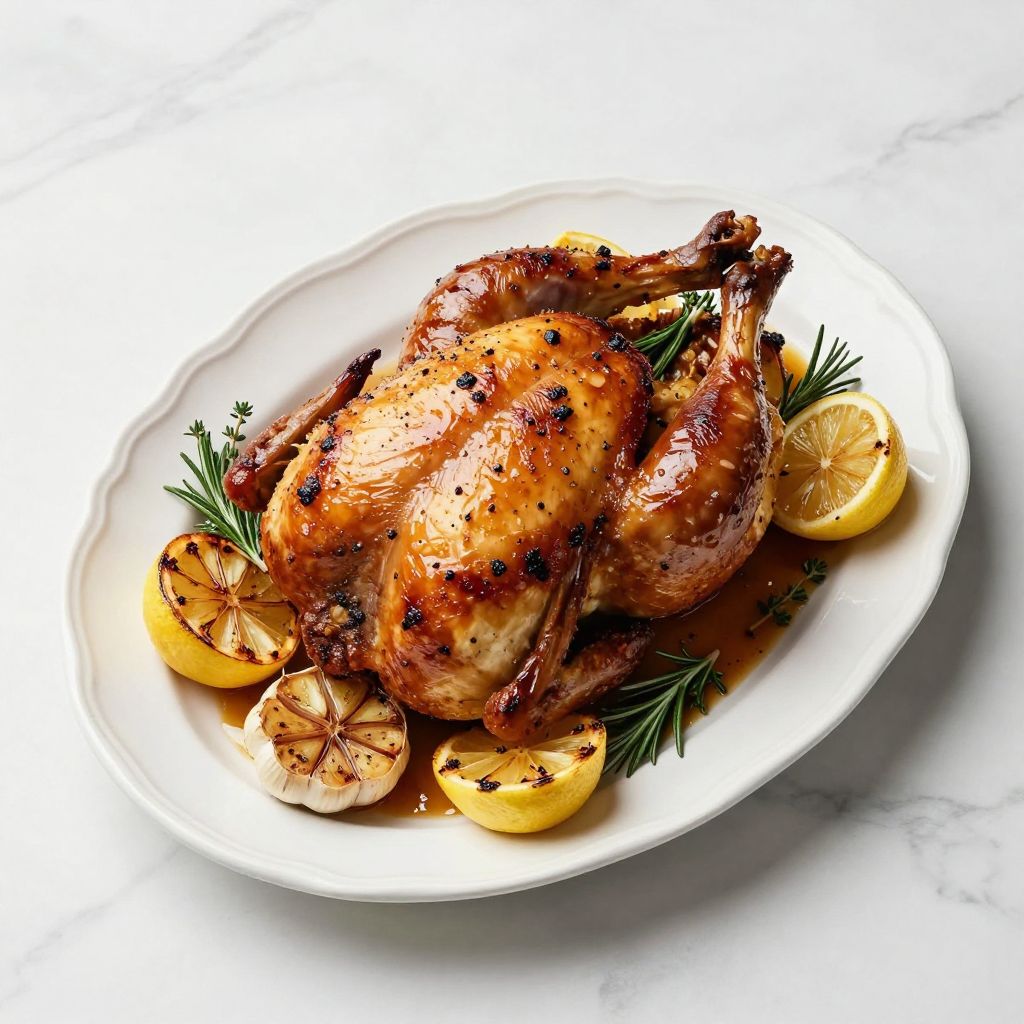
A perfectly brined and roasted chicken pairs beautifully with sides that either complement its savory depth or provide bright, fresh contrast. Serve your chicken immediately while the skin crackles and the meat stays juicy and warm.
- Roasted lemon and herb vegetables like carrots, potatoes, and Brussels sprouts cooked alongside the chicken.
- Creamy mashed potatoes or cauliflower mash that soaks up pan juices and herb-infused chicken fat.
- Fresh green salad with lemon vinaigrette to cut through the richness and refresh your palate.
- Crusty bread or rolls for sopping up the savory, herb-infused pan sauce.
- Roasted garlic cloves and thyme sprigs placed inside the cavity for aroma and flavor during cooking.
Variations to Try
- Honey Brine: Replace the sugar with 1/3 cup raw honey for deeper caramel notes and slightly darker, crispier skin when roasted.
- Asian-Inspired Brine: Add 2 tablespoons soy sauce, 1 tablespoon rice vinegar, 2 teaspoons sesame oil, and 2 sliced scallions to the basic brine for umami depth and subtle Asian flavors.
- Citrus Brine: Add zest and juice from 2 limes or oranges and 2 additional bay leaves for bright, refreshing acidity that cuts through rich chicken fat.
- Smoky Brine: Stir in 1 teaspoon smoked paprika, 1 teaspoon liquid smoke, and 1/2 teaspoon cumin to evoke barbecue flavors even when cooking indoors.
- Spicy Kick Brine: Increase red pepper flakes to 1 teaspoon, add 1/2 teaspoon cayenne pepper, and include 4-5 thin slices of fresh jalapeño for heat lovers.
Dietary Adaptations
- Gluten-Free: This basic brine is naturally gluten-free, but verify all spice blends and any additions contain no hidden gluten or additives.
- Dairy-Free: This brine contains no dairy, making it suitable for all dairy-free diets; just ensure your cooking method and any sauces added afterward are also dairy-free.
- Keto and Low-Carb: This brine works perfectly for keto since it contains minimal carbohydrates from the small amount of sugar, which mostly stays in the discarded brine liquid.
- Vegan and Vegetarian: This brine applies only to poultry, but the same salt-to-water ratio and aromatics work beautifully for brining tofu, tempeh, and hearty vegetables like portobello mushrooms.
Storage and Reheating
Refrigerator
Store cooked brined chicken in an airtight container on a shallow plate to catch any drips. It keeps safely for 3 to 4 days in the coldest part of your refrigerator.
- Keep chicken pieces separated from sauce or pan juices to prevent sogginess.
- For best quality, consume within 2 days when texture and moisture are at their peak.
Freezer
Cool the cooked chicken completely, then wrap individual pieces tightly in plastic wrap and place them in a freezer bag. Brined chicken freezes beautifully and keeps for up to 3 months with minimal quality loss.
- Thaw frozen chicken overnight in the refrigerator before reheating.
- Label your packages with the date so you remember when you froze them.
Reheating
Gently reheat brined chicken in a 325-degree oven, covered loosely with foil, for 15 to 20 minutes until warmed through. Low, slow reheating preserves moisture that high heat would drive away.
- Pan-sear chicken pieces skin-side down in a skillet over medium heat for 5 minutes to re-crisp the skin.
- Shred leftover chicken and use it in salads, sandwiches, soups, and grain bowls.
Nutrition Information
| Nutrient | Amount |
|---|---|
| Calories | 0 (Brine Discarded) |
| Total Fat | N/A |
| Saturated Fat | N/A |
| Carbohydrates | N/A |
| Fiber | N/A |
| Sugar | N/A |
| Protein | N/A |
| Sodium | N/A |
| Cholesterol | N/A |
The brine itself is discarded before cooking, so it contributes no calories or nutrients to your finished meal. Nutritional content depends entirely on the chicken portion size and your chosen cooking method and added fats.
Frequently Asked Questions
Can I brine chicken for just a few hours instead of overnight?
Yes, even 4 to 6 hours of brining shows noticeable improvement over unbrined chicken. Eight hours is the sweet spot for balanced flavor and texture, but any time in the brine beats skipping it entirely.
What happens if I accidentally brine my chicken for 48 hours?
The meat becomes mushy and overly salty as the brine’s salt continues to break down muscle fibers beyond the optimal point. Stick to 24 hours maximum for the best texture and taste.
Do I need to add ice to the brine to keep it cold?
Only if your kitchen is very warm or your brine doesn’t fit easily in the refrigerator. A cold brine at the start works fine as long as your refrigerator stays cold and the brine stays fully submerged and covered.
Can I brine chicken pieces separately from a whole bird in the same brine?
Absolutely, and pieces brine faster than whole birds, so remove them after 6 to 8 hours while whole birds need 8 to 24 hours. Use the same brine for both as long as there’s enough liquid to cover everything.
Will brining make my chicken taste too salty?
No, when you follow the recipe and rinse the chicken after brining, the seasoning feels balanced and natural. The brine seasons the meat throughout rather than oversalting the surface, creating a savory depth that tastes like skilled seasoning.
Can I use table salt instead of kosher salt for brining?
You can, but use only 1/4 cup table salt instead of 1/2 cup, as table salt is much denser than kosher salt. Measuring by volume with table salt risks over-salting your brine.
Final Thoughts
Brining chicken is genuinely one of the easiest ways to guarantee juicy, flavorful poultry that impresses everyone at your table. Once you see the difference it makes in your cooking, you’ll wonder why you ever skipped this simple step.
Try this recipe at your next meal, and get ready for compliments and questions about your secret technique. Your family is going to love you for discovering this game changer.
Basic Chicken Brine
Ingredients
Equipment
Method
- Pour 2 quarts of cold water into a large pot or container and stir in 1/2 cup kosher salt until completely dissolved, about 2 minutes.
- Add 1/4 cup granulated sugar and stir for 1 minute until fully dissolved.
- Stir in the peppercorns, thyme, rosemary, bay leaves, smashed garlic, red pepper flakes, and lemon zest to build flavor.
- Cool the brine to room temperature, then refrigerate it for at least 30 minutes until thoroughly chilled.
- Submerge the chicken in the cold brine, ensuring it is completely covered; weight it down with a plate if necessary.
- Refrigerate and brine the chicken for 8–24 hours, depending on desired flavor intensity.
- Remove the chicken from the brine, discard the liquid, and rinse the bird under cold running water for 30 seconds to remove excess salt.
- Pat the chicken thoroughly dry with paper towels, focusing on the skin for optimal browning.
- Preheat the oven to 425°F (220°C). Place the chicken on a rack in a roasting pan and roast for about 1 hour 15 minutes, or until the thickest part of the thigh reaches 165°F (74°C).
- Rest the chicken for 10 minutes before carving to allow juices to redistribute, then serve hot.