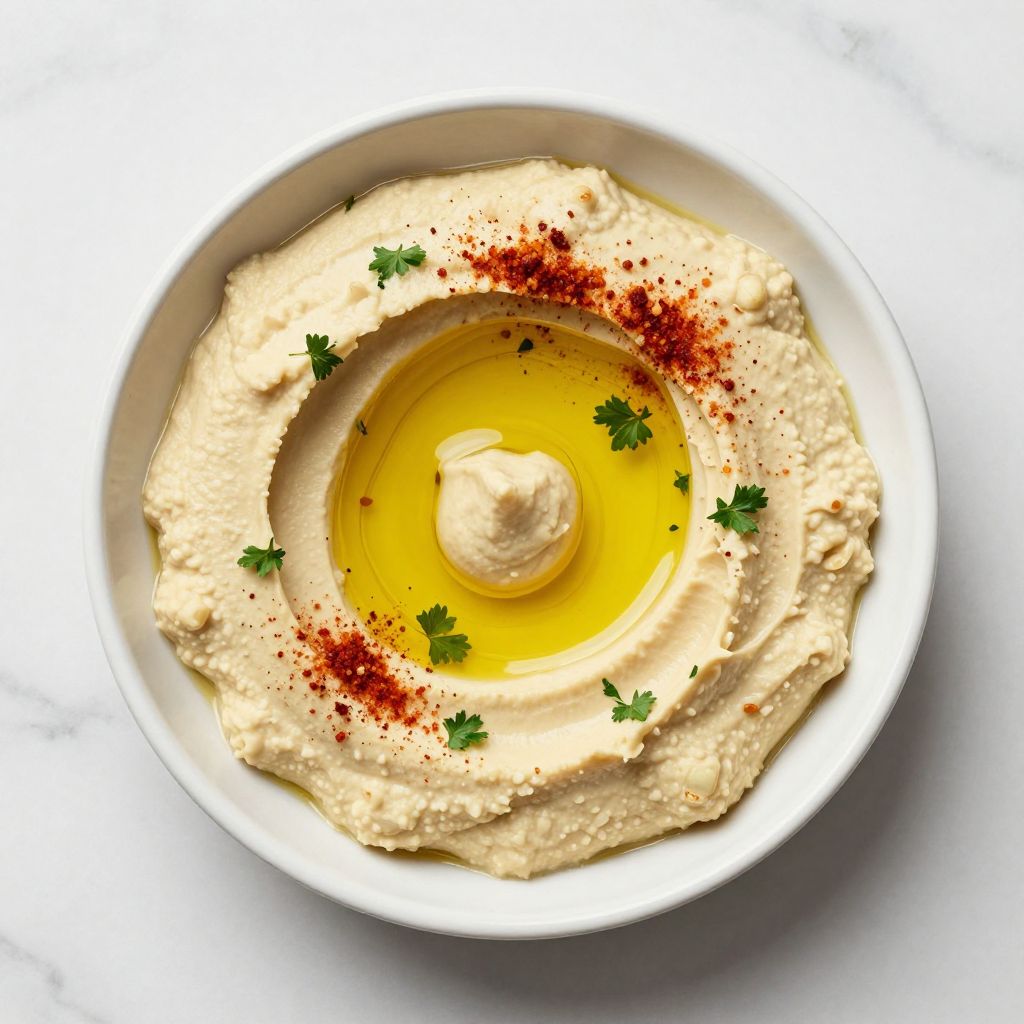
Hummus without tahini is the creamy, garlicky dip that proves you don’t need traditional sesame paste to make something delicious. If you’ve avoided hummus because tahini isn’t in your pantry or budget, this recipe opens up a whole new world of Mediterranean flavor.
The secret is using a combination of Greek yogurt and olive oil to create that signature silky texture while letting the chickpeas and garlic shine through. Let’s explore how to make this pantry-friendly version that tastes restaurant-quality.
Why You’ll Love This Recipe
This tahini-free hummus delivers everything you want from a classic dip without any fussy ingredients.
- Creamy texture that rivals traditional hummus, thanks to Greek yogurt and quality olive oil.
- Simple ingredient list that you likely have on hand right now.
- Budget-friendly since you skip the expensive tahini jar.
- Comes together in under 10 minutes with a food processor.
- Works perfectly as a snack, appetizer, or sandwich spread.
My Experience Making This Recipe
I first made this version when a friend with a tahini allergy came to dinner, and I was pleasantly surprised by how delicious it turned out. The Greek yogurt actually adds a subtle tang that makes the garlic pop without overwhelming your palate.
My family now prefers this to our old tahini-based version, which felt like a genuine shock to my system. The best part is watching guests ask for the recipe, only to realize they already have every ingredient at home.
The texture is smooth enough that you can scoop it with a pita chip or veggie stick without it crumbling or feeling grainy. I’ve made batches for potlucks, and it disappears faster than any other dip I bring.
Recipe Overview
- Recipe Name: Hummus Without Tahini
- Servings: 8 to 10
- Prep Time: 5 minutes
- Cook Time: 0 minutes
- Total Time: 5 minutes
- Course: Appetizer or Snack
- Cuisine: Mediterranean
- Calories per Serving: 95
Equipment You Will Need
- Food processor
- Can opener
- Colander or fine-mesh strainer
- Measuring cups and spoons
- Serving bowl
- Wooden spoon or rubber spatula
Ingredients for Hummus Without Tahini
- 2 cans (15 ounces each) chickpeas, drained and rinsed well
- 1/2 cup plain Greek yogurt, full-fat or nonfat
- 1/4 cup extra-virgin olive oil, plus more for garnish
- 3 garlic cloves, minced or pressed
- 3 tablespoons fresh lemon juice, from about one lemon
- 1 teaspoon ground cumin
- 1/2 teaspoon sea salt, or to taste
- 1/4 teaspoon black pepper
- 2 to 3 tablespoons water, for consistency
- Optional garnish: smoked paprika, fresh parsley, or red pepper flakes
Ingredient Notes and Substitutions
- Chickpeas: These legumes provide protein, fiber, and the base creaminess of hummus. If you prefer a richer flavor, use roasted chickpeas from a specialty store instead of canned.
- Greek yogurt: The tanginess and protein content mimic tahini’s role as a binder and add subtle flavor depth. Sour cream or silken tofu works if you avoid dairy, though the taste profile shifts slightly.
- Extra-virgin olive oil: This adds richness and helps create the smooth texture while contributing authentic Mediterranean flavor. Standard olive oil is less aromatic but still works perfectly fine.
- Garlic: Fresh garlic gives the sharpest, most authentic bite to hummus. Roasted garlic creates a sweeter, milder version if you prefer less intensity.
- Lemon juice: The acid balances richness and brightens all the flavors so they pop. Lime juice creates a different but equally delicious profile.
- Cumin: This warm spice is essential to hummus flavor and can’t truly be skipped, though you could reduce it to half a teaspoon if you prefer subtlety.
How to Make Hummus Without Tahini
Step 1: Drain and Rinse the Chickpeas
Open both cans of chickpeas and pour them into a colander, rinsing thoroughly under cool running water. This removes excess sodium and the starchy liquid that would make your hummus gummy instead of creamy.
Step 2: Add the Base Ingredients to the Food Processor
Transfer the drained chickpeas to your food processor along with the Greek yogurt, olive oil, and minced garlic. These ingredients form the creamy foundation that will come together in just a few pulses.
Step 3: Process Until Chunky
Pulse the mixture 10 to 15 times, stopping to scrape down the sides with a spatula as needed. You want a rough, chunky consistency at this stage, not a smooth puree.
Step 4: Add the Lemon Juice and Seasonings
Sprinkle in the lemon juice, cumin, salt, and pepper, then pulse another 8 to 10 times. The acid from the lemon brightens the flavors and helps balance the richness of the yogurt and oil.
Step 5: Stream in Water for Creaminess
With the processor running on a low setting, slowly drizzle in 2 to 3 tablespoons of water one tablespoon at a time. The water helps emulsify everything into a silky, spreadable consistency without making it watery.
Step 6: Taste and Adjust Seasonings
Stop the processor and taste your hummus, then decide if it needs more salt, lemon juice, or garlic. Add any adjustments one tiny pinch or squeeze at a time, pulsing briefly after each addition.
Step 7: Achieve the Desired Texture
Continue pulsing until your hummus reaches your preferred smoothness, anywhere from slightly chunky to completely velvety. Some people like flecks of chickpea, while others want it perfectly uniform.
Step 8: Transfer and Garnish
Scoop the hummus into your serving bowl, then create a shallow well in the center with the back of a spoon. Drizzle with extra olive oil and sprinkle with paprika, fresh parsley, or red pepper flakes if you like.
Pro Tip: Let your hummus sit at room temperature for 15 minutes before serving so the flavors fully meld and you taste the cumin and garlic at their best.
Tips for the Best Hummus Without Tahini
- Use full-fat Greek yogurt if you can find it, as it creates a richer, more indulgent texture than nonfat versions.
- Don’t skip rinsing the canned chickpeas, or your hummus will taste tinny and have an unpleasant starchy mouthfeel.
- Add water gradually and in small amounts, since it’s easier to thin out hummus than to thicken it back up.
- Mince your garlic very finely before adding it so it distributes evenly and doesn’t create harsh, pungent bites.
- Taste as you go and adjust seasonings before serving, because lemon juice and salt can meld with the other flavors as time passes.
- If your hummus separates after sitting in the fridge, stir it thoroughly or pulse it briefly in the food processor to recombine the oils and yogurt.
Common Mistakes to Avoid
- Skipping the yogurt rinse: If you use canned yogurt without draining it first, the excess liquid will make your hummus too thin and break the emulsion.
- Over-processing: Blending hummus too long can actually make it gluey and dense instead of light and airy, so stop pulsing once it looks creamy.
- Using cold ingredients straight from the fridge: Cold garlic and yogurt don’t blend as smoothly, so let them sit at room temperature for 20 minutes before starting.
- Forgetting the cumin: This single spice is what makes hummus taste like hummus, so skipping it leaves you with a bland chickpea dip instead.
- Adding too much water at once: Pouring water in all at once dilutes your hummus too quickly and makes it nearly impossible to fix without more chickpeas.
Serving Suggestions
This creamy dip shines with almost anything you pair it with, from fresh vegetables to warm bread. Serve it at room temperature for the best flavor and texture.
- Pita chips, flatbread, or warm pita bread for classic dipping.
- Sliced bell peppers, carrots, cucumbers, or radishes for a crisp, colorful veggie platter.
- Spread on a turkey or roast beef sandwich in place of mayo for added protein and creaminess.
- Dolloped on top of salads, grain bowls, or roasted vegetables as a creamy finishing touch.
- Served alongside olives, feta cheese, and fresh herbs as a casual Mediterranean charcuterie board.
Variations to Try
- Roasted Red Pepper Hummus: Blend in one jarred roasted red pepper and reduce the cumin to half a teaspoon for a slightly sweet, colorful version that pairs beautifully with crackers.
- Spicy Harissa Hummus: Stir in one to two tablespoons of harissa paste after blending to add smoky heat and a North African flavor profile that appeals to those who like bold spice.
- Herb-Forward Hummus: Add a handful of fresh cilantro, parsley, or dill before the final pulsing to create a brighter, grassier dip that tastes like spring.
- Roasted Garlic Version: Swap the raw garlic for four to five cloves of roasted garlic to mellow out the intensity and create a sweeter, more caramelized flavor.
- Sundried Tomato Hummus: Pulse in six to eight sundried tomatoes packed in oil to add tangy sweetness and a rustic, chunky texture that works wonderfully as a spread.
Dietary Adaptations
- Gluten-Free: This recipe is naturally gluten-free, so you only need to serve it with gluten-free crackers or bread.
- Dairy-Free: Replace the Greek yogurt with silken tofu blended smooth or dairy-free yogurt, though the flavor will shift from tangy to more neutral.
- Vegan: Swap the Greek yogurt for vegan yogurt or blended silken tofu, and use the same amounts for virtually the same result.
- Low-Carb or Keto: This recipe is naturally low-carb at about 9 grams of carbs per serving, making it keto-friendly if you count it toward your macros.
Storage and Reheating
Refrigerator
Store your hummus in an airtight container in the refrigerator for up to five days. The flavors actually improve slightly as they meld, so day two or three is often the best time to eat it.
- Keep the surface smooth and cover it with a thin layer of olive oil to prevent browning.
- If the hummus dries out slightly, stir in a tablespoon of water or lemon juice to restore creaminess.
Freezer
You can freeze hummus for up to three months, though the texture becomes slightly grainier after thawing. Pour it into ice cube trays for easy portion control, or freeze it flat in a freezer bag and break off chunks as needed.
- Thaw in the refrigerator overnight rather than at room temperature to maintain food safety.
- Stir well after thawing and add a splash of water if it seems too thick.
Reheating
Hummus doesn’t need reheating since it’s served cold, but you can bring it to room temperature by letting it sit on the counter for 30 minutes. This allows the flavors to shine more brightly than when it’s straight from the cold fridge.
- Never microwave hummus, as the yogurt can curdle and the olive oil can separate unevenly.
- If your hummus is very cold and thick, let it sit out and it will soften naturally without any loss of quality.
Nutrition Information
| Nutrient | Amount |
|---|---|
| Calories | 95 |
| Total Fat | 6 grams |
| Saturated Fat | 1 gram |
| Carbohydrates | 9 grams |
| Fiber | 2 grams |
| Sugar | 0 grams |
| Protein | 4 grams |
| Sodium | 280 milligrams |
| Cholesterol | 2 milligrams |
These values are estimates based on standard USDA data and may vary depending on your specific ingredient brands and portion sizes. Always check individual product labels for the most accurate nutritional information for your needs.
Frequently Asked Questions
Can I make this hummus without a food processor?
Yes, though it takes more elbow grease and patience. Mash the chickpeas thoroughly in a bowl with a fork or potato masher, then fold in the remaining ingredients by hand until you reach your desired consistency.
What if my hummus is too thick?
Add water one tablespoon at a time and stir well until you reach the texture you want. If you overshoot and make it too thin, pulse in a few more drained chickpeas to thicken it back up.
Can I use dried chickpeas instead of canned?
Absolutely, and many people swear the texture is even better with dried chickpeas cooked fresh. Soak and cook one cup of dried chickpeas until very tender, then use them in place of the two cans, draining away most of the cooking liquid.
Why did my hummus turn out grainy?
Grainy hummus usually means you didn’t process it long enough or used chickpeas that were insufficiently rinsed. Try pulsing longer next time, and always give your canned chickpeas a thorough rinse under running water.
How much garlic is too much garlic?
If you’re sensitive to raw garlic intensity, start with two cloves instead of three, or use roasted garlic for a milder flavor. You can always add more after tasting, so start conservative and build from there.
Is this hummus healthy?
Yes, it’s packed with fiber and plant-based protein from the chickpeas, plus healthy fats from the olive oil and yogurt. At under 100 calories per serving with no added sugars, it’s a nutrient-dense snack or appetizer.
Can I add tahini back in if I want to?
Of course, though you’ll need to reduce the Greek yogurt to maintain the right consistency. Try using two tablespoons of tahini with a quarter cup of yogurt for a hybrid version that combines both flavors.
Final Thoughts
Making hummus without tahini proves that flexibility in the kitchen leads to delicious discoveries. You’ve learned a technique that works with ingredients you already have, saves money, and honestly tastes just as good as the traditional version.
The next time you need an easy appetizer or want a healthy snack to have on hand, you know exactly what to do. Give this recipe a try, customize the seasonings to match your palate, and watch it become a staple in your kitchen.
Hummus Without Tahini
Ingredients
Equipment
Method
- Drain and rinse the chickpeas in a colander under cool running water for about 30 seconds, then let excess water drip away.
- Transfer chickpeas, Greek yogurt, olive oil, and minced garlic to the bowl of a food processor.
- Pulse 10–15 times, scraping down the sides with a rubber spatula, until the mixture is roughly chunky.
- Add lemon juice, ground cumin, sea salt, and black pepper; pulse another 8–10 times to incorporate.
- With the processor running on low, slowly drizzle in 2–3 tablespoons of water until the hummus becomes smooth and creamy.
- Taste and adjust seasonings with more salt, lemon juice, or garlic as desired, pulsing briefly after each addition.
- Spoon hummus into a serving bowl, create a shallow well in the center, drizzle with additional olive oil, and sprinkle with paprika or parsley if using.
- Let the hummus rest at room temperature for 15 minutes before serving to allow flavors to meld.