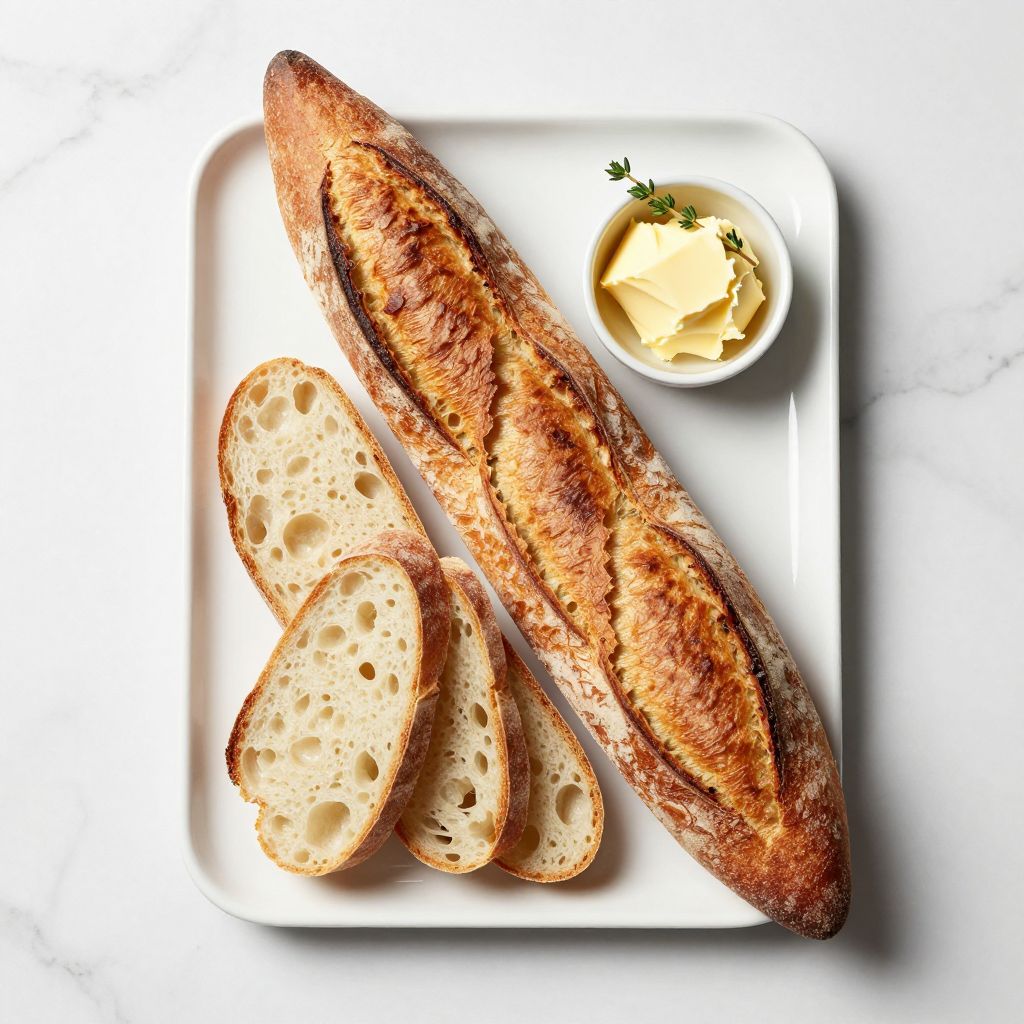
A sourdough baguette is one of the most rewarding bread projects you can tackle at home, with a crispy crust and tangy, open crumb that rivals any French bakery. The magic comes from your sourdough starter and a long, slow fermentation that builds flavor while developing that signature chewy texture.
Making this bread requires patience more than skill, and the results are absolutely worth the wait. Let me walk you through every step so you can pull a golden, crackling baguette from your oven.
Why You’ll Love This Recipe
This sourdough baguette delivers restaurant-quality results with nothing but flour, water, salt, and your starter. The long fermentation builds complexity that store-bought bread simply cannot match.
- Crispy, shattering crust with a deep golden-brown color
- Open, airy crumb with irregular holes throughout
- Tangy, complex flavor from wild yeast fermentation
- Keeps fresh for three to four days thanks to sourdough’s natural acidity
- Just four ingredients plus your starter
My Experience Making This Recipe
The first time I made a proper sourdough baguette, I was shocked at how high the hydration dough felt in my hands. It seemed impossible that something so wet and sticky could turn into anything resembling bread.
But then the magic happened. After the bulk fermentation, the dough had transformed into something alive, with bubbles pressing against the sides of my bowl and a distinct sour smell that meant real fermentation was underway. When I shaped it and watched it proof in my banneton, anticipation built with every hour.
Pulling that baguette from my Dutch oven was pure joy. The crust crackled so loudly it sounded like fire, and when I cut into it, steam rose from the perfectly open crumb structure. My family demolished half of it before dinner even started.
Recipe Overview
- Recipe Name: Sourdough Baguette
- Servings: 2 baguettes (8 slices each)
- Prep Time: 20 minutes (plus fermentation)
- Cook Time: 25 minutes
- Total Time: 16-18 hours
- Course: Bread
- Cuisine: French
- Calories per Serving: 180
Equipment You Will Need
- Kitchen scale (absolutely essential for accuracy)
- Large mixing bowl
- Dutch oven or covered baking vessel
- Banneton proofing basket or bowl lined with a floured kitchen towel
- Bench scraper or dough cutter
- Scoring tool or sharp lame blade
- Instant-read thermometer (optional but helpful for monitoring dough temperature)
- Oven with broiler capability
Ingredients for Sourdough Baguette
- 500 grams bread flour (about 4 cups)
- 350 grams water (about 1.5 cups), divided
- 100 grams active sourdough starter, fed 4-6 hours prior
- 10 grams salt (about 2 teaspoons)
Ingredient Notes and Substitutions
- Bread flour has higher protein content than all-purpose, which develops stronger gluten strands and creates better oven spring and an open crumb. You can substitute with all-purpose flour, though your crumb may be slightly tighter and the texture less extensible.
- Active sourdough starter means your starter should be bubbly and at peak rise, roughly doubling in size after feeding. Using sluggish or unfed starter will slow fermentation and weaken flavor development.
- Water temperature affects fermentation speed significantly. Warmer water (around 80-85 degrees Fahrenheit) speeds things up, while cooler water (70-75 degrees) slows fermentation for more flavor. Cold water is your friend if your kitchen is warm.
- Sea salt or kosher salt both work well and strengthen the gluten network. Avoid iodized table salt, which can inhibit fermentation and damage the structure.
How to Make Sourdough Baguette
Step 1: Mix the Dough
Combine 500 grams bread flour, 325 grams water (reserve 25 grams), and 100 grams active starter in your mixing bowl. Stir with your hands or a wooden spoon until all flour is hydrated and you have a shaggy, wet mass with no dry bits remaining.
This stage is called the autolyse, and while some bakers skip it, I prefer waiting 30-60 minutes at this point. Resting the dough lets the flour fully absorb water and begin developing gluten naturally, which means less aggressive mixing later and a more extensible dough.
Step 2: Add Salt and Complete Mixing
Add 10 grams salt and the reserved 25 grams water to your dough. Using the pincer method (grabbing the dough between your thumb and forefinger and folding it over itself), incorporate the salt thoroughly over about 5 minutes.
This method strengthens the gluten network while distributing salt evenly without overdeveloping the dough. When salt is fully incorporated, your dough should feel smooth, slightly tacky, and hold together as a cohesive mass.
Step 3: Bulk Fermentation Begins
Cover your bowl with a damp kitchen towel and let it rest at room temperature (around 75 degrees Fahrenheit) for the bulk fermentation period. This typically takes 4-5 hours for a young starter or 3-4 hours for a very active one.
The dough should increase in volume by about 50% (not double), and you should see bubbles on the surface and along the sides. If your kitchen is cooler, this may take longer.
Step 4: Perform Stretch and Folds
Every 30 minutes for the first 2 hours of bulk fermentation, perform one set of stretch and folds. Wet your hand slightly and grab the dough from one side, stretching it up and folding it over the center.
Rotate the bowl 90 degrees and repeat three more times, completing one full set. These stretches build structure without aggressive kneading and help trap gas while strengthening gluten networks.
Step 5: Monitor Bulk Fermentation
After your stretch and folds are complete, let the dough finish its bulk fermentation undisturbed. You’re looking for a dough that has increased 50% in volume, shows visible bubbles, and jiggles slightly when you shake the bowl.
Overfermentation creates a weak dough that won’t have good oven spring, so resist the urge to let it go too long. If you’re unsure, err on the side of slightly underfermented.
Step 6: Shape Your Baguettes
Turn the dough onto a lightly floured work surface and divide it in half with a bench scraper. Working with one piece at a time, gently press the dough into a rectangle, then tightly roll it toward you, sealing as you go.
Shape the roll so it’s about 12-14 inches long with tapered ends. The tension you create now becomes the structure that holds gas during baking and creates a beautiful crumb.
Step 7: Final Proof in Banneton
Place each baguette seam-side up in a banneton or a kitchen towel draped in a bowl. Mist lightly with water, cover loosely with plastic, and let proof at room temperature for 2-4 hours, or cold-proof overnight in your refrigerator.
Cold proofing (refrigerating overnight) is my preferred method because it develops flavor and makes scoring easier. The dough firms up and relaxes, making it less likely to spread when scored.
Step 8: Preheat and Score
Preheat your oven to 500 degrees Fahrenheit with a Dutch oven inside for at least 45 minutes. If proofing cold, remove your baguettes from the refrigerator 30 minutes before baking so they can relax slightly.
Using a sharp lame blade or bread knife, score each baguette with one long slash at a 30-degree angle, or three shorter slashes along the length. Scoring allows steam to escape in a controlled way and creates the signature “ear” of a baguette.
Step 9: Bake the Baguettes
Carefully transfer your shaped baguettes onto parchment paper. Place them into your preheated Dutch oven (working in batches or using two ovens if needed), cover with the lid, and bake at 500 degrees for 20 minutes.
The lid traps steam, which is essential for crust development. The moisture lets the dough expand fully before the crust sets, creating that crispy exterior and open crumb you’re after.
Step 10: Finish Baking and Cool
Remove the Dutch oven lid and lower oven temperature to 450 degrees. Bake for another 20-25 minutes until the baguettes are deep golden brown and the internal temperature reaches 205-210 degrees Fahrenheit.
Transfer to a wire rack and let cool for at least 30 minutes before slicing. I know it’s tempting to cut into warm bread, but the crumb continues setting as it cools, and you’ll get cleaner slices and better texture if you wait.
Pro Tip: Keep a spray bottle of water nearby when you bake. Misting the oven walls or tossing ice cubes onto the bottom rack creates additional steam that gives you an even more impressive crust.
Tips for the Best Sourdough Baguette
- Feed your starter at least 4-6 hours before mixing so it’s at peak activity with maximum rise. An unfed or declining starter will slow your fermentation and create weak dough with poor oven spring.
- Use a kitchen scale for all measurements, especially water and flour. Baking is chemistry, and volume measurements introduce error that compounds across multiple steps.
- Watch your dough temperature and bulk fermentation speed more than clock time. A dough at 75 degrees moves differently than one at 70 degrees, and you want visible bubbles and 50% rise, not arbitrary hours.
- Develop tension during shaping by pulling the dough toward you as you roll. This creates surface tension that traps gas and allows better expansion in the oven.
- Score with confidence and a sharp blade. A dull knife drags instead of cuts, crushing gas bubbles and preventing proper ear formation.
- Don’t skip the cooling period. Slicing into hot bread collapses the crumb structure before it sets, and you lose the delicate texture you worked so hard to build.
Common Mistakes to Avoid
- Using inactive or weakly active starter results in slow fermentation and flat, dense bread with minimal flavor. Always feed your starter well in advance and wait for visible peak activity.
- Overproofing the dough makes it weak and unable to hold gas during baking. The baguette spreads sideways instead of rising up, creating a tight crumb.
- Not creating enough tension during shaping means the dough won’t trap gas efficiently and won’t have strength to expand upward. You end up with a flat, pancake-like loaf.
- Skipping the Dutch oven or not preheating it long enough reduces steam, which results in a thick, tough crust and poor oven spring. The bread won’t expand fully and the crumb stays tight.
- Scoring too shallow or with a dull blade prevents the dough from expanding where you want it to. The crust splits unpredictably and you lose that beautiful ear.
Serving Suggestions
A warm sourdough baguette is perfect torn apart at the table, but it’s equally at home as the foundation for a great sandwich or alongside a bowl of soup. The tangy flavor and open crumb make it versatile enough for any meal.
- Sliced and served warm with salted butter and good jam for breakfast
- Toasted with olive oil and fresh garlic as bruschetta or crostini base
- Torn and dipped in a rich broth or stew
- Split lengthwise and stuffed with meats, cheeses, and vegetables for hearty sandwiches
- Sliced and dried out for homemade breadcrumbs or croutons
Variations to Try
- Whole wheat sourdough baguette: Replace up to 20% of the bread flour with whole wheat flour. This adds nuttiness and complexity but may reduce oven spring slightly, so watch your proofing carefully.
- Seeded baguette: Brush the shaped baguette with water and roll in a mix of sesame seeds, poppy seeds, and flax seeds. The seeds add crunch and visual interest while barely changing fermentation timing.
- Herbed baguette: Mix fresh or dried herbs like rosemary, thyme, and oregano directly into the dough before bulk fermentation. Herbs add aromatic depth without affecting structure.
- High hydration baguette: Increase water to 360 grams for a more open crumb and chewier texture. This requires more experience with wet dough handling but rewards you with a more dramatic crumb structure.
- Poolish method baguette: Create a poolish (equal parts flour and water plus a tiny bit of starter) the night before and use it in place of some flour and water. This adds depth and reduces active fermentation time needed.
Dietary Adaptations
- Gluten-free sourdough baguette: Use a high-quality gluten-free flour blend with added xanthan gum and expect a denser crumb and slower fermentation. Gluten development is impossible without gluten, so the structure won’t match traditional baguettes.
- Dairy-free sourdough baguette: This recipe is naturally dairy-free, so no changes needed. Sourdough requires only flour, water, salt, and starter.
- Vegan sourdough baguette: The recipe is naturally vegan since it contains no animal products whatsoever. Serve with plant-based butter or olive oil.
- Low-carb sourdough baguette: There is no realistic low-carb version of a baguette made from bread flour. Consider almond flour or cauliflower-based alternatives, though they won’t taste or perform like sourdough.
Storage and Reheating
Refrigerator
Wrapped tightly in a kitchen towel or placed in a bread bag, your baguette stays fresh for three to four days. Sourdough’s acidity naturally preserves it better than regular bread, and slicing it before storing extends usable life.
- Slice only what you’ll eat immediately to minimize exposed surface area
- Store in a paper bag for crispness or plastic for softness
- Never refrigerate uncovered, as it dries out rapidly
Freezer
Wrap your cooled baguette in plastic wrap and then aluminum foil, and it freezes beautifully for up to three months. Frozen sourdough actually thaws better than most breads because the acidity prevents staleness.
- Freeze whole baguettes or pre-slice them for easier thawing
- Label with the date so you know how long it’s been stored
- Thaw at room temperature for 1-2 hours before serving
Reheating
To restore crispness to refrigerated or frozen baguette, wrap it in a damp paper towel and microwave for 20-30 seconds, or place it directly on an oven rack at 350 degrees for 10 minutes. The moisture rehydrates the crumb while gentle heat restores the crust’s crisp texture.
- For maximum crispness, unwrap and place directly on the oven rack
- Avoid a toaster oven, which creates uneven heat and can burn the exterior
- Refresh only the portion you’ll eat immediately
Nutrition Information
| Nutrient | Amount |
|---|---|
| Calories | 180 |
| Total Fat | 1g |
| Saturated Fat | 0g |
| Carbohydrates | 37g |
| Fiber | 2g |
| Sugar | 0g |
| Protein | 6g |
| Sodium | 290mg |
| Cholesterol | 0mg |
Nutrition values are approximate and based on standard bread flour and a mature sourdough starter. Actual values vary based on hydration, fermentation time, and ingredient brands used.
Frequently Asked Questions
Can I use my sourdough starter straight from the fridge?
No, your starter needs to be fed and active before use. Feed it, wait 4-6 hours until it doubles and looks bubbly and peaked, then use it in your dough.
How do I know if my dough is ready for shaping?
Your dough should have increased about 50% in volume, show visible bubbles on top and sides, and jiggle slightly when you shake the bowl. If you poke it gently, the indentation should spring back slowly but not completely.
What if I don’t have a banneton proofing basket?
Use any bowl lined with a well-floured kitchen towel, or even a colander lined with cloth. The key is something that supports the dough without sticking.
Can I make this dough in a stand mixer?
Yes, mix on low speed for 5-6 minutes after your autolyse, then perform stretch and folds by hand. A stand mixer makes mixing easier, but monitor gluten development carefully to avoid overmixing.
Sourdough Baguette
Ingredients
Equipment
Method
- Mix 500 g bread flour, 325 g water, and 100 g active starter in a large bowl until no dry flour remains; let rest 30–60 minutes for autolyse.
- Add 10 g salt and the remaining 25 g water; pinch and fold for about 5 minutes until salt is fully incorporated.
- Cover and begin bulk ferment at about 75 °F for 3–5 hours, performing one set of stretch-and-folds every 30 minutes for the first 2 hours.
- When dough has risen roughly 50 % and shows bubbles, turn it onto a lightly floured surface and divide into two equal pieces.
- Gently flatten each piece into a rectangle, roll tightly into a log, and taper the ends to form 12–14 inch baguettes.
- Place each baguette seam-side up in a banneton or floured towel-lined bowl; cover and proof 2–4 hours at room temperature or overnight in the refrigerator.
- Preheat oven and Dutch oven to 500 °F (260 °C) for at least 45 minutes.
- Carefully invert baguettes onto parchment, score with one long slash or three diagonal slashes at a 30° angle.
- Transfer baguettes with parchment into the hot Dutch oven, cover, and bake at 500 °F (260 °C) for 20 minutes to generate steam.
- Remove lid, reduce temperature to 450 °F (232 °C), and bake 20–25 minutes more until deep golden brown and internal temperature reaches 205–210 °F (96–99 °C); cool on a wire rack at least 30 minutes before slicing.