Egg wash is the secret weapon every home cook needs in their kitchen, and making it from scratch takes just seconds. This simple mixture of eggs and liquid creates a glossy, golden finish on pastries, breads, and baked goods that looks professionally done. Whether you’re baking croissants, pie crusts, or dinner rolls, the right egg wash makes all the difference between a dull finish and one that catches the light beautifully.
Let’s walk you through everything you need to know about making and using egg wash like a pro.
Why You’ll Love This Recipe
Egg wash transforms your baked goods from ordinary to bakery-quality with minimal effort. Once you master this technique, you’ll use it on everything you bake.
- Creates a gorgeous golden-brown, shiny finish on all baked goods
- Takes literally 30 seconds to make with ingredients you already have
- Works beautifully on pastries, breads, pies, and desserts
- Helps seeds and toppings stick perfectly to your baked creations
- Costs pennies per batch and lasts for weeks in the fridge
My Experience Making This Recipe
I discovered egg wash by accident while baking croissants one Saturday morning, and it completely changed how my pastries looked. The shine was incredible, and my family actually commented on how “professional” my homemade bread looked for the first time.
What surprised me most was how much control you get by tweaking the egg wash ingredients. Using just egg white made my artisan bread look rustic and matte, while a whole egg gave me that rich, deep brown I wanted on my challah.
Now I always whisk up a batch before any baking project. It’s become as automatic as preheating the oven, and honestly, I can’t imagine baking without it anymore.
Recipe Overview
- Recipe Name: Basic Egg Wash
- Servings: Makes enough for 1 batch of baked goods (approximately 12 to 16 pieces)
- Prep Time: 2 minutes
- Cook Time: 0 minutes
- Total Time: 2 minutes
- Course: Baking ingredient
- Cuisine: International
- Calories per Serving: 17 (per teaspoon applied)
Equipment You Will Need
- Small bowl or ramekin
- Fork or small whisk
- Pastry brush (silicone or natural bristles)
- Measuring spoons
- Optional: fine mesh strainer for ultra-smooth wash
Ingredients for Egg Wash
Basic Egg Wash
- 1 large egg (or 1 egg white for matte finish, or 1 egg yolk for deep brown)
- 1 tablespoon water, milk, or cream
- Pinch of salt (optional but recommended)
For Vegan Egg Wash
- 1 tablespoon aquafaba (liquid from canned chickpeas)
- 1 tablespoon water
- Pinch of salt
For Extra Shine
- 1 egg yolk
- 1 tablespoon heavy cream or milk
- Pinch of salt
Ingredient Notes and Substitutions
- Whole egg: This gives you a balanced finish with decent shine and browning. You can swap it for 2 egg whites if you prefer a more matte, rustic look, or use just the yolk for an extra-glossy, deep mahogany finish.
- Water, milk, or cream: Water keeps things neutral, milk adds slight richness, and cream creates the glossiest finish. Use whatever you have on hand; the difference is subtle but noticeable if you bake regularly.
- Salt: This tiny addition helps the egg proteins set faster on the dough surface. You can skip it, but it truly does improve adhesion and browning.
- Aquafaba: This chickpea liquid works surprisingly well for vegan baking and creates a shine nearly identical to egg-based wash. The swap is one-to-one, though some bakers find it slightly less glossy.
How to Make Egg Wash
Step 1: Crack Your Egg Into a Bowl
Grab one large egg and crack it into a small bowl or ramekin. Work over a clean surface to avoid shells getting into your wash, which will ruin the smooth application.
Step 2: Add Your Liquid
Pour in 1 tablespoon of water, milk, or cream depending on how much shine you want. Cold liquid straight from the fridge works fine; there’s no need to warm it first.
Step 3: Add a Pinch of Salt
Sprinkle in a tiny pinch of salt if you have it. This helps the proteins denature and set faster on your dough, creating better adhesion and browning.
Step 4: Whisk Until Completely Combined
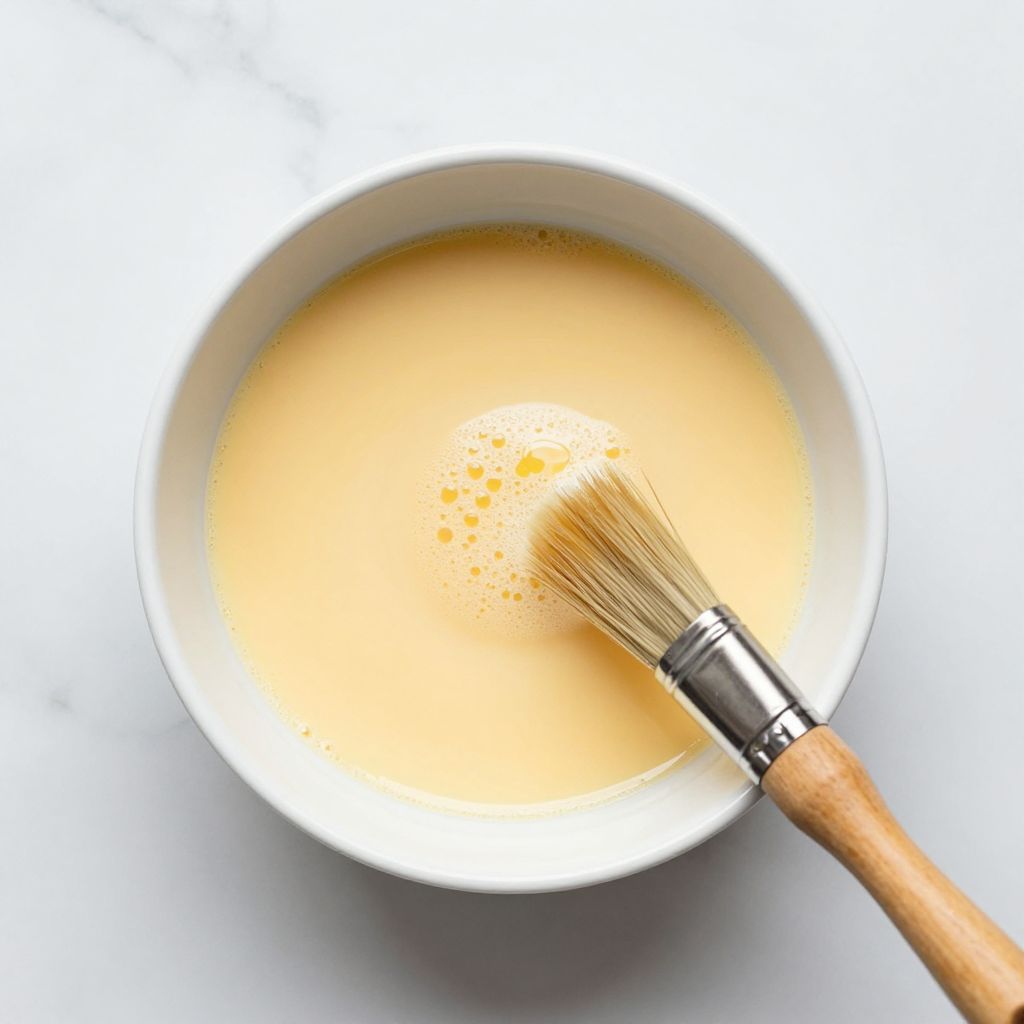
Use a fork or small whisk to beat the mixture for about 15 to 20 seconds until the egg and liquid are fully blended. You want a uniform, pale mixture with no streaks of egg white remaining.
Step 5: Strain for Ultra-Smooth Application (Optional)
Pour your egg wash through a fine mesh strainer into a clean bowl if you want a completely smooth finish with zero flecks. This step is optional but makes a noticeable difference on delicate pastries.
Step 6: Prepare Your Pastry Brush
Get your pastry brush ready and have it nearby when your baked goods are ready to brush. A silicone brush is easiest to clean, but natural bristles work beautifully too.
Step 7: Apply to Unbaked Goods
Brush your egg wash onto your pastries, breads, or baked goods about 10 to 15 minutes before baking. Apply a thin, even coat; too much wash can make things soggy at the edges.
Step 8: Optional Second Coat Halfway Through Baking
For extra-dark, shiny results, brush another thin coat of egg wash about halfway through the baking time. This creates multiple layers of glossy finish and deeper color development.
Pro Tip: Always brush egg wash on unbaked dough, never after baking. The heat sets the proteins and creates that signature glossy finish. If you brush it on already-baked goods, you’ll just have a sticky, gluey coating instead of that beautiful shine.
Tips for the Best Egg Wash
- Brush gently and evenly to avoid leaving visible brush strokes or pooling in corners. Think of it like painting a delicate surface, not scrubbing.
- Use a thin coat rather than a thick one; excess egg wash can bake on unevenly and create spots of browning that look unintentional.
- Apply egg wash only to the visible parts of your pastry to prevent sticky, wet edges from sealing shut and trapping steam.
- Keep your egg wash covered with plastic wrap if you’re not using it right away; it can dry out and separate after 30 minutes or so.
- For maximum shine, use an egg yolk and cream mixture instead of a whole egg, and apply it twice: once before baking and once at the halfway point.
- Let egg wash-coated dough rest for a few minutes before baking so it has time to set on the surface and adhere properly.
Common Mistakes to Avoid
- Brushing on already-baked goods: You’ll end up with a gluey, opaque coating that looks and feels wrong. Egg wash must go on unbaked dough to create that glossy finish.
- Using too much wash or applying it too thickly: This causes uneven browning, pooling, and thick, caramelized edges that taste burnt. Less is always more with egg wash.
- Forgetting to whisk the components together: Unmixed egg and liquid separate during baking, leaving patchy, inconsistent color and shine.
- Applying egg wash to the bottom of pastries: This can cause sticking to the baking sheet, even with parchment paper. Stick to the tops and sides only.
- Using old, separated eggs or dairy: Stale ingredients won’t create a smooth, uniform wash and can cause off-flavors or poor browning.
Serving Suggestions
Egg wash isn’t eaten on its own, but it elevates the presentation of so many baked goods. Here are the perfect projects for showing off your egg wash skills.
- Artisan sourdough bread with sesame or poppy seeds for a bakery-perfect look
- Buttery croissants and Danish pastries for that golden, glossy sheen
- Homemade pie crusts with a deep, mahogany finish
- Dinner rolls and focaccia studded with herbs and coarse salt
- Breakfast pastries like pain au chocolat or fruit danish with a stunning mirror-like shine
Variations to Try
- Egg white only: Skip the yolk for a more matte, rustic finish that looks less shiny. This works beautifully on artisan breads where you want a subtle, less glossy appearance.
- Egg yolk only: Use just the yolk mixed with a tablespoon of cream for an ultra-glossy, deep mahogany finish. This is the most luxurious option and looks absolutely professional.
- Water instead of milk or cream: This creates a thinner wash that’s easier to apply evenly without pooling. Use it when you want shine but not too much richness.
- Milk wash: Replace the egg entirely with 1 tablespoon of milk for a matte finish with subtle browning. This is perfect for vegan bakers who prefer a less shiny result.
- Aquafaba wash: Use liquid from canned chickpeas instead of egg for a vegan-friendly option that creates surprising shine and browning. Mix 1 tablespoon aquafaba with 1 tablespoon water and a pinch of salt.
Dietary Adaptations
- Gluten-free: Egg wash itself is naturally gluten-free, so no changes needed. Apply it to your gluten-free pastries exactly as you would regular dough.
- Dairy-free: Use water or plant-based milk (oat or almond work well) instead of dairy milk or cream. The finish will be slightly less glossy but still beautiful and professional-looking.
- Vegan: Swap the egg entirely for aquafaba using a one-to-one ratio. Mix 1 tablespoon aquafaba with 1 tablespoon water and a pinch of salt for nearly identical results.
- Low-carb/keto: Egg wash is already keto-friendly with zero carbs, so use it as written. Apply it to your low-carb baked goods without any modifications.
Storage and Reheating
Refrigerator
Store unused egg wash in an airtight container or covered bowl in the fridge for up to five days. Give it a quick stir before using again in case the egg and liquid have separated slightly.
- Always keep it covered to prevent the surface from drying out
- Stir well before each use to recombine any separation
- Discard immediately if it smells off or looks discolored
Freezer
You can freeze egg wash in ice cube trays for up to three months if you want to make batches ahead. This is perfect for frequent bakers who always have wash on hand.
- Pop out frozen cubes and thaw in the fridge before using
- Each cube is roughly 1 tablespoon, perfect for single batches of pastries
- Never refreeze thawed egg wash
Reheating
Room-temperature egg wash applies best, so pull it from the fridge 10 to 15 minutes before using. You don’t need to reheat it; just let it come to room temperature naturally.
- Stir gently before application to ensure uniform consistency
- If it feels too thick, whisk in a few drops of water to loosen it
- Never microwave egg wash as it can cook unevenly
Nutrition Information
| Nutrient | Amount |
|---|---|
| Calories | 17 |
| Total Fat | 1.3g |
| Saturated Fat | 0.4g |
| Carbohydrates | 0.1g |
| Fiber | 0g |
| Sugar | 0g |
| Protein | 1.6g |
| Sodium | 64mg |
| Cholesterol | 55mg |
These values are approximate per teaspoon of egg wash applied to baked goods. The actual amount consumed is minimal since most of the wash stays on the exterior surface.
Frequently Asked Questions
Can I make egg wash without salt?
Yes, salt is completely optional and won’t affect the basic function of egg wash. However, salt does help the proteins set faster on the dough surface, so I recommend including it when you can.
How far in advance can I make egg wash?
Make egg wash fresh right before you need it for the best results, or prepare it up to five days ahead and store it covered in the fridge. Stir it well before using, as the egg and liquid can separate slightly over time.
What’s the difference between using milk and water?
Milk creates a richer, slightly glossier finish with more browning, while water produces a cleaner shine with less color development. The difference is subtle, and honestly, either works beautifully depending on your preference.
Why does my egg wash look streaky or blotchy after baking?
This usually means you applied too much wash or didn’t whisk it thoroughly before application. Make sure to blend the egg and liquid until completely uniform, and use a thin, even coat rather than painting it on heavily.
Can I use egg wash on items that go in the freezer?
Yes, you can brush egg wash on unbaked pastries and then freeze them before baking. The egg wash will still work beautifully; just add a minute or two to the baking time since the pastries start from frozen.
Final Thoughts
Egg wash is one of those tiny kitchen techniques that delivers massive results with almost no effort. Once you start using it regularly, you’ll wonder how you ever baked without it, and your friends will start asking for your “secret” to perfectly golden baked goods.
Go ahead and whisk up a batch today, brush it onto your next baking project, and watch the magic happen in your oven. Your pastries deserve to look as delicious as they taste.
Basic Egg Wash
Ingredients
Equipment
Method
- Crack one large egg into a small bowl or ramekin, working over a clean surface to avoid shells.
- Pour in 1 tablespoon of water, milk, or cream depending on desired shine level. Cold liquid works fine; no need to warm it.
- Sprinkle in a tiny pinch of salt if desired. This helps proteins denature and set faster on dough.
- Use a fork or small whisk to beat the mixture for 15 to 20 seconds until egg and liquid are fully blended with no streaks remaining.
- Pour egg wash through a fine mesh strainer into a clean bowl for ultra-smooth application (optional step).
- Prepare pastry brush and have it ready when baked goods are prepared.
- Brush egg wash onto pastries, breads, or baked goods about 10 to 15 minutes before baking. Apply thin, even coat; too much wash can make edges soggy.
- For extra-dark, shiny results, brush another thin coat of egg wash about halfway through the baking time.