Crumpets are those wonderfully spongy, hole-filled English treats that soak up butter and jam like nothing else on earth. Making them at home is easier than you’d think, and homemade crumpets beat store-bought ones by a mile because they’re fresher, fluffier, and warm from your own kitchen.
The magic happens when you use a simple yeast batter that creates those signature holes as it cooks, giving you that perfect texture for spreading. If you’ve ever wondered why café crumpets taste so good, it’s because they’re made fresh, and now you’ll know exactly how to recreate that magic at home.
Why You’ll Love This Recipe
Homemade crumpets deliver results that taste like they came straight from a London bakery, and they’re genuinely fun to make. Once you nail the technique, you’ll find yourself making them regularly because the dough comes together quickly and impresses everyone at the table.
- Soft, chewy texture with loads of holes for butter absorption
- Takes under two hours from start to finish, including rise time
- Simple ingredients you already have in your kitchen
- Perfect for breakfast, afternoon tea, or a light dinner
- Freezes beautifully, so batch-making makes sense
My Experience Making This Recipe
The first time I made crumpets, I was skeptical that such simple ingredients could produce something so restaurant-quality. The moment I poured the batter onto my crumpet rings and watched those holes appear as it cooked, I became a believer.
What surprised me most was how quickly the batter rises and how foolproof the cooking process is once you understand the timing. My kids now request crumpets over toast, and honestly, watching them pile on toppings and watch the melted butter pool in those holes makes the effort worth it every time.
The real magic moment comes when you flip a crumpet and see those gorgeous golden holes ready to catch whatever topping you’re throwing at it. If you can make pancakes, you can make crumpets, and they’ll taste infinitely better than anything you’ll find in a supermarket.
Recipe Overview
- Recipe Name: Crumpets
- Servings: Makes 12 crumpets
- Prep Time: 15 minutes
- Rise Time: 1 hour and 20 minutes
- Cook Time: 25 minutes
- Total Time: 1 hour and 50 minutes
- Course: Breakfast or Afternoon Tea
- Cuisine: British
- Calories per Serving: 110 calories per crumpet
Equipment You Will Need
- Large mixing bowl
- Measuring cups and spoons
- Whisk or electric mixer
- Crumpet rings or metal molds (4-inch diameter)
- Non-stick griddle or heavy-bottomed skillet
- Spatula or thin turner
- Tea towel or plastic wrap
- Thermometer (optional but helpful)
- Small measuring jug for batter
Ingredients for Crumpets
- All-purpose flour, 2 cups (250 grams)
- Warm water, 1.5 cups (360 milliliters)
- Instant yeast, 1 teaspoon (5 grams)
- Salt, 1/2 teaspoon
- Sugar, 1/2 teaspoon
- Baking soda, 1/4 teaspoon
- Butter, 1 tablespoon for greasing
Ingredient Notes and Substitutions
- All-purpose flour gives crumpets their tender crumb and is the standard choice. Bread flour creates chewier crumpets with more structure, so use it if you prefer a heartier bite.
- Instant yeast is reliable and fast-acting compared to active dry yeast. Active dry yeast works too, but you may need to extend rising time by 10 to 15 minutes.
- Warm water (around 110 degrees Fahrenheit) activates the yeast without killing it. Tepid water works but extends rise time; hot water kills the yeast and ruins your batch.
- Baking soda is added just before cooking to create extra holes and lift. Skipping it means fewer holes and denser crumpets, so don’t leave it out.
- Salt balances sweetness and strengthens the gluten network. Omitting it makes the dough weaker and less flavorful.
How to Make Crumpets
Step 1: Mix the Dry Ingredients
Combine 2 cups of flour, 1 teaspoon of instant yeast, 1/2 teaspoon of salt, and 1/2 teaspoon of sugar in a large mixing bowl. Whisking these together ensures the yeast distributes evenly, which guarantees consistent rising throughout your batter.
Step 2: Add the Water and Create the Batter
Pour 1.5 cups of warm water into the dry ingredients and whisk until you have a smooth, pourable batter with the consistency of thin pancake batter. The batter should be much thinner than standard bread dough because crumpets need that liquid consistency to develop their signature holes.
Step 3: Let the Batter Rise
Cover the bowl with a tea towel or plastic wrap and leave it at room temperature for 1 hour and 15 minutes. During this time, the yeast ferments and creates bubbles that will eventually become those beautiful holes you’re after.
Step 4: Check for Bubbles and Readiness
After the rise time, your batter should look bubbly and have a noticeably different texture from when you started. If it doesn’t look bubbly, give it another 15 minutes before proceeding, as the yeast may have been slower to activate.
Step 5: Add Baking Soda Just Before Cooking
Stir 1/4 teaspoon of baking soda into the batter until it’s just combined, which will make the batter slightly thicker and fluffier. The baking soda reacts with the acidic byproducts of fermentation, creating additional lift and extra holes during cooking.
Step 6: Heat Your Griddle and Prepare Molds
Place your non-stick griddle or heavy skillet over medium heat and let it warm for 2 to 3 minutes until a drop of water sizzles gently on contact. Lightly butter your crumpet rings and place them on the warm griddle, letting them heat for about 30 seconds so the batter doesn’t stick.
Step 7: Pour and Cook the First Side
Using a small jug or ladle, carefully pour batter into each crumpet ring until it reaches about three-quarters of the way up the side. Cook for 4 to 5 minutes over medium heat without moving anything, allowing the bottom to set and those holes to form as steam escapes upward.
Step 8: Check for Doneness and Flip
Look at the top of your crumpet; it should look mostly dry with visible holes and only a slight shine. Carefully remove the crumpet ring by lifting it straight up, then flip the crumpet and cook the other side for 1 to 2 minutes until it’s pale golden and set.
Step 9: Cool and Repeat
Transfer finished crumpets to a wire rack or clean tea towel to cool slightly while you repeat steps 6 through 8 with the remaining batter. Work in batches and don’t rush; properly spaced cooking prevents crowding and ensures even heat distribution.
Pro Tip: The secret to perfect holes is keeping your heat steady at medium and resisting the urge to peek or move the crumpets while they cook on the first side; let the steam do the work.
Tips for the Best Crumpets
- Use water that’s around 110 degrees Fahrenheit because it activates yeast without killing it. Too hot and your yeast dies; too cold and rising takes forever.
- Don’t skip the 1-hour-plus rise time, as it’s essential for developing flavor and creating the hole structure. A rushed rise produces flat, dense crumpets.
- Keep your griddle at medium heat throughout cooking because high heat scorches the bottoms before the tops set properly. Medium heat cooks slowly and evenly, creating those signature holes.
- Butter your rings generously so crumpets slide out easily without sticking or tearing. A quick wipe between batches keeps them greased without building up too much butter.
- Serve crumpets warm within an hour of cooking for the best texture and hole absorption. They’re never quite as spectacular once they cool completely.
- If you’re cooking multiple batches, keep finished crumpets warm by loosely wrapping them in a clean tea towel until you’re ready to serve.
Common Mistakes to Avoid
- Using hot water instead of warm water kills the yeast, so your batter won’t rise and your crumpets will be dense and flat. Always check water temperature with your hand or a thermometer.
- Overcooking on the first side burns the bottom and prevents holes from forming properly because the outside sets before steam can escape. Watch carefully and flip once the top is mostly dry.
- Skipping the baking soda step eliminates extra rise and holes, making your crumpets taste more like pancakes. Add it right before cooking for maximum impact.
- Using crumpet rings that are too shallow means batter spills out and you can’t create proper tall crumpets. Use 4-inch rings that are at least 1.5 inches tall.
- Rushing the rise time produces crumpets with few holes and weak flavor. Plan ahead and let that batter do its thing for the full rising period.
Serving Suggestions
Crumpets are endlessly flexible and shine whether you keep things simple or get creative with toppings. The key is serving them warm so the holes are primed to soak up whatever you pile on top.
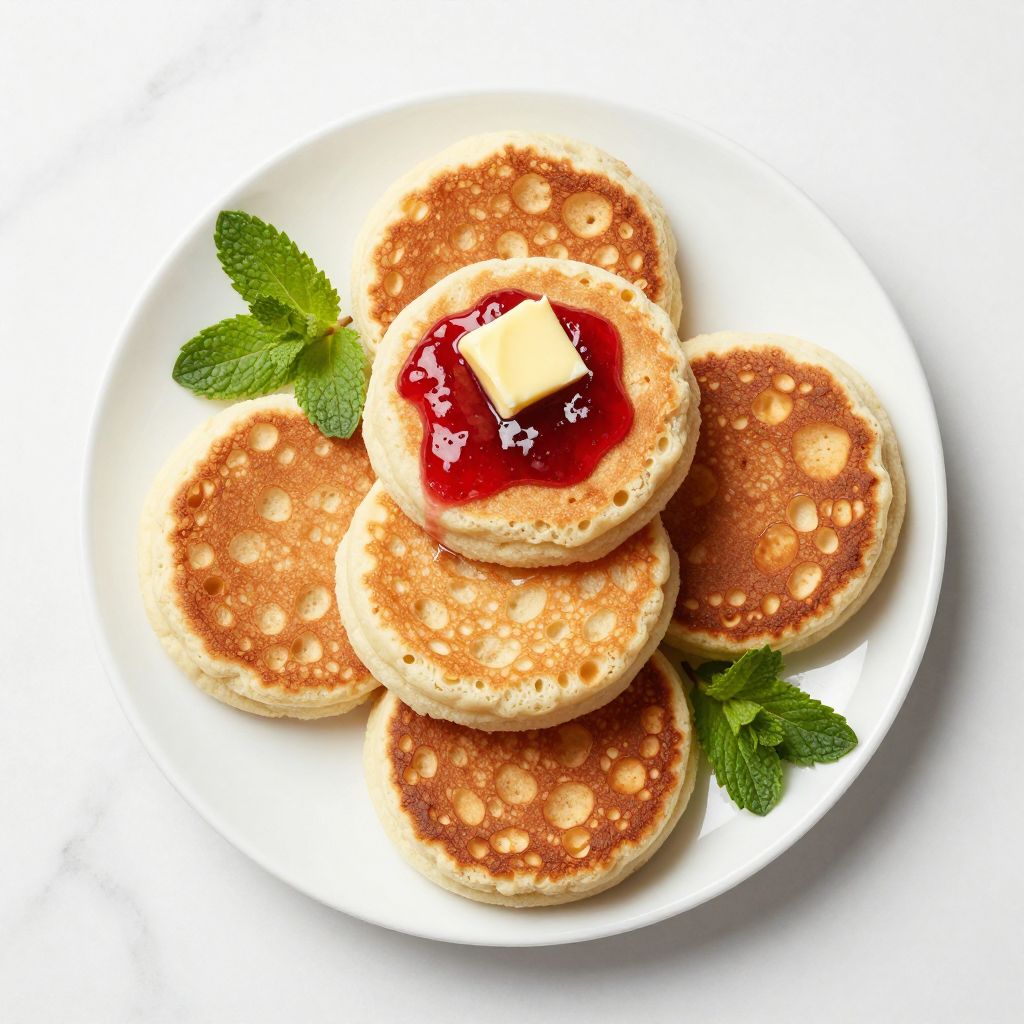
- Classic butter and jam, where the melted butter pools in the holes and jam spreads across the surface
- Honey drizzled generously with a sprinkle of sea salt for sweet and salty contrast
- Cream cheese and smoked salmon for a sophisticated brunch option
- Cinnamon sugar and a dollop of whipped cream for an afternoon tea treat
- Melted cheese and a fried egg on top for a savory breakfast that fills you up
Variations to Try
- Whole wheat crumpets: Replace 1 cup of all-purpose flour with whole wheat flour for nuttier flavor and added fiber, though the holes will be slightly smaller and the texture denser.
- Honey crumpets: Add 1 tablespoon of honey to the batter for subtle sweetness and improved browning, which makes them taste richer without being overly sweet.
- Sourdough crumpets: Substitute 1/2 cup of the water with active sourdough starter for tangy flavor and a more complex taste that pairs beautifully with savory toppings.
- Cornmeal crumpets: Add 1/4 cup of polenta or cornmeal to the flour mixture for a slightly grittier texture and corn flavor that works especially well with honey.
- Extra-tall crumpets: Use 5-inch-tall rings instead of standard 4-inch rings and increase batter slightly per ring for crumpets that hold more topping.
Dietary Adaptations
- Gluten-free: Substitute all-purpose flour with a 1:1 gluten-free baking blend and add 1/4 teaspoon of xanthan gum to improve structure, though the holes will be smaller and texture slightly different.
- Dairy-free: Use olive oil instead of butter for greasing rings and griddle, and dairy-free butter works for serving, making the recipe naturally dairy-free except for optional toppings.
- Vegan: This recipe is already vegan except for the butter used for cooking and serving, so simply use vegan butter instead and all your crumpets are plant-based.
- Low-carb or keto: This recipe doesn’t adapt well to low-carb because flour is the main ingredient, so making crumpets keto-friendly requires flour substitutes that dramatically change texture and flavor.
Storage and Reheating
Refrigerator
Store cooled crumpets in an airtight container for up to 3 days, and they stay remarkably fresh because of their moisture content. Stack them with parchment between layers to prevent sticking.
- Keep in an airtight container on a shelf away from the back where it’s coldest
- They’ll firm up slightly in the fridge but won’t go stale quickly
Freezer
Freeze cooked crumpets in a freezer bag for up to 2 months, and they thaw and reheat beautifully without texture loss. This makes batch-making a smart strategy since you can pull crumpets out whenever you want.
- Lay crumpets flat on a baking sheet, freeze for 2 hours, then transfer to freezer bags
- Write the date on the bag so you remember when you froze them
Reheating
Reheat frozen or refrigerated crumpets by toasting them in a toaster or under the broiler until warm and slightly crispy on the edges. Toasting brings back the initial warmth and softens the holes perfectly for toppings.
- Toaster: Set to medium or medium-high and toast for 1 to 2 minutes
- Broiler: Place on a baking sheet 6 inches from the heat for 2 to 3 minutes until warm
- Microwave: Wrap in a damp paper towel and heat for 30 to 45 seconds, though this makes them less crispy
Nutrition Information
| Nutrient | Amount |
|---|---|
| Calories | 110 |
| Total Fat | 1.5g |
| Saturated Fat | 0.8g |
| Carbohydrates | 22g |
| Fiber | 1g |
| Sugar | 0.5g |
| Protein | 3g |
| Sodium | 145mg |
| Cholesterol | 0mg |
These values are for the crumpets alone without toppings, and they’ll change based on your serving additions. Butter, jam, or cream cheese toppings will increase calories and fat content significantly.
Frequently Asked Questions
Can I make the batter the night before?
Yes, prepare the batter through step 3, cover it well, and refrigerate overnight, then let it come to room temperature for 20 minutes before adding baking soda and cooking. Cold batter rises more slowly, so plan for the timing shift.
Why aren’t my crumpets developing holes?
Holes form when steam escapes upward, so make sure you’re not moving the crumpets while they cook on the first side, and ensure your heat is steady at medium. If yeast is old or water was too hot, the batter won’t ferment properly, eliminating the bubbles that become holes.
Can I make crumpets without crumpet rings?
You can use English muffin rings, large cookie cutters, or even a 4-inch PVC pipe fitted with a handle, though dedicated crumpet rings work best. Without rings, batter spreads too thin and you won’t get the tall, distinct crumpet shape.
What if my batter is too thick or too thin?
Thin pancake batter is the correct consistency; if yours is too thick, whisk in water 1 tablespoon at a time. If it’s too thin and watery, whisk in a bit more flour, though this is rare with this recipe.
How do I know when my griddle is the right temperature?
A drop of water should sizzle gently and evaporate in about 3 to 4 seconds on a properly heated medium griddle. If it evaporates instantly, your heat is too high; if it sits there, heat is too low.
Can I use self-rising flour instead of all-purpose flour?
Self-rising flour already contains baking powder and salt, so you’d need to reduce the salt and skip the baking soda, creating unpredictable results. Stick with all-purpose flour for consistent, reliable crumpets.
Final Thoughts
Homemade crumpets genuinely transform your breakfast game and taste so much better than anything you can buy that once you make them, you’ll wonder why you waited so long. The technique is straightforward, the ingredients are minimal, and the result feels like a genuine achievement you can share with people you care about.
Give this recipe a try and watch people’s faces light up when they taste warm, homemade crumpets loaded with their favorite toppings. You’re about to become the person who makes crumpets from scratch, and that’s something to be proud of.
Homemade Crumpets
Ingredients
Equipment
Method
- In a large bowl, whisk together flour, instant yeast, salt and sugar until the dry ingredients are evenly combined.
- Pour the warm water into the dry mixture and whisk until a smooth, thin batter forms; it should resemble thin pancake batter.
- Cover the bowl with a tea towel or plastic wrap and let the batter rise at room temperature for 1 hour 15 minutes, or until bubbly and expanded.
- Stir the batter, then sprinkle in the baking soda and whisk just until incorporated; the batter will thicken slightly.
- Preheat a non-stick griddle or heavy skillet over medium heat for 2–3 minutes; a drop of water should sizzle and evaporate in about 3–4 seconds.
- Generously butter the insides of the crumpet rings and the cooking surface, place the rings on the griddle and allow them to heat for 30 seconds.
- Using a jug or ladle, pour batter into each ring until it is three-quarters full. Cook undisturbed for 4–5 minutes, until the top looks set and riddled with holes.
- Carefully lift off the rings with tongs, flip each crumpet, and cook the second side for 1–2 minutes until pale golden.
- Transfer cooked crumpets to a wire rack and repeat with remaining batter, greasing rings lightly between batches.