Making homemade slushi drinks with a Ninja Creami recipe transforms frozen juice, coffee, or smoothie bases into café-quality frozen treats in seconds. This machine turns your kitchen into a professional smoothie bar, and the results taste so good you won’t believe you made them at home. Whether you crave a refreshing fruit slush or a creamy gelato-style dessert, the Ninja Creami opens up endless flavor possibilities.
The magic lies in freezing a liquid base, then letting the machine break it down into perfectly textured frozen bliss. I’ll walk you through the best recipes, techniques, and tricks to get Instagram-worthy results every single time.
Why You’ll Love This Recipe
Ninja Creami recipes deliver restaurant-quality frozen drinks at a fraction of the cost and with total flavor control. You skip the lines and the sugar-loaded syrups, creating something genuinely delicious tailored to your taste.
- Ready in under five minutes once your base is frozen
- Customizable sweetness, texture, and ingredient choices
- No added preservatives or artificial flavors like store-bought versions
- Works with smoothies, coffee, juice, yogurt, and even cocktails
- Perfect for meal prep or last-minute entertaining
My Experience Making This Recipe
I first used a Ninja Creami on a sweltering summer afternoon when my kids begged for something frozen and fun. I grabbed some leftover smoothie from the fridge, froze it in one of the special containers, and hit the button. The speed and texture blew me away, and honestly, it became my secret weapon for turning simple ingredients into a showstopper.
What surprised me most was how forgiving the machine is with liquid bases. A slightly too-thick smoothie? The Creami handles it beautifully. Too thin and watery? Still works, just with a different texture that’s equally refreshing. My family went from skeptical to obsessed within one week.
The cleanup is genuinely painless too, which matters when you’re making these regularly. A quick rinse under water, and you’re done. No complicated assembly or hidden crevices trapping dried fruit.
Recipe Overview
- Recipe Name: Ninja Creami Mixed Berry Slushi
- Servings: 2
- Prep Time: 10 minutes
- Freeze Time: 6 hours or overnight
- Processing Time: 2 minutes
- Total Time: 6 hours 12 minutes
- Course: Dessert or Beverage
- Cuisine: American
- Calories per Serving: 120
Equipment You Will Need
- Ninja Creami machine
- Creami-compatible freezer containers (usually included with machine)
- Blender or food processor
- Measuring cups and spoons
- Spoon or spatula for stirring
- Freezer
- Tall glasses for serving
Ingredients for Ninja Creami Mixed Berry Slushi
- 2 cups fresh or frozen mixed berries (blueberries, strawberries, raspberries)
- 1 cup coconut milk or regular milk
- 1/2 cup Greek yogurt
- 3 tablespoons honey or agave syrup
- 1/2 teaspoon vanilla extract
- 1/4 cup water (adjust for desired thickness)
Ingredient Notes and Substitutions
- Mixed berries: These deliver bright flavor and natural color without added dyes. Swap with mango, peach, or pineapple for tropical vibes, though the tartness will change slightly.
- Coconut milk: It adds richness and a subtle tropical note that balances tartness. Use almond milk for fewer calories or whole milk for creamier texture, keeping the taste profile similar.
- Greek yogurt: This creates that luxurious frozen texture while adding protein and probiotics. Replace with silken tofu for a vegan option that maintains creaminess perfectly.
- Honey: It sweetens without the grainy texture of regular sugar when frozen. Use maple syrup or agave in equal amounts for comparable results, though maple adds a distinct earthy note.
- Vanilla extract: This enhances berry flavor subtly and rounds out the overall taste. Almond extract works too, but use half the amount to avoid overpowering the berries.
How to Make Ninja Creami Mixed Berry Slushi
Step 1: Prepare Your Berries
If using fresh berries, rinse them thoroughly and pat dry with paper towels to remove excess moisture. Removing water prevents an overly icy texture later, keeping your slushi smooth and creamy rather than hard and chunky.
Step 2: Combine Base Ingredients in Blender
Add your berries, coconut milk, Greek yogurt, honey, vanilla extract, and water to a blender. Blend on high speed for 45 to 60 seconds until completely smooth with no visible berry chunks or lumps.
Step 3: Strain the Mixture (Optional but Recommended)
Pour the blended mixture through a fine mesh strainer into a bowl, pressing gently with the back of a spoon to push liquid through while catching seeds and pulp. This step creates a silkier, more refined texture, though skipping it gives you extra fiber and keeps it thicker.
Step 4: Taste and Adjust Sweetness
Sample a small spoonful of the base and add more honey if you prefer it sweeter. Remember that freezing mutes sweetness slightly, so aim for a taste that feels a bit sweeter than you ultimately want.
Step 5: Pour Into Creami Containers
Carefully pour your mixture into the Ninja Creami-compatible freezer containers, leaving about half an inch of space at the top to allow for expansion. Overfilling makes it harder for the machine to process and can cause spillage.
Step 6: Insert Lids and Freeze
Screw the lids onto your containers securely and place them upright in the freezer for at least six hours, though overnight freezing works best. A complete freeze ensures the machine processes your base into that perfect icy-smooth texture.
Step 7: Remove From Freezer and Let Sit Briefly
Take your frozen container out of the freezer and let it sit at room temperature for two to three minutes before processing. This slight thaw prevents the machine from struggling and ensures more even texture throughout.
Step 8: Insert Into Ninja Creami and Select Function
Place the container into your Ninja Creami machine with the lid facing up, then close the top cover. Choose your desired setting, such as slushi for an icy texture or sorbet for something smoother, then press start.
Step 9: Process and Serve Immediately
The machine processes your frozen base in about 30 to 60 seconds, breaking it down into that signature slushy consistency. Pour into chilled glasses right away while the texture is optimal, then enjoy your creation before it starts to melt.
Pro Tip: Freeze your serving glasses for 15 minutes before adding your Creami creation to keep it frozen longer and maximize that perfect texture.
Tips for the Best Ninja Creami Mixed Berry Slushi
- Use high-quality ingredients since there’s nowhere to hide in such a simple recipe. Fresh or premium frozen berries make a noticeable difference in flavor depth.
- Don’t skip the freezing time in your rush. A partially frozen base creates an inconsistent, watery texture instead of the smooth slush you want.
- Experiment with the water ratio based on your preference. Less water gives you a thicker, more sorbetlike result, while more water creates a thinner, more drinkable slushi.
- Freeze multiple containers ahead of time so you always have bases ready to process on hot days or for last-minute guests. This turns the Creami into true convenience.
- Keep the machine and containers in separate spots in your freezer to save space and stay organized for regular use.
- Add texture and interest by blending in a tablespoon of seeds like chia or flax before freezing for extra nutrition without altering the taste.
Common Mistakes to Avoid
- Skipping the strain step creates a chunky texture from seeds that gets broken down unevenly, leaving some sips grainy and others watery. Taking two minutes to strain pays off in the finished product.
- Using regular sugar instead of honey makes your slushi icy and hard because granulated sugar doesn’t freeze as smoothly. Stick with honey, agave, or simple syrup for better results.
- Packing containers too full prevents the machine from churning properly, leading to stuck containers and frustration. Leave a half inch of headspace at the top.
- Processing frozen bases straight from the freezer without a brief sit time taxes the machine and produces uneven texture. Those two to three minutes make a real difference.
- Using thawed or partially melted bases wastes your prep work and creates a watery drink instead of a proper slushi. Ensure complete freezing before processing.
Serving Suggestions
A Ninja Creami slushi shines on its own but pairs beautifully with light desserts and summer gatherings. Think of it as a refreshing palate cleanser after a meal or a standalone treat on a hot afternoon.
- Serve alongside grilled pound cake or angel food cake for a classic dessert combination
- Pair with fresh mint leaves and a squeeze of lime for an elevated presentation
- Top with whipped cream and granola for an unexpected textural contrast
- Offer as part of a summer brunch spread with pastries and fresh fruit
- Float a scoop in sparkling water or lemonade for a refreshing punch at parties
Variations to Try
- Tropical Mango Slushi: Replace berries with fresh mango chunks and use passion fruit juice instead of water for a vacation-worthy flavor that feels indulgent and special.
- Coffee Creami: Blend strong cold brew coffee with milk, a touch of vanilla, and a tablespoon of honey for a frozen coffee shop drink that beats expensive lattes. The texture becomes silky and perfect for sipping.
- Strawberry Cheesecake Creami: Add cream cheese to your strawberry base along with graham cracker crumbs stirred in before freezing for a dessert that tastes like the real thing. This version feels more decadent without being overly heavy.
- Green Smoothie Creami: Blend spinach, banana, mango, coconut milk, and a tablespoon of almond butter for a nutritious frozen treat. It tastes purely fruity with no green flavor dominating.
- Watermelon Lime Slushi: Combine fresh watermelon juice with lime juice and a pinch of sea salt for a refreshing summer variation. The salt enhances both flavors beautifully.
Dietary Adaptations
- Gluten-free: This recipe is naturally gluten-free as written since no flour or gluten-containing ingredients appear in the base. Just verify your honey and any add-ins are certified gluten-free if that’s important to you.
- Dairy-free: Swap Greek yogurt for coconut yogurt or cashew cream and use any plant-based milk instead of regular milk. The texture remains creamy and delicious without any dairy products.
- Vegan: Replace yogurt with silken tofu and use agave or maple syrup instead of honey, then choose any plant-based milk option. You lose no flavor or texture quality with these straightforward swaps.
- Low-carb and Keto: Use erythritol or monk fruit sweetener instead of honey and add a tablespoon of coconut oil for richness and fat content. The carb count drops significantly while maintaining that frozen dessert appeal.
Storage and Reheating
Refrigerator
Store prepared Creami bases in their sealed containers for up to three days in the freezer. The texture stays optimal during this window, though flavors meld and deepen slightly after the first day.
- Keep containers upright on a flat freezer shelf to prevent leaks
- Label containers with the contents and date for easy identification
- Stack containers carefully if space is tight, but avoid crushing them
Freezer
Frozen bases keep safely for up to two weeks in the freezer, though best flavor and texture occur within the first week. Extended freezing can cause ice crystal formation that changes the texture when processed.
- Store in the back of the freezer away from the door for consistency
- Wrap containers in plastic wrap for extra protection against freezer burn
- Keep dedicated space so containers don’t get pushed around
Reheating
Never reheat a processed Creami drink because melting and refreezing destroys the texture. Instead, thaw your base container in the refrigerator overnight and reprocess it the next day for fresh texture.
- Allow eight hours of thaw time before reprocessing
- Once thawed, use the base immediately for best quality
- Don’t leave thawed base at room temperature for more than two hours
Nutrition Information
| Nutrient | Amount |
|---|---|
| Calories | 120 |
| Total Fat | 3g |
| Saturated Fat | 2g |
| Carbohydrates | 22g |
| Fiber | 2g |
| Sugar | 18g |
| Protein | 3g |
| Sodium | 35mg |
| Cholesterol | 2mg |
These values reflect the mixed berry slushi recipe as written and assume a two-serving yield. Variations with different fruits or add-ins will shift macros accordingly, particularly sugar and calorie content.
Frequently Asked Questions
Can I use frozen fruit straight from the bag?
Yes, frozen fruit works beautifully and sometimes produces better results than fresh because it’s picked at peak ripeness. Thaw it slightly before blending to help your blender process it more easily and smoothly.
What if my base is too thick or too thin after freezing?
A too-thick base that the machine struggles with will process into a dense, grainy texture. Next time, add more water or liquid before freezing, using a ratio of roughly one part liquid to one part fruit.
Can I make these alcoholic for adult gatherings?
Absolutely, though alcohol freezes at a lower temperature than water, so your base takes longer to freeze solid. Add one to two ounces of vodka or rum to your base and plan for eight to ten hours of freezing instead of six.
How do I prevent the machine from jamming during processing?
Let your frozen container sit at room temperature for two to three minutes before processing, then ensure the container sits level in the machine with the lid facing straight up. Partial thawing gives the machine something to work with smoothly.
Can I use my Creami for store-bought frozen juice or smoothie bases?
Yes, any pre-made smoothie or juice works perfectly in your Creami. Just freeze it in a compatible container following the same timeline, and you get a restaurant-quality result from convenience products.
What’s the difference between the slushi and sorbet settings?
The slushi setting breaks your base into icy chunks while the sorbet setting creates a smoother, more cohesive frozen texture. Choose slushi for drinkable, chunky results and sorbet for something closer to gelato consistency.
Can I make Creami bases with milk alone, no fruit?
Pure milk freezes too hard for the machine to process smoothly, so always include some sugar or fruit to lower the freezing point. A mixture of milk with fruit puree, yogurt, or sweetener works far better.
Final Thoughts
Making Ninja Creami recipes transforms frozen fruit and simple ingredients into something that feels indulgent and special. The machine takes five minutes of actual work and turns that into a frozen treat that tastes like you spent hours creating something fancy.
Stop by the store for quality berries this week and give this recipe a try. Your family will think you’ve mastered some secret kitchen skill, and honestly, you kind of have.
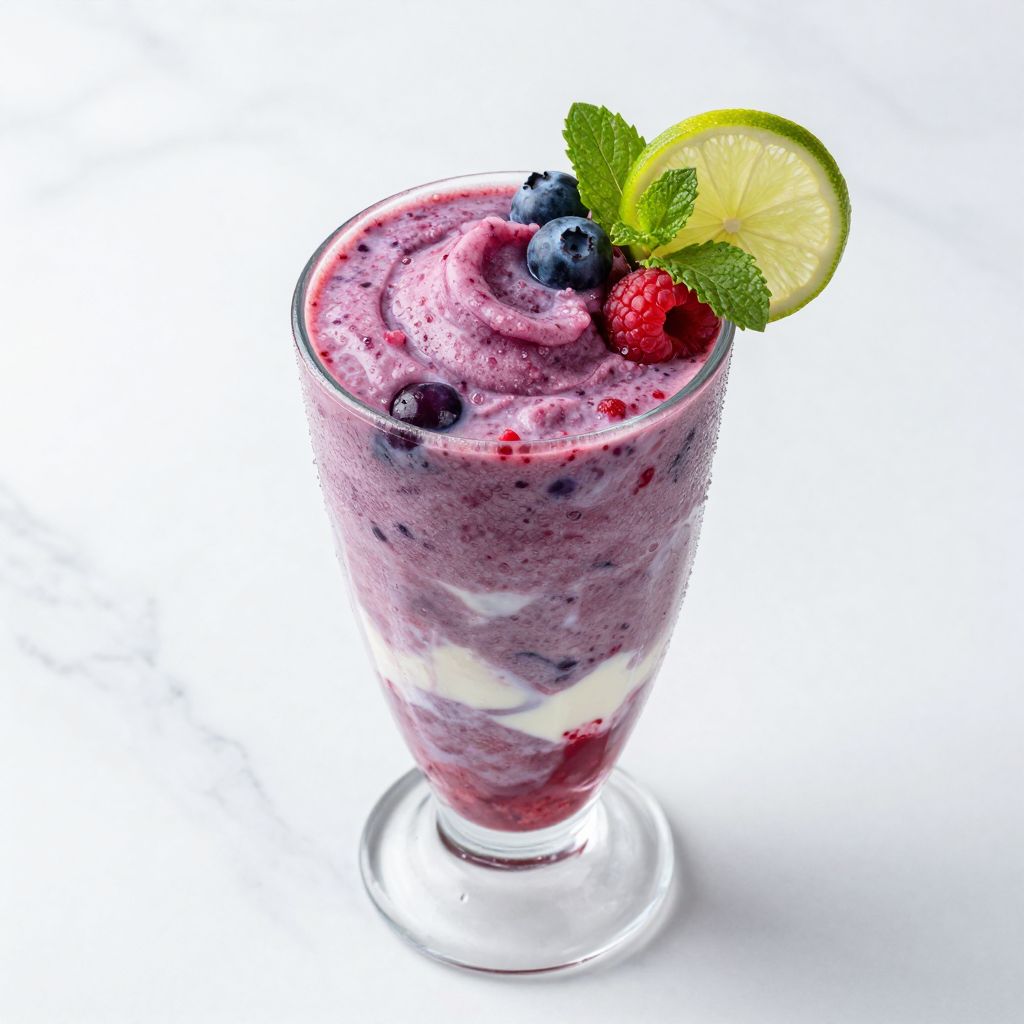
Ninja Creami Mixed Berry Slushi
Ingredients
Equipment
Method
- Rinse fresh berries under cold water and pat dry to remove excess moisture.
- Add berries, coconut milk, Greek yogurt, honey, vanilla extract, and water to a blender. Blend on high for 45–60 seconds until completely smooth.
- Optional: Pour the mixture through a fine mesh strainer into a bowl to remove seeds and pulp for an ultra-smooth texture.
- Taste the base and add an extra teaspoon of honey if a sweeter flavor is desired.
- Pour the blended base into the Ninja Creami freezer container, leaving about 1/2 inch of headspace, and secure the lid.
- Freeze the container upright for at least 6 hours, preferably overnight, until solid.
- Remove the container from the freezer and let it sit at room temperature for 2–3 minutes to slightly soften the edges.
- Insert the container into the Ninja Creami, choose the Slushi setting, and process for about 60 seconds until the mixture becomes an icy, drinkable consistency.
- Immediately spoon or pour the slushi into chilled glasses and serve at once for the best texture.



