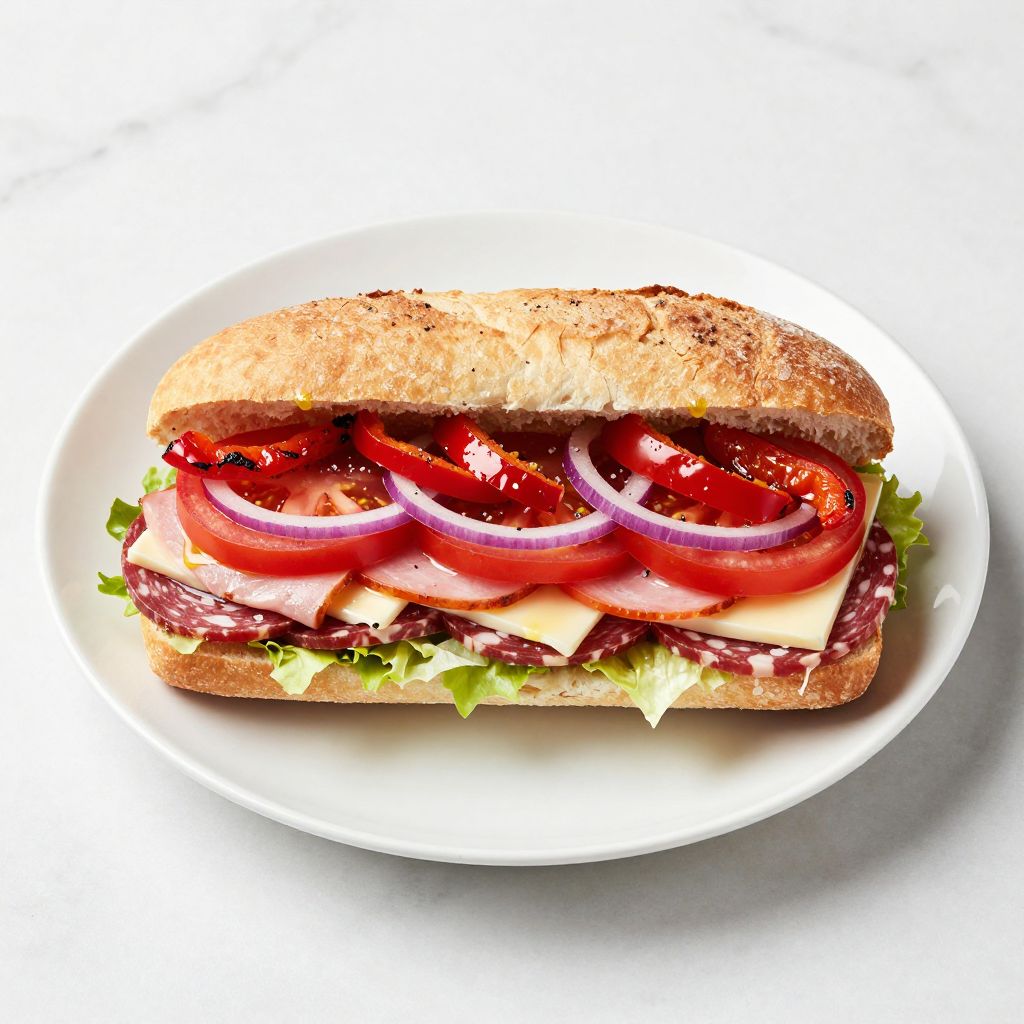
A grinder sandwich is the ultimate handheld feast, loaded with layers of cold cuts, cheese, and crisp vegetables all piled onto a long sub roll.
This classic deli sandwich delivers maximum flavor and satisfying texture in every bite, and the best part is that you can customize it however you like. Whether you are feeding a crowd or packing lunch for the week, a grinder comes together in minutes with quality ingredients and simple assembly. Let me walk you through how to build one that tastes like it came straight from an old-school Italian deli.
Why You’ll Love This Recipe
The grinder sandwich wins because it requires zero cooking skills and works for any meal or occasion. You get fresh vegetables, savory meats, melted cheese, and bold dressing all in one portable package.
- No cooking required: assemble and eat in under 10 minutes
- Endlessly customizable with your favorite deli meats and toppings
- Perfect for meal prep, lunches, picnics, or quick dinners
- Budget-friendly when you shop sales and buy quality deli meat
- Tastes even better the next day as flavors meld together
My Experience Making This Recipe
I grew up eating grinders at a tiny deli counter in my neighborhood, and the owner taught me that the secret is good bread and not skimping on the fillings. I started making them at home and realized that the quality of your ingredients matters way more than any fancy technique.
My family devours these sandwiches, and I love how my kids get excited when I set out all the toppings and let them build their own versions. The look on their faces when they bite into a perfectly layered grinder with that first crunch of lettuce is pure joy, honestly.
What surprised me most is how a simple grinder became my go-to meal prep strategy on Sundays, and I can make a week’s worth of lunches in about 20 minutes. The flavors only improve as the sandwich sits in the fridge overnight.
Recipe Overview
- Recipe Name: Grinder Sandwich
- Servings: 1 sandwich
- Prep Time: 10 minutes
- Cook Time: 0 minutes
- Total Time: 10 minutes
- Course: Lunch, Dinner
- Cuisine: Italian-American
- Calories per Serving: 580
Equipment You Will Need
- Cutting board
- Serrated bread knife
- Slicing knife
- Spreader or butter knife
- Parchment paper or foil for wrapping (optional)
Ingredients for Grinder Sandwich
- 1 sub roll or hoagie roll, 10-12 inches long
- 2 ounces sliced salami or pepperoni
- 2 ounces sliced ham
- 2 ounces sliced provolone cheese
- 1/4 cup shredded lettuce
- 2-3 slices tomato
- 3-4 thin red onion slices
- 6-8 roasted red peppers from a jar, or fresh bell pepper strips
- 2 tablespoons Italian dressing or olive oil and vinegar
- Salt and black pepper to taste
- Optional: banana peppers, pickles, or hot peppers for heat
Ingredient Notes and Substitutions
- Sub roll: A quality crusty roll holds all the fillings without falling apart and gives you that satisfying bite. Swap it for a focaccia or ciabatta roll if you want something softer or more flavorful, though you may need to eat it slightly sooner before it gets soggy.
- Salami: Adds a peppery, slightly spicy kick and rich flavor that defines a classic grinder. Use capicola, soppressata, or any cured meat you enjoy, depending on how much heat and intensity you want.
- Provolone: Melts slightly when layered with warm ingredients and has a mild, creamy flavor that binds everything together. Swap in fresh mozzarella for a creamier bite, or use Swiss if you prefer something milder and less waxy.
- Italian dressing: Brings acidity and herbs that cut through the richness of the meats and cheese. Use vinaigrette, ranch, or even a light spread of pesto if you want to change the flavor profile.
- Roasted red peppers: Add sweetness and a subtle charred flavor that complements the savory meats perfectly. Fresh bell pepper strips work in a pinch but lack the depth, and they can make the sandwich watery if sliced too thinly.
How to Make Grinder Sandwich
Step 1: Choose and Prepare Your Roll
Select a fresh sub roll that feels sturdy with a crispy crust on the outside and a soft interior. Slice the roll lengthwise almost completely through, leaving a slight hinge on one side so the two halves stay connected.
Step 2: Build the Base Layer
Lightly spread Italian dressing or a thin layer of oil and vinegar on both the top and bottom halves of the roll. This prevents the bread from absorbing moisture from the wet ingredients and helps every bite stay flavorful.
Step 3: Layer the Cold Cuts
Start with salami, overlapping each slice slightly so they cover the entire bottom half of the roll. Add ham next, again overlapping to ensure even distribution across the entire sandwich.
Step 4: Add Cheese
Layer provolone cheese over the cold cuts, using as many slices as you like since cheese is where the magic happens. The cheese will soften slightly from the cool ingredients and create a creamy texture that binds everything together.
Step 5: Layer the Vegetables
Arrange lettuce first on top of the cheese, creating a barrier that keeps excess moisture away from the bread. This simple trick prevents your sandwich from getting soggy even if you make it the night before.
Step 6: Add Tomato and Onion
Place tomato slices in a single layer on top of the lettuce, patting them dry with a paper towel first if they seem too juicy. Layer red onion slices next, using as much as you can handle because they add a sharp, crisp bite that elevates the whole sandwich.
Step 7: Top with Roasted Peppers
Spread roasted red peppers across the top layer, letting some of the oil from the jar drizzle onto the sandwich for extra flavor. The sweet and slightly smoky peppers balance the salty meats and add visual appeal.
Step 8: Season and Close
Sprinkle a pinch of salt and cracked black pepper over the vegetables, then press the top half of the roll down gently. The gentle pressure helps all the layers meld together slightly without squashing the sandwich flat.
Step 9: Wrap and Rest
Wrap the sandwich tightly in parchment paper or foil, which holds everything in place and makes it portable. Let it rest in the refrigerator for at least 15 minutes before eating, allowing all the flavors to blend and the bread to absorb just enough moisture.
Pro Tip: Build your grinder the night before and wrap it tightly in the fridge, because the flavors meld beautifully overnight and the bread achieves the perfect texture.
Tips for the Best Grinder Sandwich
- Buy deli meat sliced fresh at the counter rather than pre-packaged, because it has better flavor and texture that makes a noticeable difference in every bite.
- Pat your tomato slices dry before layering to prevent excess moisture from soaking into the bread and making it fall apart.
- Arrange toppings so they extend all the way to the edges of the roll, ensuring every bite includes all the flavors you added.
- Use good quality Italian dressing or make your own with olive oil, red wine vinegar, and Italian herbs for a fresher taste.
- Toast the roll lightly if you prefer a crunchier bite, though this works best if you eat the sandwich immediately after assembly.
- Chill your ingredients before assembly, as cold components stay fresher longer and taste crisper in every bite.
Common Mistakes to Avoid
- Skipping the oil or dressing on the bread: Dry bread makes the sandwich taste bland and fall apart easily, so always add some fat or acidity as your base layer.
- Overloading with wet ingredients: Too many tomatoes or peppers will make the bread soggy and cause the sandwich to fall apart when you bite into it.
- Using stale roll: A grinder needs a fresh roll with structure, and old or dry bread will not hold up to all the fillings.
- Forgetting to layer strategically: Placing lettuce directly on bread without first putting down oil causes sogginess, so always respect the layer order.
- Skimping on ingredients: A skimpy grinder tastes boring and forgettable, so load it generously with meat, cheese, and vegetables for maximum flavor.
Serving Suggestions
A grinder stands perfectly well on its own, but pairing it with complementary sides transforms it into a complete meal. The crispy, juicy sandwich shines alongside something cold and refreshing or something salty and crunchy.
- Crispy potato chips or kettle chips for that satisfying crunch and salty contrast
- A cold pickle spear or jar of pickles to add briny acidity that cuts through the richness
- Pasta salad with Italian dressing for a light, fresh side that won’t weigh you down
- Coleslaw for a crisp, tangy complement that adds texture and freshness
- Ice-cold lemonade or iced tea to cool you down, especially if you added spicy peppers
Variations to Try
- Hot Grinder: Toast the assembled sandwich in a 400-degree oven for 5 minutes, letting the cheese melt and the flavors warm together, then add fresh lettuce and tomato after toasting for contrast.
- Vegetarian Grinder: Skip the meats entirely and load up with roasted vegetables, fresh mozzarella, sun-dried tomatoes, and pesto for a lighter but still satisfying sandwich.
- Spicy Version: Add hot peppers, pepperoni, and a drizzle of hot sauce to create a sandwich with real kick that builds as you eat.
- Classic Italian: Use mortadella instead of salami, add marinated artichokes, and use a creamy Italian mayo to create a more elegant, refined flavor profile.
- Turkey Club Style: Layer smoked turkey, crispy bacon, Swiss cheese, and avocado for a grinder that tastes like an upscale club sandwich.
Dietary Adaptations
- Gluten-Free: Use a quality gluten-free sub roll, though options are limited and texture won’t match traditional bread, so toast it lightly to add structure.
- Dairy-Free: Replace provolone with dairy-free cheese or skip cheese entirely and add extra roasted red peppers and olives for richness and flavor.
- Vegan: Use plant-based deli meats and dairy-free cheese, then bulk up with hummus, avocado, and extra roasted vegetables for a satisfying sandwich.
- Low-Carb/Keto: Use a lettuce wrap or cloud bread instead of a traditional roll, then pile on extra meats, cheese, and fatty toppings like avocado and olives.
Storage and Reheating
Refrigerator
Wrap the finished grinder tightly in parchment paper or foil, then place it in an airtight container or zip-top bag. It keeps well for up to 2 days, and flavors actually improve as the ingredients meld together overnight.
- Do not add wet toppings like tomato or dressing more than 24 hours in advance if you prefer a crispier sandwich.
- Keep lettuce and bread separate if making ahead, then assemble just before eating for maximum crunch.
Freezer
Grinders do not freeze well because the bread becomes tough and the vegetables lose their crisp texture. However, you can freeze the meat and cheese separately for up to 3 months, then build fresh sandwiches as needed.
- Wrap meats individually in parchment paper before bagging to prevent freezer burn.
- Thaw in the refrigerator for 4-6 hours before using.
Reheating
If you want a warm grinder, wrap it loosely in foil and heat at 350 degrees for 5-7 minutes until the cheese melts and bread warms through. Add any crisp fresh vegetables after heating to preserve their texture.
- Do not microwave, as it makes the bread chewy and unevenly heated.
- Toasting works best for gently warming the sandwich without drying it out.
Nutrition Information
| Nutrient | Amount |
|---|---|
| Calories | 580 |
| Total Fat | 28g |
| Saturated Fat | 11g |
| Carbohydrates | 52g |
| Fiber | 3g |
| Sugar | 5g |
| Protein | 28g |
| Sodium | 1520mg |
| Cholesterol | 65mg |
These values are approximate and based on standard ingredient portions, so adjust based on your specific brands and additions.
Frequently Asked Questions
Can I make a grinder ahead of time?
Yes, build it the night before and wrap it tightly in parchment paper, then refrigerate for flavors to meld. The sandwich actually tastes better the next day, though avoid adding soft tomato more than 8 hours ahead if you want to preserve crunch.
What is the best bread for a grinder sandwich?
A fresh sub roll with a crispy crust and soft interior works best because it holds fillings without falling apart. Look for rolls baked the same day at your bakery or grocery store, and avoid anything that feels hard or dry.
How do I prevent my grinder from getting soggy?
Oil the bread first as a moisture barrier, pat tomatoes dry before adding them, and place lettuce directly on the cheese rather than on the bread. Building the sandwich no more than 4 hours before eating also helps preserve texture.
Can I make this sandwich hot?
Wrap the assembled sandwich loosely in foil and heat it at 400 degrees for 5 minutes until the cheese melts, then add fresh lettuce and tomato after heating if you prefer some crunch. This creates a warm sandwich with both melted cheese and crisp vegetables.
What meats work best in a grinder?
Salami, ham, and capicola are the traditional trio, but you can use any deli meat you enjoy including turkey, roast beef, or Italian meats. Buy from the deli counter for fresher flavor and better texture than pre-packaged options.
Can I make a vegetarian grinder?
Absolutely, load it with roasted vegetables, fresh mozzarella, olives, and pesto to create something satisfying and flavorful. You can add avocado, sun-dried tomatoes, or marinated artichokes for extra richness and depth.
Final Thoughts
The grinder sandwich is proof that sometimes the simplest meals deliver the most joy and satisfaction. There is no timer to watch, no complicated technique to master, just quality ingredients layered thoughtfully between fresh bread.
Make one this week, maybe two if you are feeling ambitious, and experience how a humble sandwich becomes the star of your lunch. Your taste buds will thank you, and you will find yourself making these regularly for weekday meals and weekend gatherings alike.
Grinder Sandwich
Ingredients
Equipment
Method
- Slice the sub roll lengthwise, leaving a hinge so the two halves remain attached.
- Spread 1 tablespoon of the Italian dressing (or olive oil and vinegar) on both the cut sides of the roll.
- Layer the sliced salami over the bottom half of the roll, overlapping the slices so they cover the bread completely.
- Add the sliced ham on top of the salami, again overlapping for even coverage.
- Place the provolone cheese slices over the meats to form a cohesive cheese layer.
- Top the cheese with shredded lettuce to create a moisture barrier.
- Arrange tomato slices in a single layer, then add the red onion slices and roasted red pepper strips.
- Drizzle the remaining tablespoon of Italian dressing over the vegetables, then season with a pinch of salt and freshly cracked black pepper. Add banana peppers or other hot peppers if desired.
- Close the sandwich, press gently, wrap tightly in parchment paper or foil, and let rest for at least 15 minutes before serving. For a hot grinder, wrap in foil and bake at 400°F (200°C) for 5 minutes, then add fresh lettuce and tomato after heating.