Vanilla bean paste is the secret weapon that transforms ordinary desserts into something extraordinary. Made from real vanilla beans, this thick, aromatic paste delivers intense vanilla flavor that extract simply cannot match.
Unlike vanilla extract, which relies on alcohol to carry flavor, homemade vanilla bean paste uses the whole bean to create a luxurious condiment that coats your spoon and clings to every ingredient it touches. You will notice the difference immediately in your baking.
This recipe takes just 10 minutes of hands-on time and requires only two ingredients, making it one of the smartest kitchen shortcuts you can master. Let me walk you through creating your own batch.
Why You’ll Love This Recipe
Homemade vanilla bean paste gives you complete control over quality and flavor intensity while costing less than pre-made versions.
- Pure, potent vanilla flavor that outshines store-bought paste
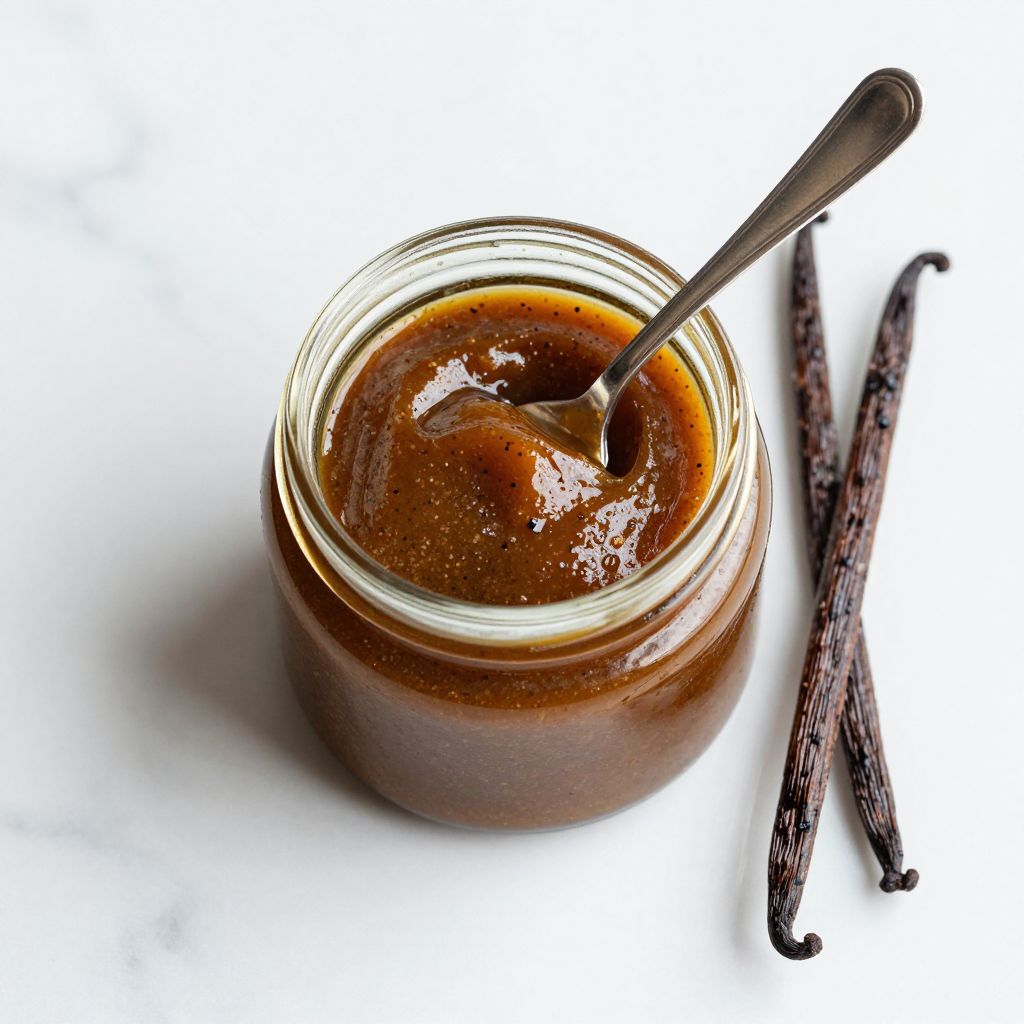
- Gorgeous speckled appearance with real vanilla bean flecks
- Takes just 10 minutes to make with minimal effort
- Stores for months in your pantry
- Costs a fraction of specialty brands
My Experience Making This Recipe
I first made vanilla bean paste on a whim after spending thirty dollars on a tiny jar at a specialty kitchen shop. I felt genuinely silly for wasting money when I realized I already had everything at home.
The moment I split open those vanilla beans and scraped out the seeds, I understood why people rave about this ingredient. The aroma alone made my kitchen smell like a French patisserie.
Now I make a batch every few months and keep jars in my pantry like they are liquid gold. My brownies, cookies, and ice cream all taste noticeably richer and more complex.
Recipe Overview
- Recipe Name: Vanilla Bean Paste
- Servings: Makes approximately 1/2 cup
- Prep Time: 10 minutes
- Cook Time: 0 minutes
- Total Time: 10 minutes
- Course: Condiment/Ingredient
- Cuisine: French-inspired
- Calories per Serving: 35 calories per tablespoon
Equipment You Will Need
- Sharp paring knife or small serrated knife
- Cutting board
- Small bowl or measuring cup
- Spoon for mixing
- Glass jar with airtight lid for storage
- Fine mesh strainer (optional, for smoothing)
Ingredients for Vanilla Bean Paste
- 4 vanilla beans, grade B or C (grade A works but is pricier)
- 1/2 cup granulated sugar
Ingredient Notes and Substitutions
- Vanilla beans provide the intense flavor and beautiful black specks that make this paste special. You can substitute with 2 tablespoons of vanilla extract if beans are unavailable, though the texture and flavor will be thinner and less impressive.
- Granulated sugar acts as a preservative and helps extract flavor from the beans. Brown sugar works but will change the color and add molasses notes; coconut sugar works similarly but costs more.
How to Make Vanilla Bean Paste
Step 1: Select and Inspect Your Vanilla Beans
Choose plump, moist vanilla beans that feel slightly flexible when you bend them gently. If your beans are dried out and brittle, they will yield less flavor and fewer visible specks in your final paste.
Step 2: Split the Vanilla Beans Lengthwise
Place each vanilla bean on your cutting board and use a sharp knife to carefully split it in half lengthwise, cutting just deep enough to open the pod without cutting clear through to the other side. This technique keeps the two halves connected so you can scrape both sides efficiently.
Step 3: Scrape Out the Seeds
Hold each split bean firmly and use the flat edge of your knife to scrape the inside of the pod from one end to the other, collecting all the tiny seeds and dark pulp in a small bowl. You will see a stream of glossy black material; this is exactly what you want and where all the flavor lives.
Step 4: Measure Your Sugar
Pour your granulated sugar into a small bowl or measuring cup, using exactly 1/2 cup for the four beans. The sugar amount matters because it acts as both a preservative and a texture builder for your paste.
Step 5: Combine Seeds and Sugar
Add your scraped vanilla seeds directly to the sugar and stir well, breaking up any clumps with the back of your spoon. You will notice the sugar immediately begins to absorb the moist pulp and turns darker as it mingles with the vanilla.
Step 6: Mix Until Fully Incorporated
Continue stirring for about one minute, pressing and crushing the mixture gently against the sides of the bowl to help the seeds distribute evenly throughout the sugar. The paste should look wet and glossy, with visible specks throughout.
Step 7: Optional Smoothing Step
If you prefer an ultra-smooth paste without visible seed pieces, press the mixture through a fine mesh strainer using the back of a spoon, catching the paste in a clean bowl below. This step is entirely optional and takes another two minutes if you choose to do it.
Step 8: Transfer to Storage Jar
Spoon your finished vanilla bean paste into a clean glass jar with an airtight lid, packing it down gently so it is level. Seal the jar tightly and store in your pantry away from direct sunlight.
Pro Tip: The paste will continue to develop flavor and become more fragrant over the first week as the sugar fully absorbs the vanilla oils, so resist the urge to use it immediately if possible.
Tips for the Best Vanilla Bean Paste
- Buy vanilla beans from a reputable source that stores them in sealed packages, as they dry out quickly when exposed to air. Grade B beans cost less than grade A and have thinner pods that are actually easier to scrape.
- Split your beans while they are cool; warm beans become sticky and harder to handle. Keep them refrigerated until you are ready to use them.
- Do not throw away those vanilla bean pods after scraping them. Drop them into a jar of sugar or alcohol to make vanilla sugar or vanilla extract for later use.
- Use a damp paper towel to wipe your knife between scraping each bean to prevent buildup. This keeps your scraping motion smooth and clean.
- The paste thickens slightly as it sits, so do not worry if it seems wet immediately after mixing. This is normal and expected.
- Double or triple this recipe when you make it, since the effort is the same and you will use more than you think.
Common Mistakes to Avoid
- Using too little sugar will result in a paste that ferments or spoils quickly. The sugar acts as a preservative, so stick to the 1/2 cup measurement for four beans.
- Scraping dried or stale beans wastes your effort and money. Test the bean before committing by bending it; if it cracks, it has lost moisture and flavor.
- Buying pre-ground vanilla powder instead of whole beans delivers far less flavor and aroma. Whole beans are worth the small extra cost.
- Skipping the full mixing and pressing step leaves you with clumpy paste that does not incorporate smoothly into batters. Take the full minute to thoroughly combine everything.
Serving Suggestions
Use vanilla bean paste anywhere you would use vanilla extract, but remember that a little goes a long way thanks to its concentrated flavor. You can also use it as a finishing touch on desserts for visual appeal and intense vanilla notes.
- Stir into buttercream frosting for layer cakes and cupcakes
- Swirl into whipped cream as a topping for berries or pie
- Mix into homemade ice cream base before churning
- Add to custards, panna cotta, and other creamy desserts
- Dust over vanilla panna cotta or cheesecake with a pinch of fleur de sel
Variations to Try
- Honey vanilla paste uses honey instead of sugar, creating a thinner, darker paste with caramel notes and natural preservative qualities. Use equal parts honey and vanilla seeds, understanding that honey paste tastes sweeter and less pure-vanilla forward than sugar paste.
- Spiced vanilla paste adds a pinch of sea salt, cardamom, or cinnamon to the basic recipe, creating a more complex flavor profile perfect for coffee cakes and pumpkin desserts. Add spices after mixing the vanilla and sugar, using just 1/8 teaspoon of any single spice to avoid overpowering the vanilla.
- Alcohol-infused paste combines scraped seeds with a splash of vodka or bourbon alongside the sugar, creating a paste that tastes like both extract and paste. Use only 1 tablespoon of clear alcohol to 1/2 cup sugar to avoid making it too wet.
- Coconut vanilla paste swaps half the sugar for unsweetened shredded coconut, delivering tropical flavor alongside vanilla. This variation works beautifully in vegan baking and coconut-forward desserts.
Dietary Adaptations
- Gluten-free: This recipe is naturally gluten-free, but ensure your storage jar and utensils have not contacted gluten-containing ingredients.
- Dairy-free: Vanilla bean paste contains no dairy and works perfectly in all dairy-free baking applications as a direct extract replacement.
- Vegan: This recipe is entirely vegan, using only plant-based ingredients with no processing aids that would compromise vegan status.
- Low-carb/Keto: Replace granulated sugar with erythritol or monk fruit sweetener using a 1:1 ratio, understanding that the paste will be slightly less thick but equally flavorful.
Storage and Reheating
Refrigerator
Vanilla bean paste stores beautifully in the refrigerator for up to six months in an airtight container. The cold does not degrade flavor; in fact, some people prefer the slightly firmer texture it provides.
- Transfer to a small glass jar with a tight-fitting lid
- Keep away from light sources and strong-smelling foods
- Check occasionally for any signs of mold or fermentation
Freezer
Vanilla bean paste freezes well for up to one year, though the sugar content means it will not freeze solid like water-based products. Thaw at room temperature for 30 minutes before using.
- Portion into ice cube trays before freezing for easy measuring later
- Wrap the jar tightly in plastic wrap before freezing to prevent freezer burn
- Transfer frozen portions to an airtight freezer bag once solid
Reheating
Vanilla bean paste does not require reheating since you use it cold or at room temperature in recipes. Simply scoop out the amount you need and use it directly in your recipe.
- Let cold paste sit at room temperature for 10 minutes if it has thickened too much
- Stir gently before using if the paste has separated slightly during storage
- No microwave reheating necessary
Nutrition Information
| Nutrient | Amount |
|---|---|
| Calories | 35 |
| Total Fat | 0g |
| Saturated Fat | 0g |
| Carbohydrates | 9g |
| Fiber | 0g |
| Sugar | 9g |
| Protein | 0g |
| Sodium | 0mg |
| Cholesterol | 0mg |
Nutrition values are approximate and based on one tablespoon serving size. The paste is so concentrated that you typically use only a teaspoon or two per recipe, making the actual nutritional impact negligible.
Frequently Asked Questions
Can I use vanilla bean paste as a direct replacement for vanilla extract?
Yes, use half the amount called for in your recipe since paste is more concentrated. One teaspoon of paste equals roughly one tablespoon of extract in terms of flavor intensity.
Why is my vanilla bean paste grainy or gritty?
This usually means you did not mix long enough or the sugar crystals did not fully absorb the vanilla moisture. Stir for a full minute and press gently against the bowl sides to help dissolution.
How long does homemade vanilla bean paste actually last?
In your pantry, expect six to eight months before flavor noticeably diminishes. In the refrigerator, you will get a full year of excellent quality thanks to cooler temperatures slowing any degradation.
Can I make this with vanilla bean powder instead of whole beans?
You can, but the result will be thinner and less luxurious-looking without those beautiful black specks. Powder works fine functionally but loses the visual appeal that makes homemade paste special.
What if my vanilla beans arrived dried out and hard?
Soak them in warm water for 30 minutes to rehydrate them before scraping. This extra step restores moisture and makes them easier to work with, recovering much of the lost flavor.
Should I refrigerate vanilla bean paste or keep it in the pantry?
Either works fine, though refrigerator storage extends shelf life noticeably. Pantry storage works perfectly if you use your paste regularly and keep the jar tightly sealed away from heat and light.
Final Thoughts
Making your own vanilla bean paste feels fancy but honestly takes less time than ordering takeout. You will feel like a professional baker every time you pull that jar from your pantry and watch other people’s faces light up when they taste what you have created.
Start making this today and you will never go back to extract alone. Your desserts will taste noticeably better, and you will save money while impressing everyone who tries your baking.
Vanilla Bean Paste
Ingredients
Equipment
Method
- Inspect vanilla beans; they should be plump, moist, and flexible.
- Place each bean on a cutting board and, using a sharp paring knife, split it lengthwise without cutting through.
- Scrape the seeds and pulp from each bean into a small bowl.
- Add 1/2 cup granulated sugar to the bowl with the scraped seeds.
- Stir and press the mixture with the back of a spoon for about 1 minute until the sugar absorbs the moisture and forms a glossy paste.
- Optional: Press the paste through a fine mesh strainer for an ultra-smooth texture.
- Transfer the paste to a clean glass jar, packing it down to remove air pockets.
- Seal the jar and store in a cool, dark place for at least 24 hours before using for best flavor development.