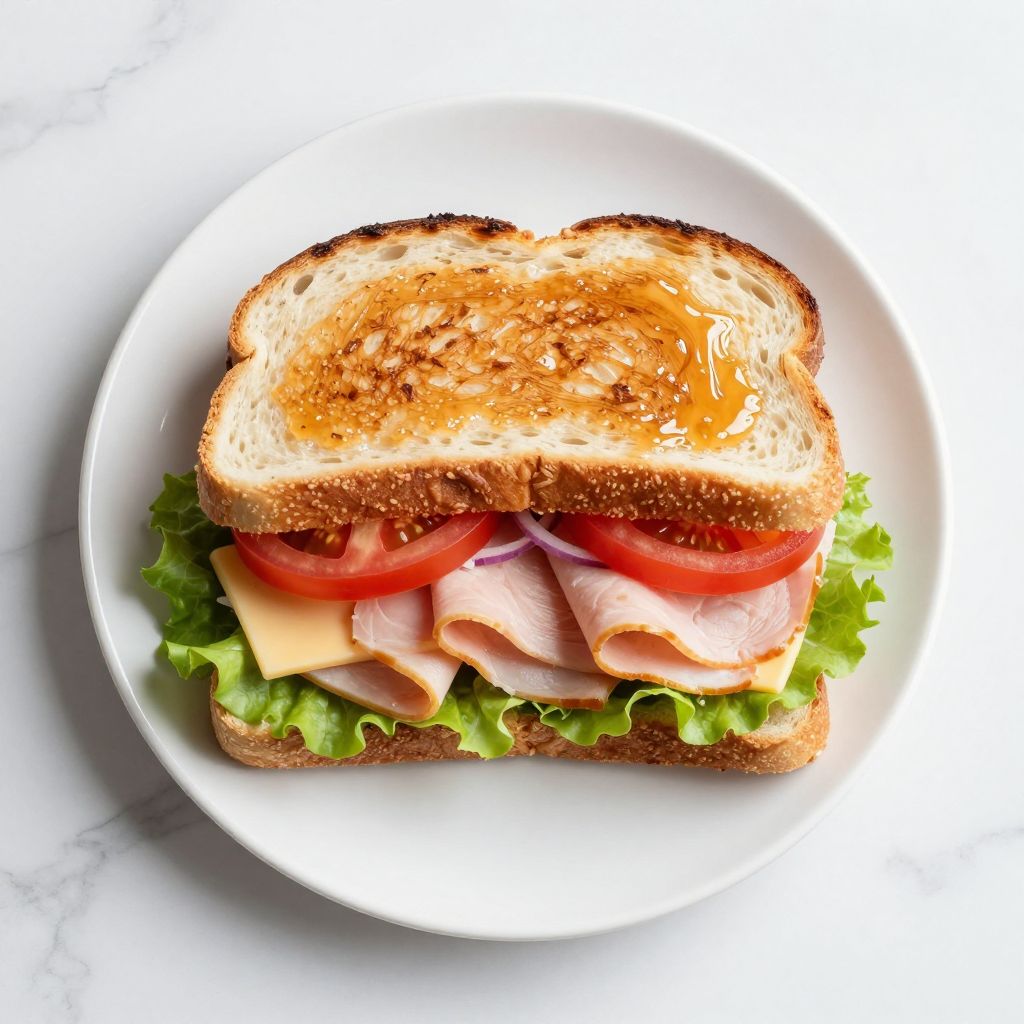
A shiny sandwich recipe transforms everyday bread and fillings into something that catches the eye and satisfies the appetite in equal measure.
The secret to that glossy, appetizing finish lies in a simple glaze technique that takes just minutes to master. Whether you’re packing lunch, hosting guests, or simply craving something that looks as good as it tastes, this method delivers.
Why You’ll Love This Recipe
This sandwich stands out because it looks bakery-fresh and tastes absolutely delicious, all without requiring any special skills or hard-to-find ingredients.
- The shiny glaze makes your sandwich look professionally made and restaurant-quality.
- Takes under 15 minutes from start to finish, perfect for busy weekdays.
- Works with virtually any filling combination you prefer.
- Impresses guests and makes lunchbox meals feel special.
- The glaze keeps bread soft and prevents it from drying out.
My Experience Making This Recipe
The first time I applied a glaze to a sandwich, I honestly expected it to slide right off the bread. Instead, it created this gorgeous, wet-look finish that made the sandwich appear as though it had just come from a high-end deli.
My family’s reaction sealed the deal. They were skeptical until they took a bite and realized the glaze added subtle flavor without making anything soggy.
Since then, I’ve made this recipe dozens of times, experimenting with different glazes and fillings each time. It’s become my go-to method whenever I want to elevate a simple sandwich into something memorable.
Recipe Overview
- Recipe Name: Shiny Sandwich Recipe
- Servings: 1 sandwich
- Prep Time: 5 minutes
- Cook Time: 2 minutes
- Total Time: 7 minutes
- Course: Lunch or Light Dinner
- Cuisine: Modern American
- Calories per Serving: 385
Equipment You Will Need
- Small bowl or shallow dish
- Small pastry brush or clean kitchen brush
- Cutting board
- Serrated bread knife
- Spoon for mixing glaze
Ingredients for Shiny Sandwich Recipe
For the Sandwich
- 2 slices quality bread (sourdough, ciabatta, or brioche work best)
- 2 tablespoons butter or mayo (your choice for spread)
- 3 slices deli turkey or ham (or your preferred protein)
- 1 slice cheese (optional but recommended)
- 2 leaves fresh lettuce
- 2 slices tomato
- A few slices of red onion
For the Shiny Glaze
- 1 tablespoon honey or agave syrup
- 1/2 tablespoon water
- 1/4 teaspoon salt
- 1 pinch of black pepper (optional)
Ingredient Notes and Substitutions
- Honey creates the classic glossy finish and adds a subtle sweetness. You can swap this with agave, maple syrup, or even melted butter mixed with a touch of sugar.
- Quality bread makes an enormous difference because sturdy bread holds the glaze without becoming mushy. If you only have soft white bread, use it, but handle it gently during assembly and glazing.
- The water thins the glaze so it brushes smoothly and evenly. Skip it if your honey is already runny, but most honey needs this dilution.
- Salt enhances the glaze flavor and prevents it from tasting one-dimensional or overly sweet. You can skip it if you’re watching sodium intake, though the glaze will taste less complex.
- Deli meat is traditional, but roasted chicken, tuna salad, or even plant-based deli slices work beautifully with this glaze technique.
How to Make Shiny Sandwich Recipe
Step 1: Prepare Your Glaze Mixture
Combine honey, water, salt, and black pepper in a small bowl and stir until completely smooth. This takes about 30 seconds and ensures the glaze will brush on evenly without any lumps.
Step 2: Slice and Toast Your Bread
Cut your bread slices if needed and lightly toast them for about 1 minute on each side. Toasting creates a subtle barrier that prevents the glaze from over-saturating the bread while still allowing it to absorb enough moisture to stay soft.
Step 3: Apply the Spread
Spread a thin layer of butter or mayo on the inside of both bread slices. This acts as a flavor layer and prevents wet fillings from seeping into the bread.
Step 4: Layer Your Fillings
On the bottom slice, arrange your cheese first, followed by meat, lettuce, tomato, and onion in that order. This stacking method keeps lighter ingredients from getting crushed and creates a balanced bite.
Step 5: Top the Sandwich
Place the second bread slice on top and press down gently to seal all the fillings together. You want the sandwich to hold together without squishing the ingredients.
Step 6: Apply the Glaze to the Top
Using your pastry brush, paint a thin, even layer of the glaze mixture onto the top bread slice. Work from the center outward and use gentle strokes to avoid tearing the bread.
Step 7: Glaze the Sides
Carefully brush glaze onto the exposed edges and sides of the sandwich where the filling shows. This creates an elegant, finished appearance and seals in the fillings.
Step 8: Optional Second Coat
If you want extra shine, wait 30 seconds and apply a second thin coat of glaze. Let it set for a minute before serving to allow the glaze to become tacky and set properly.
Pro Tip: Apply your glaze right before serving, as it looks shiniest when freshly applied and can become dull if it sits too long.
Tips for the Best Shiny Sandwich Recipe
- Use a pastry brush with soft bristles to avoid damaging the bread surface. A worn-out brush with split bristles creates uneven glaze application.
- Keep your glaze mixture warm but not hot when applying it. Warm glaze spreads more easily and looks glossier than cold glaze.
- Don’t oversaturate the bread with glaze or it becomes soggy within minutes. A light, thin coat is all you need for that stunning shine.
- Toast your bread lightly instead of heavily to provide structure while keeping the bread soft enough to bite through easily.
- Assemble your sandwich immediately before glazing so fillings don’t have time to release excess moisture onto the bread.
- Cut your sandwich on a diagonal after the glaze sets to reveal the beautiful cross-section of fillings inside.
Common Mistakes to Avoid
- Using cold glaze straight from the fridge makes it hard to spread evenly and creates a dull finish instead of shine. Always warm it slightly before applying.
- Applying too much glaze makes the bread soggy and causes it to fall apart when you bite down. Less is more with this technique.
- Skipping the salt in your glaze creates a one-note sweetness that tastes flat and unbalanced. The salt wakes up the flavor considerably.
- Using soft, squishy bread that hasn’t been toasted results in a falling-apart sandwich that falls apart before you finish eating it. Toasting is non-negotiable.
- Waiting too long after glazing to eat allows the glaze to absorb fully and lose its glossy appearance. Serve immediately for maximum shine impact.
Serving Suggestions
This sandwich shines brightest when served fresh and can be paired with sides that complement rather than compete with its elegant presentation. Here are some ideas that work beautifully.
- Serve alongside a simple side salad with light vinaigrette to add freshness and vegetables.
- Pair with potato chips or kettle-cooked chips for satisfying crunch and classic lunch appeal.
- Add a cup of tomato soup for a traditional comfort food pairing that matches the sandwich’s warmth.
- Include fresh fruit like apple slices or grapes for a lighter, more balanced meal.
- Serve with a pickle spear and olives for a Mediterranean-inspired lunch setup.
Variations to Try
- Honey mustard glaze: Replace the water with whole grain mustard for a tangy, sophisticated finish that works beautifully with turkey and Swiss cheese.
- Garlic herb glaze: Add 1/4 teaspoon minced garlic and a pinch of Italian seasoning to your base glaze for an aromatic, savory shine.
- Spicy chili glaze: Mix honey with a few drops of hot sauce and a pinch of cayenne for a glossy finish with a subtle kick that pairs well with roast beef.
- Maple bourbon glaze: Swap honey for pure maple syrup and add one drop of vanilla extract for a richer, more complex flavor profile.
- Everything bagel glaze: Mix honey with a pinch of everything bagel seasoning for a trendy, flavorful finish that adds visual interest.
Dietary Adaptations
- Gluten-free: Use certified gluten-free bread and verify that your honey or syrup contains no hidden gluten. The glaze technique remains identical.
- Dairy-free: Substitute vegan butter for regular butter in the spread and use dairy-free cheese or skip cheese entirely. The glaze is naturally dairy-free as written.
- Vegan: Use plant-based deli meat, skip the cheese, and use vegan mayo as your spread. Honey may not be vegan, so swap it for agave or maple syrup instead.
- Low-carb or keto: Use low-carb bread alternatives and skip the honey glaze entirely, or replace it with a thin brush of melted butter seasoned with salt and pepper.
Storage and Reheating
Refrigerator
Store your finished sandwich in an airtight container or wrapped tightly in parchment paper for up to one day. The glaze will lose its shine as it absorbs moisture, but the sandwich still tastes delicious.
- Keep it away from strong-smelling foods to prevent flavor transfer.
- Remove from the fridge 10 minutes before eating to bring it back to closer to room temperature.
Freezer
You can freeze unglazed sandwiches for up to one week if you build them without lettuce, tomato, or other high-water vegetables. Thaw in the refrigerator and apply fresh glaze before serving.
- Wrap the sandwich in plastic wrap, then aluminum foil for best protection.
- Label with the date so you remember when you froze it.
Reheating
This sandwich is best served cold or at room temperature and doesn’t require reheating. If you prefer it warm, wrap it loosely in foil and heat in a 300-degree oven for about 5 minutes.
- Don’t microwave as it makes the bread rubbery and the glaze becomes unappealing.
- Reapply a fresh coat of glaze after warming for optimal appearance.
Nutrition Information
| Nutrient | Amount |
|---|---|
| Calories | 385 |
| Total Fat | 18g |
| Saturated Fat | 5g |
| Carbohydrates | 35g |
| Fiber | 2g |
| Sugar | 8g |
| Protein | 18g |
| Sodium | 820mg |
| Cholesterol | 32mg |
These values are estimates based on standard ingredient amounts and will vary slightly depending on your specific bread choice, meat selection, and portion sizes. If you have specific dietary needs, calculate values using your exact ingredients.
Frequently Asked Questions
Can I make this sandwich ahead of time?
Yes, you can assemble the sandwich without the glaze up to 4 hours ahead. Apply the glaze just before serving to maintain that beautiful shine and prevent the bread from becoming soggy.
What if my honey is too thick to brush on easily?
Warm your honey gently in the microwave for 10 seconds or mix it with slightly more water until it reaches a paintable consistency. Avoid overheating or the honey will become too runny.
Can I use this glaze on other foods?
Absolutely. This honey glaze works beautifully on roasted vegetables, baked chicken, or brushed onto dinner rolls before serving. The salt and honey combination is versatile and enhances many savory dishes.
Why does my glaze look dull instead of shiny?
This usually happens if you apply the glaze too thick or if it sits too long after application. Apply a thin coat right before serving and eat within 5 minutes for maximum shine.
Can I substitute the honey with something else entirely?
Yes. Agave nectar, maple syrup, or even a simple butter mixture with a touch of salt all create shine. Each brings its own subtle flavor, so experiment to find your favorite.
Final Thoughts
This shiny sandwich recipe proves that small techniques can transform an ordinary meal into something that feels special and looks impressive. You’re not just building a sandwich; you’re creating something that tastes as good as it looks, and that’s a win every single time.
Try this recipe today and watch how a simple glaze technique elevates your lunch game. Once you master it, you’ll find yourself reaching for your pastry brush whenever you want to make something memorable.
Shiny Sandwich Recipe
Ingredients
Equipment
Method
- In a small bowl, combine honey (or agave), water, salt, and black pepper; stir until completely smooth, about 30 seconds.
- Lightly toast the two bread slices for about 1 minute per side in a toaster or dry skillet over medium heat.
- Spread a thin layer of butter or mayo on the toasted sides of both bread slices.
- On the bottom slice, layer cheese, deli meat, lettuce, tomato, and red onion in that order.
- Place the top slice of bread over the fillings and press gently to secure the sandwich.
- Using a pastry brush, paint a thin, even coat of glaze over the top bread slice, working from the center outward.
- Carefully brush glaze onto the exposed edges and sides of the sandwich for a complete glossy finish.
- For extra shine, wait 30 seconds and apply a second light coat; let the glaze set for 1 minute before serving.