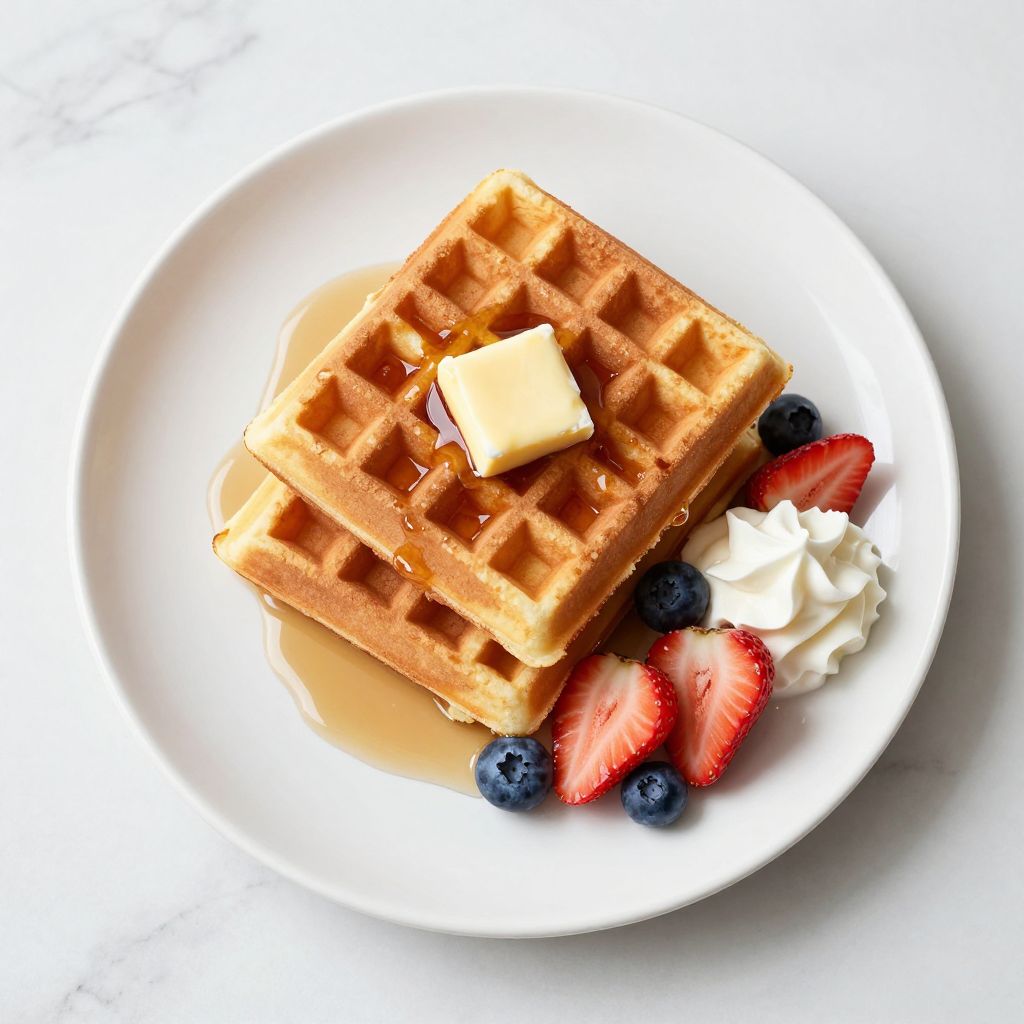
Nothing beats a stack of Bisquick waffles on a lazy Sunday morning when you want something crispy on the outside, fluffy on the inside, and ready in under 20 minutes. This recipe transforms that iconic baking mix into golden, perfectly-textured waffles that rival anything from a fancy brunch spot, but cost a fraction of the price and taste like you actually tried. The secret is in how you handle the batter and your waffle iron temperature, both of which we’ll cover in detail.
Whether you’re feeding a crowd or just yourself, these waffles deliver consistent, restaurant-quality results every single time. Let’s dig into what makes this simple recipe so reliable and delicious.
Why You’ll Love This Recipe
This recipe wins because it’s fast, foolproof, and tastes legitimately fantastic without any fussy techniques or hard-to-find ingredients.
- Ready in 15 minutes from kitchen to plate
- Makes 8 to 10 waffles per batch depending on waffle iron size
- Crispy exterior with a fluffy, tender interior
- Works with pantry staples you likely already have
- Easily customizable with add-ins like chocolate chips or berries
My Experience Making This Recipe
I started making these waffles about three years ago when I wanted a breakfast hack that didn’t involve buying fancy mixes or measuring out five different dry ingredients. The first batch came out golden and crispy, and my family actually requested them over my from-scratch waffle recipe, which stung a little but also felt oddly liberating.
What surprised me most was how the ratio of mix to liquid changes the texture compared to following the box directions. I’ve experimented with extra butter, different milk types, and even a splash of vanilla, and the waffles stay consistently good.
The smell alone when these hit the waffle iron is enough to get everyone out of bed. My kids now ask for these specifically, and the fact that I can have breakfast ready before anyone finishes scrolling their phone is basically witchcraft.
Recipe Overview
- Recipe Name: Bisquick Waffle Recipe
- Servings: 8 to 10 waffles (serves 4)
- Prep Time: 5 minutes
- Cook Time: 12 minutes
- Total Time: 17 minutes
- Course: Breakfast
- Cuisine: American
- Calories per Serving: 220 calories
Equipment You Will Need
- Waffle iron (preferably one that signals when ready and done)
- Large mixing bowl
- Whisk or fork
- Measuring cups and spoons
- Small bowl for wet ingredients
- Spatula or silicon turner
- Serving plate
Ingredients for Bisquick Waffle Recipe
- 2 cups Bisquick baking mix
- 1 and 3/4 cups milk (whole or 2% works best)
- 1 large egg
- 2 tablespoons melted butter, plus more for the iron
- 1 tablespoon granulated sugar
- 1/2 teaspoon vanilla extract
- Pinch of salt (optional, but recommended)
Ingredient Notes and Substitutions
- Bisquick mix is the base because it already contains leavening agents and salt, saving you time and ensuring consistent rise. If you don’t have Bisquick, use 2 cups all-purpose flour mixed with 1 tablespoon baking powder and 1/2 teaspoon salt.
- Whole or 2% milk creates a richer, more tender crumb than skim milk. You can swap in buttermilk for a tangier flavor, though you may need to reduce the baking powder by half since buttermilk reacts differently with leavening.
- The egg binds the batter and adds lift, creating that fluffy interior. If you’re vegan, use a flax egg (1 tablespoon ground flaxseed mixed with 3 tablespoons water) or applesauce, though the texture will be slightly less airy.
- Melted butter enriches the waffles and adds browning power. Vegetable oil or melted coconut oil works in a pinch, but butter delivers better flavor and color.
- Vanilla extract adds subtle depth without making the waffles taste sweet. You can skip it entirely if you don’t have it on hand, or use almond extract for a different flavor angle.
How to Make Bisquick Waffle Recipe
Step 1: Preheat Your Waffle Iron
Plug in your waffle iron and let it heat for at least 3 to 5 minutes until it reaches full temperature. A properly preheated iron ensures your waffles cook evenly and develop that golden crust rather than steaming into pale, soggy discs.
Step 2: Combine Dry Ingredients
Pour 2 cups of Bisquick mix into a large mixing bowl. Add 1 tablespoon sugar and a pinch of salt, then whisk everything together for about 10 seconds to break up any clumps and distribute the leavening agents evenly.
Step 3: Mix Wet Ingredients Separately
In a separate small bowl, whisk together 1 and 3/4 cups milk, 1 large egg, 2 tablespoons melted butter, and 1/2 teaspoon vanilla extract until the mixture is smooth and combined. Mixing wet and dry separately prevents overmixing, which is the number-one enemy of fluffy waffles.
Step 4: Combine Wet and Dry
Pour the wet ingredients into the bowl with the dry ingredients and stir with a whisk or fork until the mixture just comes together. Stop as soon as you see no white streaks of dry mix; lumps are fine and actually desirable here since overmixing develops gluten and makes waffles dense rather than fluffy.
Step 5: Let Batter Rest
Let the batter sit for 1 minute while you butter your waffle iron. This brief rest allows the Bisquick to fully hydrate and the baking powder to begin activating, which helps your waffles puff up beautifully.
Step 6: Butter the Waffle Iron
Use a pastry brush or paper towel to lightly coat the top and bottom grids with melted butter or cooking spray. This step is critical because even nonstick irons benefit from this extra insurance against sticking, especially for the first waffle.
Step 7: Pour and Cook the Waffles
Pour about 1/2 cup of batter into the center of the preheated waffle iron (adjust based on your iron’s size; you want it about 3/4 full). Close the lid immediately and cook for 3 to 4 minutes, or until the steam stops escaping and the waffle is golden brown on the outside.
Resist the urge to peek or open the iron early, as this releases steam and causes uneven cooking. When the waffle is done, the iron typically signals with a beep or light, or you’ll simply see no more steam.
Step 8: Remove and Serve
Use a silicon or plastic spatula to gently lift the waffle out of the iron and place it on a serving plate. If you’re making multiple waffles, place finished ones on a wire rack so they stay crispy instead of steaming themselves into softness on a solid plate.
Step 9: Repeat Until Batter Is Gone
Stir the batter briefly between each waffle since the Bisquick mix can settle slightly. Pour the next batch and repeat until all batter is used or you’ve made as many waffles as you need.
Pro Tip: Don’t open your waffle iron until the steam stops completely; opening early traps moisture inside and guarantees a soggy, undercooked waffle.
Tips for the Best Bisquick Waffle Recipe
- Use the exact milk measurement listed because the Bisquick mix varies slightly between brands in moisture absorption. Too much milk makes soggy waffles; too little makes them dense and crumbly.
- Keep your waffle iron at medium to medium-high heat throughout all batches. If the first waffle burns before it finishes cooking, lower the heat slightly for the next one.
- Add mix-ins like chocolate chips, blueberries, or chopped nuts directly to the batter just before cooking, but don’t overstir or you’ll knock out the air bubbles you worked hard to preserve.
- If your waffles taste bland, bump up the vanilla to 1 teaspoon or add a pinch of cinnamon or nutmeg to the dry mix for subtle warmth and depth.
- Make the batter fresh each time rather than storing leftover batter in the fridge, as the leavening agents lose potency quickly once the wet and dry ingredients combine.
- Serve waffles immediately with your favorite toppings, or keep finished ones warm in a 200-degree oven on a wire rack while you finish cooking the rest.
Common Mistakes to Avoid
- Opening the waffle iron too early traps steam inside and creates waffles that are crispy outside but gummy in the middle. Wait until steam stops before peeking.
- Overmixing the batter develops the gluten in the flour and makes waffles tough and dense instead of light and fluffy. Stir just until combined and accept the lumps.
- Using cold milk or eggs straight from the fridge slows cooking and prevents proper rise. Let ingredients sit at room temperature for 15 minutes if you have the time, or use warm milk.
- Forgetting to butter the waffle iron before the first batch causes sticking and torn waffles that fall apart when you try to remove them.
- Stacking finished waffles on a solid plate traps steam underneath and makes them soggy within minutes. Use a wire rack or serve immediately instead.
Serving Suggestions
These waffles shine with both sweet and savory toppings, so you have plenty of options for breakfast, brunch, or even a casual dinner.
- Classic route: maple syrup, butter, and whipped cream with a dusting of powdered sugar
- Fresh fruit: sliced strawberries, blueberries, or peaches with yogurt and honey
- Decadent option: Nutella, sliced bananas, and crushed hazelnuts
- Savory angle: fried egg, crispy bacon, sharp cheddar, and a drizzle of hot sauce
- Brunch-style: smoked salmon, creme fraiche, dill, and capers for something sophisticated
Variations to Try
- Add 1/2 teaspoon cinnamon and 1/4 teaspoon nutmeg to the dry mix for apple pie inspired waffles, and fold in 1/2 cup diced apple just before cooking.
- Stir 1/3 cup of mini chocolate chips or chopped white chocolate into the batter for chocolate lovers, which adds richness without making the waffles overly sweet.
- Replace 1/2 cup of the milk with buttermilk to create a tangier, slightly thinner waffle that tastes a bit more sophisticated and pairs beautifully with fruit.
- Add 2 tablespoons of cocoa powder and 1 extra tablespoon of sugar to the dry ingredients for chocolate waffles that taste indulgent but still feel like breakfast.
- Fold in 1/2 cup of shredded coconut and 1/2 teaspoon coconut extract for a tropical twist that works especially well with pineapple or mango toppings.
Dietary Adaptations
- Gluten-free: Use a 1-to-1 gluten-free flour blend in place of Bisquick, or swap in a dedicated gluten-free baking mix, though the texture may be slightly less crispy.
- Dairy-free: Replace milk with unsweetened almond milk, oat milk, or coconut milk, and swap butter for coconut oil or dairy-free butter in equal amounts.
- Vegan: Use a flax egg and dairy-free milk as mentioned above, and ensure your Bisquick is vegan certified since some versions contain animal products.
- Low-carb or keto: Use almond flour or coconut flour instead of Bisquick, though you’ll need to adjust ratios and add more leavening, and the waffles will have a different texture entirely.
Storage and Reheating
Refrigerator
Cool leftover waffles completely on a wire rack, then store them in an airtight container with parchment between layers to prevent sticking. They’ll keep for up to 3 days.
- Reheat in a toaster oven at 350 degrees for 5 to 7 minutes until warmed through and crispy again
- Or pop them in a regular toaster on medium setting for a quick refresh
Freezer
Freeze cooled waffles on a baking sheet for 2 hours, then transfer them to a freezer bag or airtight container where they’ll keep for up to 2 months. Parchment between layers prevents them from sticking together.
- Toast frozen waffles directly in a toaster or toaster oven without thawing first
- Reheat in a 350-degree oven for 8 to 10 minutes if you prefer a gentler warming
Reheating
Toasters are fastest and restore crispiness best, while oven reheating is gentler if you’re warming a larger batch. Never microwave waffles unless you enjoy the texture of a rubber sponge.
- Add fresh toppings after reheating so berries and whipped cream don’t warm up and lose their appeal
Nutrition Information
| Nutrient | Amount |
|---|---|
| Calories | 220 |
| Total Fat | 8g |
| Saturated Fat | 3g |
| Carbohydrates | 32g |
| Fiber | 0g |
| Sugar | 3g |
| Protein | 4g |
| Sodium | 480mg |
| Cholesterol | 22mg |
These values are estimates based on the ingredients listed and assume 8 waffles per batch. Actual nutrition varies based on your specific brands and any add-ins or toppings you use.
Frequently Asked Questions
Can I use self-rising flour instead of Bisquick?
Self-rising flour contains leavening agents like Bisquick does, so technically yes, but the ratios might throw off your results since Bisquick also contains fat and salt. Stick with the recipe as written for best results, or swap in another baking mix if you prefer.
How do I make crispy waffles instead of fluffy ones?
Use slightly less milk (reduce to 1.5 cups) to create a thicker batter, and cook the waffles a minute or two longer until they’re darker gold. The extra cooking time evaporates more moisture and creates a crispier texture throughout.
Can I make the batter ahead of time?
The batter is best used immediately after mixing since the baking powder begins activating the moment it hydrates. If you must prep ahead, mix the dry ingredients the night before and whisk the wet ingredients just before cooking, then combine them fresh.
Why are my waffles coming out pale instead of golden?
Pale waffles usually mean your iron isn’t hot enough or you’re opening it too soon. Let the iron heat for a full 5 minutes and resist peeking until steam stops completely, then increase the heat slightly for the next batch.
Is there a way to make these waffles fluffier?
Separate the egg white from the yolk, whisk the white to stiff peaks, and fold it into the batter just before cooking. This extra air creates impossibly fluffy waffles, though it adds an extra step and a dirty bowl to the process.
Can I add fresh berries directly to the batter?
Yes, but toss them lightly in a bit of flour first so they don’t sink to the bottom or bleed color into the batter. Add them just before pouring the batter into the iron so they stay whole and delicious.
Final Thoughts
This Bisquick waffle recipe proves that simple ingredients and good technique are all you need to make breakfast feel special. The fact that you can have a homemade, crispy-on-the-outside, fluffy-on-the-inside waffle in your hand within 17 minutes is honestly kind of magical in our busy lives.
Make these waffles this weekend, top them however you like, and watch everyone at your table actually put their phones down. You’ve got this, and your breakfast game is about to level up in the best possible way.
Bisquick Waffle Recipe
Ingredients
Equipment
Method
- Preheat the waffle iron for 3–5 minutes, or until it reaches full temperature.
- In a large bowl, whisk together 2 cups Bisquick, 1 tablespoon sugar, and a pinch of salt.
- In a small bowl, whisk 1 3/4 cups milk, 1 large egg, 2 tablespoons melted butter, and 1/2 teaspoon vanilla until smooth.
- Pour the wet ingredients into the dry mixture and stir just until no dry streaks remain; lumps are fine.
- Let the batter rest for 1 minute while lightly brushing the waffle iron grids with melted butter.
- Pour about 1/2 cup batter onto the center of the hot iron (about 3/4 full), close, and cook for 3–4 minutes until steam stops and the waffle is golden brown.
- Use a spatula to remove the waffle and place it on a wire rack or serving plate.
- Repeat greasing the iron lightly and cooking remaining batter, stirring the batter briefly between waffles.
- Serve waffles hot with your favorite toppings such as butter, maple syrup, or fresh fruit.