Chili oil is one of the simplest condiments you can make at home, yet it transforms everything it touches. With just chili peppers, oil, and a handful of aromatics, you’ll create a versatile condiment that beats anything from a bottle.
This recipe takes about 15 minutes of active time and delivers weeks of spicy, flavorful results that elevate pasta, soups, roasted vegetables, and even pizza. Let me show you how to make it.
Why You’ll Love This Recipe
Homemade chili oil puts you in complete control of heat level, flavor profile, and ingredient quality. You’ll save money compared to fancy store versions while enjoying superior taste and freshness.
- Ready in minutes with minimal hands-on time.
- Customizable heat and flavor to match your preferences.
- Stores for weeks, making it perfect for meal prep.
- Works on nearly any savory dish you can imagine.
- Impresses dinner guests and makes an excellent homemade gift.
My Experience Making This Recipe
The first time I made chili oil at home, I was skeptical that something so simple could rival the commercial versions I’d been buying. Within one batch, I was hooked and honestly annoyed I’d wasted money on inferior products for years.
I’ve since made this at least 20 times, experimenting with different chili varieties, infusion times, and aromatics. The smell alone when the oil hits the pan is intoxicating, and watching friends’ faces light up when they taste it on fresh bread never gets old.
My favorite discovery was adding a touch of Sichuan peppercorn for a subtle numbing tingle that keeps people coming back for more. Once you have a bottle in your fridge, you’ll find yourself drizzling it on everything.
Recipe Overview
- Recipe Name: Chili Oil
- Servings: Makes about 1 cup
- Prep Time: 10 minutes
- Cook Time: 5 minutes
- Total Time: 15 minutes plus infusion time
- Course: Condiment
- Cuisine: Asian-inspired
- Calories per Serving: 120 calories per tablespoon
Equipment You Will Need
- Small saucepan or skillet
- Glass jar or bottle for storage
- Fine mesh strainer
- Paper towels
- Spoon for stirring
- Measuring cups and spoons
- Cutting board and knife
Ingredients for Chili Oil
- 1 cup neutral oil (vegetable, canola, or light olive oil)
- 3 to 4 dried red chilies (adjust based on heat preference)
- 2 to 3 fresh red chilies (optional, for fresh kick)
- 1 tablespoon chili flakes (red pepper flakes)
- 4 garlic cloves, thinly sliced
- 1 teaspoon Sichuan peppercorns (optional, for subtle numbing sensation)
- 1 teaspoon cumin seeds (optional)
- 1 teaspoon coriander seeds (optional)
- Salt to taste
- 1 small piece of ginger, thinly sliced (optional)
Ingredient Notes and Substitutions
- Neutral oil carries the heat and flavors without overpowering them. If you prefer, infuse-quality olive oil for a richer taste, though it may solidify when chilled.
- Dried red chilies provide concentrated flavor and authentic depth. You can skip them and use only chili flakes if you prefer convenience, though the result will taste less complex.
- Fresh red chilies add brightness and texture to the finished oil. Substitute with more dried chilies or increase flakes if fresh peppers are unavailable, though you’ll lose some fresh pepper character.
- Chili flakes deliver consistent heat and are widely available. You can substitute with cayenne powder, but use slightly less as it’s spicier.
- Garlic infuses savory depth into the oil. Omit if you dislike garlic, though your oil will taste less rich and complex.
- Sichuan peppercorns create a subtle numbing, tingling sensation unique to this spice. Skip them if you don’t enjoy that sensation, or substitute black peppercorns for traditional peppery heat instead.
How to Make Chili Oil
Step 1: Prepare Your Chilies
Start by removing the stems from your dried red chilies and shaking out most of the seeds. Keeping a few seeds adds extra heat, but removing them makes the oil less intensely fiery and more approachable for most palates.
Step 2: Slice Your Aromatics
Thinly slice your garlic cloves and ginger into uniform pieces so they infuse evenly into the oil. Consistency in size matters here because thick pieces won’t flavor the oil as effectively as thin slices will.
Step 3: Combine Dry Spices
If using optional spices like cumin, coriander, or Sichuan peppercorns, add them to a small bowl along with your prepared dried chilies and chili flakes. Mixing them ahead prevents them from scattering when you add the hot oil.
Step 4: Heat Your Oil
Pour your neutral oil into a small saucepan and heat it over medium heat until it shimmers and reaches about 325 to 350 degrees Fahrenheit. You want the oil hot enough to infuse the flavors but not so hot it burns them, which would create a bitter taste.
Step 5: Toast the Aromatics Briefly
Add your sliced garlic and ginger to the hot oil and let them cook for about 30 to 45 seconds, stirring occasionally. This brief toasting develops their flavors without letting them brown or burn, which would make the oil taste harsh.
Step 6: Add the Chilies and Spices
Pour your chili mixture into the hot oil carefully and remove the pan from heat immediately. The residual heat will continue to infuse the flavors while preventing the chilies from scorching or turning dark brown.
Step 7: Let It Infuse
Allow the oil to cool to room temperature, which takes about 30 minutes and lets the flavors fully develop and meld together. You’ll notice the oil gradually becoming darker and more fragrant as it cools, which is exactly what you want.
Step 8: Strain and Store
Once cooled, pour the oil through a fine mesh strainer lined with paper towels into your storage jar, pressing gently on the solids to extract all the flavorful oil. Store in a cool, dark place or the refrigerator for up to three weeks, though the flavor peaks within the first two weeks.
Pro Tip: Leave a few chili flakes and sliced garlic in the finished oil for visual appeal and bursts of extra flavor when drizzling.
Tips for the Best Chili Oil
- Use whole dried chilies rather than pre-made chili powder, which contains added spices and filler ingredients that muddy the flavor profile.
- Don’t skip the cooling step; it’s when the magic happens as flavors fully integrate and the oil becomes silky and cohesive.
- Taste the oil as it cools and adjust salt at that point, adding just a pinch to enhance the other flavors without making it taste seasoned.
- Keep your storage jar completely dry before filling it, as any water droplets can cause mold or spoilage over time.
- Invest in quality oil; cheaper oils can have off-flavors that become more noticeable when infused.
- Label your jar with the date so you know when to make a fresh batch and don’t accidentally use oil that’s past its prime.
Common Mistakes to Avoid
- Overheating the oil causes the chilies to burn and turn bitter, ruining the entire batch with a harsh, unpleasant taste.
- Skipping the straining step leaves sediment that can continue to release flavors unpredictably and may eventually spoil.
- Using stale or old chilies results in weak, dusty flavors that won’t properly infuse the oil.
- Sealing the jar while the oil is still hot traps moisture inside, which promotes mold growth and ruins your condiment.
- Adding too much garlic overwhelms the chili flavor and can turn the oil unpleasantly pungent after a few days.
Serving Suggestions
Chili oil is endlessly versatile and works on nearly every savory dish imaginable. Drizzle it freely without hesitation and adjust the amount based on your heat tolerance.
- Finish hot pasta, soups, and stews with a generous drizzle just before serving.
- Top creamy dishes like hummus, burrata cheese, or whipped feta for a spicy contrast.
- Serve alongside fresh bread and olives for an elegant appetizer.
- Drizzle over roasted vegetables, pizza, or grilled fish for instant flavor boost.
- Mix into mayonnaise or yogurt to create a spicy dipping sauce or spread.
Variations to Try
- Smoky Chili Oil: Replace some dried chilies with chipotles in adobo sauce for a deep, smoky flavor that pairs beautifully with grilled meats and beans.
- Garlic Lover’s Version: Double or triple the garlic for a more assertive, savory oil that works especially well on bread and in soups.
- Citrus Chili Oil: Add a tablespoon of lemon or lime zest before storing for brightness that complements seafood and light pasta dishes.
- Spiced Chili Oil: Include star anise, cardamom, or fennel seeds for a warmer, more complex flavor profile inspired by Chinese cuisine.
- Herb-Infused Version: Add dried oregano, thyme, or rosemary to the oil for Mediterranean flavor that enhances Italian and Greek dishes.
Dietary Adaptations
- Gluten-free: This recipe is naturally gluten-free as written; just verify that any purchased spices are certified gluten-free if you have celiac disease.
- Dairy-free: The recipe contains no dairy and works perfectly for dairy-free diets without any modifications needed.
- Vegan: This recipe is completely vegan since it uses only plant-based oil and vegetables with no animal products involved.
- Low-carb and Keto: Chili oil is virtually carb-free and fits seamlessly into low-carb and keto diets for adding flavor without impacting macros.
Storage and Reheating
Refrigerator
Store your chili oil in a glass jar with a tight-fitting lid in the coldest part of your refrigerator. Properly stored, it keeps for up to three weeks, though the flavor is best within the first two weeks.
- Make sure the jar is completely sealed to prevent air exposure.
- Keep it away from the door where temperature fluctuates.
Freezer
You can freeze chili oil for longer storage, though it becomes very thick and solid when frozen. This doesn’t affect the flavor, but it does make portioning difficult.
- Freeze in ice cube trays for easy portion control.
- Transfer frozen cubes to freezer bags once solid for compact storage.
- Use frozen oil within two months for best flavor.
Reheating
Chili oil doesn’t need reheating and tastes best used straight from the jar at room temperature. If it’s been refrigerated and feels too thick, let it sit on the counter for a few minutes to soften slightly.
- Never microwave or heat stored chili oil, as this can damage the flavor.
- Drizzle directly from the jar onto hot dishes where it warms naturally from the food’s heat.
Nutrition Information
| Nutrient | Amount |
|---|---|
| Calories | 120 |
| Total Fat | 14g |
| Saturated Fat | 1.5g |
| Carbohydrates | 0.5g |
| Fiber | 0g |
| Sugar | 0g |
| Protein | 0g |
| Sodium | 50mg |
| Cholesterol | 0mg |
Nutrition values are approximate and based on one tablespoon serving of finished chili oil. Values may vary slightly depending on specific oil brand and exact ingredient amounts used.
Frequently Asked Questions
Can I use fresh chilies instead of dried?
You can use fresh chilies, but they produce a different flavor profile that’s brighter but less concentrated than dried. If using only fresh, increase the amount to four or five peppers and follow the same heating method for best results.
How hot will my chili oil be?
The heat level depends entirely on the chili varieties you choose and how many seeds you keep in. Start with fewer chilies or remove all seeds, then add more heat in future batches once you know your preference.
Will the oil separate or solidify?
Chili oil naturally solidifies slightly when refrigerated, which is normal and doesn’t indicate any problem. It returns to liquid consistency when you remove it from the fridge or use it on hot food.
Can I reuse the leftover chili solids?
Yes, the strained solids still contain flavor and can be mixed into mayo, yogurt, or cream cheese for a spicy spread. You can also sprinkle them over finished dishes for extra texture and heat.
Is homemade chili oil safe to store at room temperature?
Since this recipe contains garlic and aromatics, storing it at room temperature risks botulism if conditions allow bacteria growth. Refrigerate your chili oil and discard if you notice any off smells or cloudiness.
Can I make this in larger batches?
Absolutely, this recipe scales up easily by multiplying all ingredients proportionally. Just use the same heating and infusion method and store the excess in separate glass jars.
Final Thoughts
Making your own chili oil at home reveals just how simple it is to create restaurant-quality condiments that cost pennies to produce. Once you taste homemade chili oil versus store-bought versions, you’ll never go back.
Give this recipe a try this week and watch how quickly it becomes a staple in your kitchen. Your future self will thank you every time you drizzle it on something delicious.
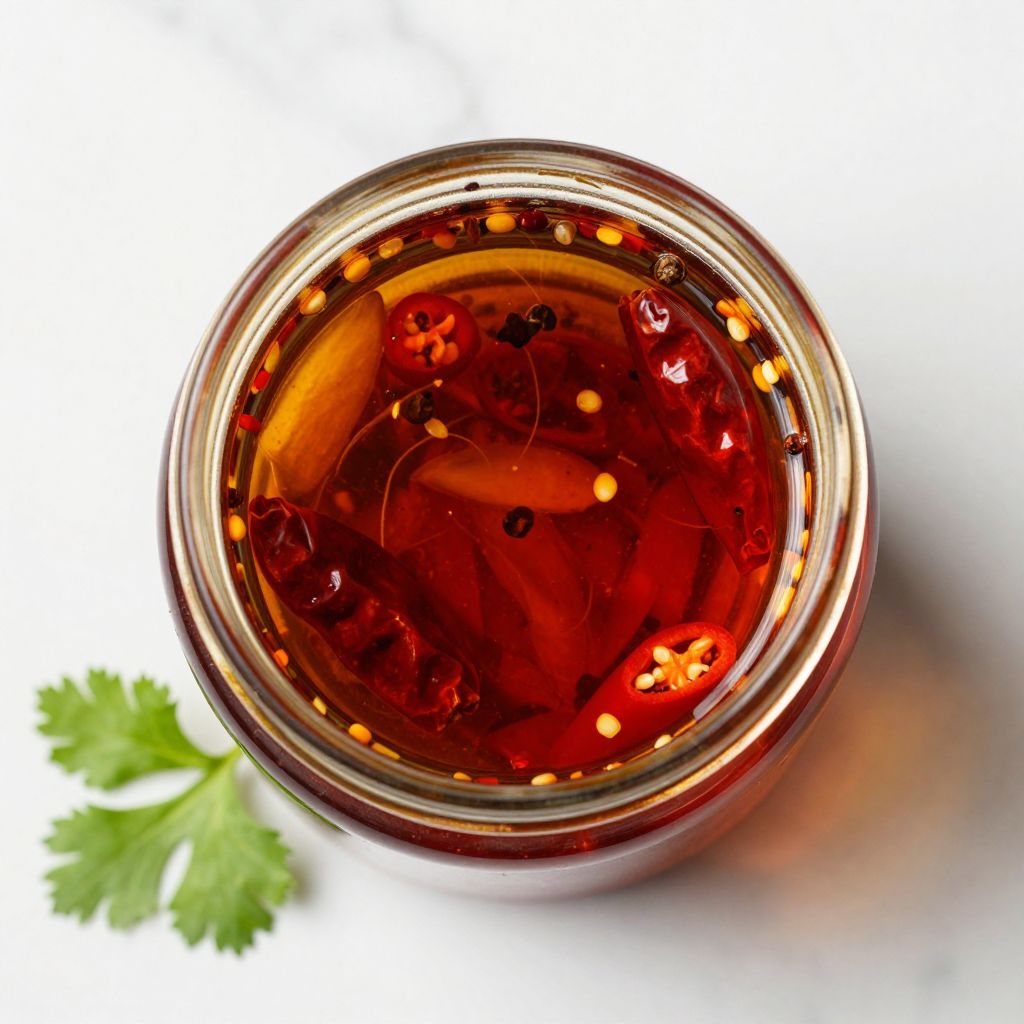
Homemade Chili Oil
Ingredients
Equipment
Method
- Remove stems from dried chilies and shake out most seeds; set aside.
- Thinly slice garlic cloves and ginger for even infusion.
- Combine dried chilies, fresh chilies, chili flakes, Sichuan peppercorns, cumin seeds, and coriander seeds in a heat-proof bowl or keep nearby if adding directly to the pan.
- Pour the neutral oil into a small saucepan and heat over medium until shimmering and 325–350°F (about 3–4 minutes).
- Add sliced garlic and ginger to the hot oil; cook 30–45 seconds, stirring, until fragrant but not browned.
- Carefully add the chili and spice mixture to the oil and immediately remove the pan from heat; stir for 30 seconds to prevent scorching.
- Let the oil cool and infuse at room temperature for about 30 minutes.
- Strain the cooled oil through a fine mesh strainer lined with paper towels into a clean, dry glass jar, pressing on solids to extract maximum flavor. Leave a few flakes for visual appeal if desired.
- Season with a pinch of salt, seal the jar, and refrigerate for up to 3 weeks.