Chicken Riggies is a beloved Utica, New York specialty that combines tender chicken, rigatoni pasta, and a rich tomato sauce with peppers and onions into one irresistible baked dish. This comfort food classic delivers bold Italian-American flavors that warm you from the inside out.
If you’ve never tried this regional gem, you’re missing out on one of the most satisfying pasta dishes around. Let me show you how to make it at home with confidence and ease.
Why You’ll Love This Recipe
Chicken Riggies hits all the marks for a weeknight dinner or weekend gathering.
- Loaded with tender chicken and hearty rigatoni in a savory tomato sauce
- One-dish meal that feels restaurant-quality but comes together in under an hour
- Freezer-friendly, so you can make it ahead for busy nights
- Feeds a crowd without requiring complicated techniques
- Flexible enough to customize with your favorite vegetables or cheese blends
My Experience Making This Recipe
The first time I made Chicken Riggies, I was skeptical about the simplicity of the ingredient list. How could something so basic taste so incredible?
The answer hit me the moment the oven opened and that aroma filled my kitchen. The peppers soften into the sauce, the chicken stays juicy, and the cheese gets just slightly golden on top.
My family devoured it so fast I barely got a second helping. Now it’s become a regular rotation in my meal planning, and I make a double batch so I always have leftovers ready to reheat.
Recipe Overview
- Recipe Name: Chicken Riggies
- Servings: 6
- Prep Time: 15 minutes
- Cook Time: 35 minutes
- Total Time: 50 minutes
- Course: Main Dish
- Cuisine: Italian-American
- Calories per Serving: 520
Equipment You Will Need
- Large pot for boiling pasta
- Colander for draining
- Large skillet or Dutch oven
- Wooden spoon for stirring
- 9×13 inch baking dish
- Measuring cups and spoons
- Sharp knife for chopping
- Cutting board
Ingredients for Chicken Riggies
- 1 pound boneless, skinless chicken breasts, cut into bite-sized chunks
- 1 pound rigatoni pasta
- 2 tablespoons olive oil
- 1 large onion, diced
- 2 large bell peppers (red and/or green), chopped into chunks
- 4 cloves garlic, minced
- 1 can (28 ounces) crushed tomatoes
- 1 can (6 ounces) tomato paste
- 1 teaspoon dried Italian seasoning
- 1/2 teaspoon red pepper flakes
- Salt and black pepper to taste
- 1 cup whole milk or heavy cream
- 1.5 cups shredded mozzarella cheese
- 1/2 cup grated Parmesan cheese
Ingredient Notes and Substitutions
- Chicken breasts: Chicken breasts provide a lean protein that stays tender when cut into chunks and cooked in the sauce. You can swap in chicken thighs for a richer, more forgiving texture, though the flavor will be slightly different.
- Rigatoni pasta: The tube shape of rigatoni catches the sauce beautifully and holds up well during baking. Penne or ziti work as acceptable alternatives if rigatoni is unavailable.
- Crushed tomatoes: Crushed tomatoes create a smooth, cohesive sauce base. Canned diced tomatoes will work but will result in a chunkier texture.
- Mozzarella cheese: Mozzarella melts evenly and creates that classic stringy, melted top layer. Part-skim mozzarella works fine and keeps the dish lighter.
- Cream: Heavy cream adds richness and helps balance the acidity of the tomato sauce. Half-and-half or even whole milk works as a lighter substitute.
How to Make Chicken Riggies
Step 1: Cook the Pasta
Bring a large pot of salted water to a boil and add the rigatoni. Cook the pasta about 2 minutes short of the package’s recommended time, since it will finish cooking in the oven and you don’t want it mushy.
Drain the pasta in a colander and set it aside. Slightly undercooking helps the pasta absorb the sauce without becoming overcooked.
Step 2: Season and Brown the Chicken
Pat the chicken chunks dry with paper towels and season them lightly with salt and black pepper. This helps them brown more evenly in the skillet.
Heat olive oil in a large skillet over medium-high heat. When the oil shimmers, add the chicken in a single layer and cook for 3 to 4 minutes per side until golden brown, then transfer to a plate.
Step 3: Saute the Vegetables
In the same skillet, add the diced onion and bell peppers. Cook them over medium heat for about 5 minutes, stirring occasionally, until they start to soften and the onions become translucent.
Softening the peppers and onions here lets them release their natural sugars and become tender before everything bakes, so they blend seamlessly into the sauce.
Step 4: Add Garlic and Tomato Paste
Add the minced garlic to the vegetables and cook for 1 minute, stirring constantly, until fragrant. The brief cooking time releases the garlic flavor without letting it burn.
Stir in the tomato paste and cook for another minute to caramelize it slightly. This deepens the tomato flavor and removes any raw paste taste.
Step 5: Build the Sauce
Pour in the crushed tomatoes, Italian seasoning, and red pepper flakes. Stir well to combine and return the cooked chicken to the skillet.
Simmer the mixture over medium heat for 5 minutes, stirring occasionally, so the chicken finishes cooking through and the flavors meld together. The sauce should smell rich and savory at this point.
Step 6: Add the Cream
Remove the skillet from heat and stir in the heavy cream or milk. The cream cools the mixture slightly and adds a velvety texture that balances the acidity of the tomatoes.
Taste the sauce and adjust the seasoning with salt and black pepper as needed. Remember that the cheese will add saltiness later, so go easy on the salt now.
Step 7: Combine Pasta and Sauce
Add the cooked rigatoni to the skillet with the sauce and chicken. Stir gently until every piece of pasta is coated and evenly distributed throughout.
Combining everything off the heat prevents the pasta from sticking together and ensures the sauce distributes evenly before baking.
Step 8: Assemble and Bake
Transfer the entire pasta mixture to a 9×13 inch baking dish and spread it into an even layer. Combine the shredded mozzarella and grated Parmesan in a small bowl, then sprinkle the cheese mixture evenly over the top.
Bake at 375 degrees Fahrenheit for 20 to 25 minutes, until the cheese melts and the top develops light golden spots. The edges of the dish will bubble slightly when it’s ready.
Pro Tip: Don’t skip the step of undercooking the pasta by 2 minutes; this single adjustment prevents the rigatoni from becoming mushy after baking.
Tips for the Best Chicken Riggies
- Cut your chicken into uniform bite-sized pieces so they cook evenly and don’t leave some pieces raw while others dry out.
- Brown the chicken properly before adding it to the sauce; this creates deeper flavor through the Maillard reaction, not just pale cooked chicken.
- Don’t skip salting your pasta water; this is your only chance to season the pasta itself from the inside.
- Use a combination of mozzarella and Parmesan rather than just mozzarella for more complex cheese flavor and better browning on top.
- Let the baked dish sit for 5 minutes after coming out of the oven before serving; this helps it set slightly and makes plating cleaner.
- Make this dish the day before and refrigerate it unbaked, then bake it fresh when you’re ready; it actually tastes better this way as the flavors meld overnight.
Common Mistakes to Avoid
- Cooking the pasta all the way through before adding it to the sauce leads to mushy, overcooked rigatoni by the time the dish finishes baking.
- Skipping the browning step on the chicken results in pale, bland pieces that don’t contribute real depth to the final dish.
- Using too much cream can make the sauce cloying and mask the tomato flavor; stick to the recommended amount.
- Not seasoning the sauce properly before it goes into the oven means you can’t fix it once it’s baked; taste and adjust now.
- Baking at too high a temperature will brown the cheese too quickly while leaving the interior cold, so stick to 375 degrees.
Serving Suggestions
Chicken Riggies is hearty enough to stand alone, but a few thoughtful sides round out the meal beautifully. Serve it warm straight from the baking dish for maximum comfort and ease.
- Fresh garden salad with a light vinaigrette to cut through the richness
- Garlic bread or toasted ciabatta for soaking up extra sauce
- Steamed or roasted green beans seasoned with garlic and olive oil
- Simple arugula salad with lemon juice and Parmesan shavings
- Roasted broccoli or zucchini for a vegetable-forward side
Variations to Try
- Spicy Version: Add 1 teaspoon of hot sauce or increase the red pepper flakes to 1 full teaspoon for a fiery kick that lingers pleasantly.
- Vegetarian Riggies: Replace the chicken with cubed firm tofu or add extra mushrooms and zucchini for a plant-based version that’s just as satisfying.
- White Wine Addition: Add 1/2 cup of dry white wine to the sauce after browning the chicken; simmer it for 2 minutes to burn off the alcohol and add complexity.
- Bacon Version: Cook 4 slices of bacon, crumble it, and stir it into the sauce along with the cooked chicken for a smoky depth.
- Seafood Riggies: Replace the chicken with large shrimp added in the last few minutes of sauce cooking for a lighter, briny twist.
Dietary Adaptations
- Gluten-Free: Use gluten-free rigatoni in place of regular pasta; the sauce and cooking method remain exactly the same, though the texture will be slightly softer.
- Dairy-Free: Substitute the mozzarella and Parmesan with dairy-free cheese blends, and use unsweetened coconut milk or oat milk in place of heavy cream, though the richness will be noticeably lighter.
- Vegan: Use plant-based chicken or extra vegetables like zucchini and eggplant, swap the cream for coconut milk, and use dairy-free cheese; the result is lighter but still deeply flavorful.
- Low-Carb/Keto: Replace the rigatoni with spiralized zucchini or cauliflower rice; keep the rest of the recipe the same, though the texture will be very different and less filling.
Storage and Reheating
Refrigerator
Store leftovers in an airtight container for up to 4 days. The flavors actually deepen slightly as the dish sits, making day-two leftovers exceptional.
- Let the dish cool to room temperature before covering to prevent condensation
- Store in shallow containers for faster cooling and more even reheating
Freezer
Chicken Riggies freezes beautifully for up to 3 months. Assemble the unbaked dish, cover it tightly with plastic wrap and aluminum foil, then freeze; you can bake it straight from frozen, just add 15 minutes to the baking time.
- Freeze the dish before adding cheese for best results, then top with fresh cheese before baking
- Alternatively, freeze after baking and reheat in a 325-degree oven covered with foil for 25 to 30 minutes
Reheating
For refrigerated portions, reheat in a 325-degree oven for 15 to 20 minutes covered with foil until heated through. You can also microwave individual portions for 2 to 3 minutes, though the oven method keeps the texture better.
- Add a splash of milk or water if the sauce seems dry; the pasta absorbs liquid as it sits
- Cover with foil to prevent the cheese from browning too much while the interior heats
Nutrition Information
| Nutrient | Amount |
|---|---|
| Calories | 520 |
| Total Fat | 18g |
| Saturated Fat | 8g |
| Carbohydrates | 62g |
| Fiber | 3g |
| Sugar | 7g |
| Protein | 28g |
| Sodium | 850mg |
| Cholesterol | 65mg |
These values are estimates based on standard ingredient brands and a 6-serving yield. Individual nutrition may vary depending on specific brands used and portion sizes.
Frequently Asked Questions
Can I make Chicken Riggies ahead of time?
Yes, absolutely. Assemble the entire dish up to 24 hours in advance, cover it, and refrigerate it unbaked.
When you’re ready to bake, add 5 to 10 extra minutes to the baking time since the dish will start cold. This method also lets the flavors meld and develop overnight for an even better result.
What if I don’t have heavy cream?
Whole milk, half-and-half, or even Greek yogurt work as substitutes, though the sauce will be less rich. Sour cream added at the very end (off heat) also works well and adds a pleasant tang.
Can I use store-bought rotisserie chicken instead?
Yes, you can shred about 3 cups of rotisserie chicken and skip the browning step entirely. Add it to the sauce during the simmering phase to warm it through, saving you 10 minutes of prep and cooking time.
Why is my sauce too watery?
Watery sauce usually means you used too much liquid or your tomatoes were very juicy. Simmer the sauce uncovered for an extra 5 to 10 minutes before adding the pasta to let some moisture evaporate and concentrate the flavors.
Can I use fresh basil instead of dried Italian seasoning?
Yes, but add fresh basil at the very end or sprinkle it on top after baking, since heat destroys its bright flavor. Use about 3 tablespoons of chopped fresh basil if you go this route.
Is there a way to make this less heavy?
Use 2% milk instead of heavy cream, reduce the cheese to 1 cup total, and use mostly chicken breast which is leaner than thighs. The dish will be lighter but still deeply satisfying.
Final Thoughts
Chicken Riggies might look like a simple dish, but it delivers comfort and satisfaction that makes it worth revisiting again and again. Once you master the basic technique, you’ll find yourself naturally adapting it to whatever vegetables, proteins, or cheeses you have on hand.
Make this recipe this week and watch how quickly it becomes a family favorite. Your kitchen will smell amazing, and your dinner table will be filled with happy faces.
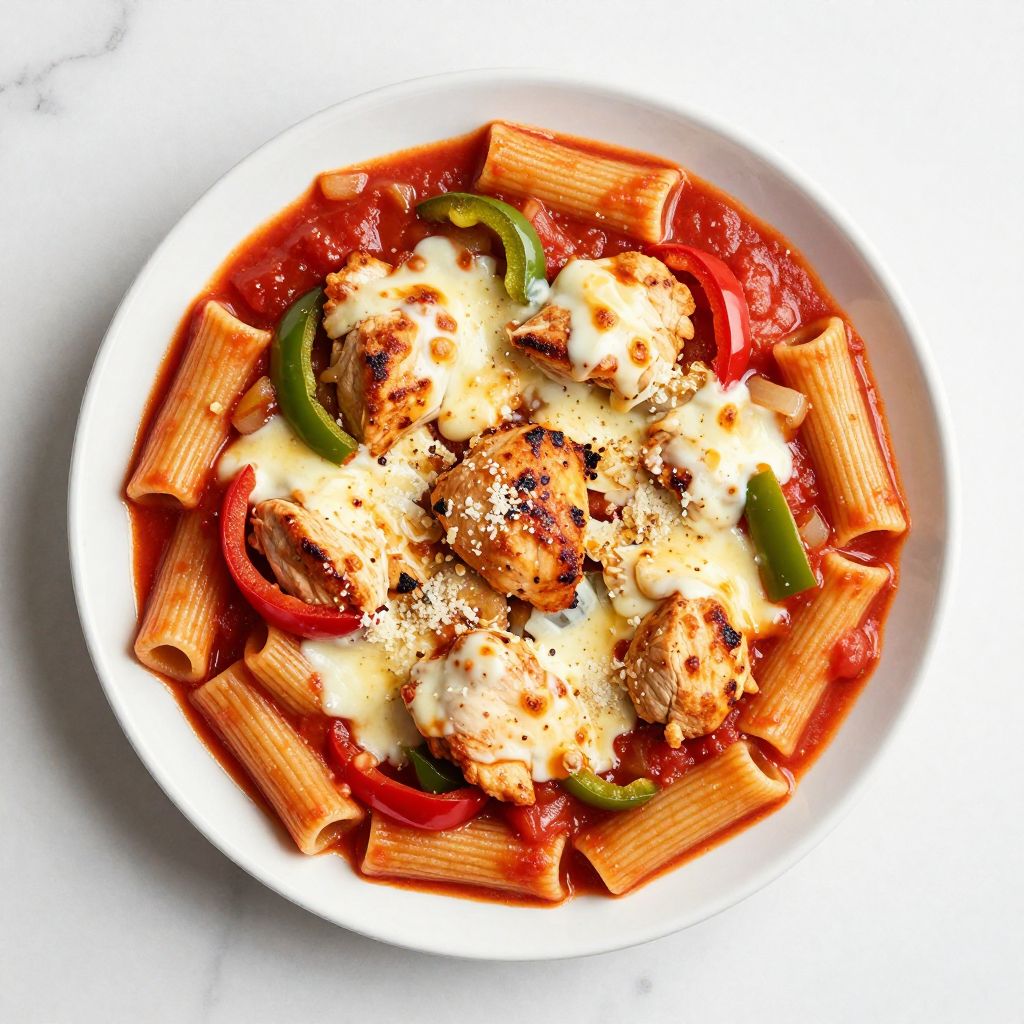
Chicken Riggies
Ingredients
Equipment
Method
- Preheat your oven to 375°F (190°C).
- Bring a large pot of salted water to a boil. Add the rigatoni and cook 2 minutes less than package directions. Drain and set aside.
- Pat chicken chunks dry, season with salt and black pepper.
- Heat olive oil in a large skillet over medium-high heat. Brown the chicken for 3–4 minutes per side until golden; transfer to a plate.
- In the same skillet, sauté diced onion and bell peppers over medium heat for 5 minutes until softened.
- Add minced garlic; cook 1 minute. Stir in tomato paste and cook another minute to caramelize.
- Pour in crushed tomatoes, Italian seasoning, and red pepper flakes. Return chicken to the skillet and simmer 5 minutes.
- Remove skillet from heat and stir in the milk or cream. Taste and adjust salt and pepper.
- Add cooked rigatoni to the sauce; fold gently to coat evenly.
- Transfer mixture to a 9x13 inch baking dish. Combine mozzarella and Parmesan; sprinkle evenly over the top.
- Bake at 375°F (190°C) for 20–25 minutes until cheese is melted and lightly golden and sauce is bubbling at the edges.
- Let stand 5 minutes before serving.



