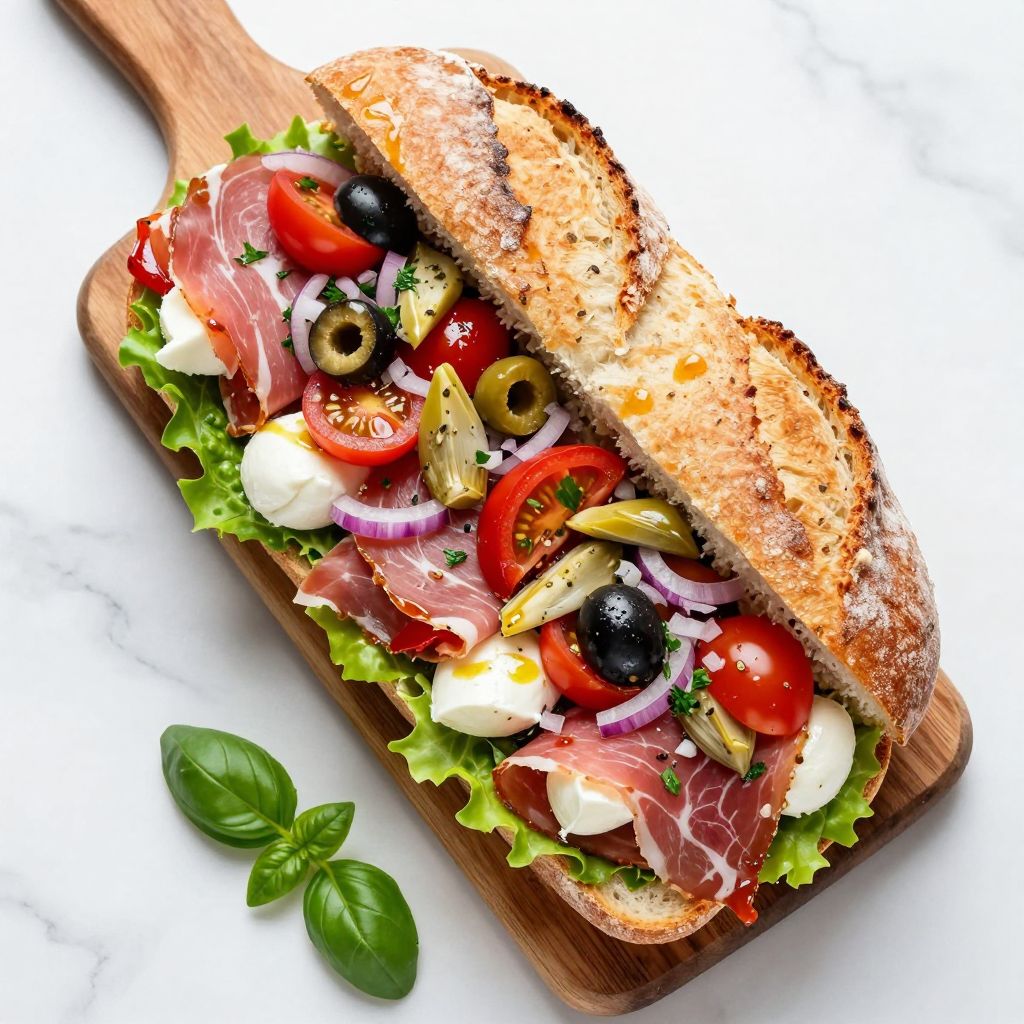
A chopped Italian sandwich is your answer to quick lunch cravings that don’t sacrifice flavor or substance. This deconstructed take on a classic Italian sub features finely chopped meats, cheeses, and vegetables tossed together with zesty vinaigrette, served on crusty bread for maximum texture and taste.
The beauty of this sandwich lies in its simplicity and how it transforms humble deli ingredients into something unexpectedly exciting. Read on to learn how to build this crowd-pleaser that works equally well for meal prep or entertaining.
Why You’ll Love This Recipe
This sandwich delivers authentic Italian flavors in a format that’s fun to eat and even more fun to customize.
- Chopped ingredients distribute flavor evenly in every bite, unlike traditional stacked sandwiches where toppings shift around
- The vinaigrette soaks into the bread, creating a cohesive, flavorful dish rather than separate components
- Prep work is minimal and can be done hours ahead, making it perfect for meal prep or entertaining
- Naturally accommodates substitutions and dietary tweaks without changing the core appeal
- Costs less per serving than most deli sandwiches while tasting significantly better
My Experience Making This Recipe
I stumbled onto this concept when I had leftover Italian cold cuts and wanted something different than the usual sandwich stack. The first time I chopped everything together with vinaigrette, I realized I’d accidentally created something my entire family fought over.
What surprised me most was how the chopped format made the sandwich feel lighter and less messy to eat, despite having the same ingredients as a traditional sub. The vinaigrette clings to each piece, so you get that salty, tangy hit in every single bite rather than just where the dressing pooled.
Now I make it constantly for weeknight lunches, and it’s become my go-to dish when friends pop over unexpectedly. The fact that it actually tastes better after sitting in the fridge for a few hours means you can make it the night before without any quality loss.
Recipe Overview
- Recipe Name: Chopped Italian Sandwich
- Servings: 4
- Prep Time: 15 minutes
- Cook Time: 0 minutes
- Total Time: 15 minutes
- Course: Lunch or Light Dinner
- Cuisine: Italian-American
- Calories per Serving: 520
Equipment You Will Need
- Cutting board
- Sharp chef’s knife
- Large mixing bowl
- Small bowl for vinaigrette
- Whisk
- Wooden spoon or salad tongs
- Serrated bread knife
- Measuring spoons and cups
Ingredients for Chopped Italian Sandwich
For the Sandwich Filling
- 8 ounces Italian deli meats (mix of provolone, mortadella, and capicola, chopped into 1/4-inch pieces)
- 4 ounces fresh mozzarella (torn into small pieces)
- 1 cup roasted red peppers (jarred or fresh, chopped)
- 1/2 cup red onion (finely diced)
- 1/2 cup cherry tomatoes (quartered)
- 1/2 cup marinated artichoke hearts (chopped)
- 1/4 cup fresh basil leaves (torn)
- 2 tablespoons fresh parsley (chopped)
- 1/2 cup mixed Italian olives (pitted and halved)
For the Vinaigrette
- 1/4 cup extra virgin olive oil
- 3 tablespoons red wine vinegar
- 1 teaspoon dried oregano
- 1/2 teaspoon garlic powder
- Salt and black pepper to taste
For Assembly
- 1 large crusty Italian loaf (or 4 individual sub rolls)
- Optional: lettuce leaves for serving
Ingredient Notes and Substitutions
- Deli Meats: The mix of provolone, mortadella, and capicola creates a balanced flavor profile with richness and spice. Substitute with equal parts ham and salami if you prefer milder flavors, or use all prosciutto for a more delicate version.
- Fresh Mozzarella: This adds creamy texture and mild flavor that balances the salty cured meats. Regular mozzarella works if fresh isn’t available, though the texture will be slightly firmer.
- Roasted Red Peppers: They contribute sweetness and a tender texture that contrasts with crunchy vegetables. Swap for fresh bell peppers chopped fine, though they’ll lack the deeper caramelized flavor.
- Red Wine Vinegar: This acidic base cuts through the richness of the meats and cheese with sharp brightness. White wine vinegar or balsamic vinegar both work, but balsamic will make the filling darker and sweeter.
- Crusty Bread: The structure holds up to moist fillings without falling apart, and the crust provides textural contrast. Ciabatta, focaccia, or even sourdough work beautifully as alternatives.
How to Make Chopped Italian Sandwich
Step 1: Prepare All Ingredients
Gather all your ingredients and begin chopping them into small, uniform pieces, roughly 1/4 inch or smaller. This uniformity ensures every bite contains a balanced mix of textures and flavors rather than chunks of one ingredient dominating.
Step 2: Chop the Deli Meats
Cut the Italian deli meats into 1/4-inch pieces, removing any thick layers of fat if desired. Chopping rather than slicing transforms the texture and helps the vinaigrette coat every piece evenly.
Step 3: Prepare the Vegetables and Cheese
Dice the red onion, halve the cherry tomatoes, chop the roasted red peppers, and tear the fresh mozzarella into small pieces. Keep the basil separate for now, as it will be added last to prevent wilting.
Step 4: Make the Vinaigrette
Whisk together the olive oil, red wine vinegar, oregano, and garlic powder in a small bowl until the mixture emulsifies and thickens slightly. Taste and adjust seasoning with salt and pepper, remembering that the cured meats and olives add saltiness, so go easy initially.
Step 5: Combine All Filling Ingredients
Transfer all the chopped meats, cheese, vegetables, olives, and herbs to a large mixing bowl. Pour the vinaigrette over everything and toss gently with wooden spoon or salad tongs until every piece is coated evenly.
Step 6: Let the Filling Marinate
Allow the chopped mixture to sit for 5 to 10 minutes so the flavors meld and the bread’s moisture begins to distribute throughout. This resting period is crucial for developing depth, not optional, so resist the urge to assemble immediately.
Step 7: Prepare the Bread
Slice the crusty Italian loaf lengthwise, creating two long halves. If using individual sub rolls, slice each one in half, being careful not to cut all the way through so the sandwich holds together.
Step 8: Assemble the Sandwiches
If desired, place a bed of fresh lettuce on the bottom half of the bread to act as a moisture barrier. Spoon the chopped Italian mixture evenly onto the bottom half, then close with the top half, pressing gently so the filling compresses slightly and the bread absorbs the vinaigrette.
Pro Tip: Make this sandwich the night before and wrap it tightly in foil or plastic wrap; the flavors intensify and the bread fully absorbs the vinaigrette, creating a cohesive, supremely flavorful sandwich.
Tips for the Best Chopped Italian Sandwich
- Keep your knife sharp and your cutting board clean between ingredients, especially when moving from raw vegetables to cured meats, for food safety and flavor integrity.
- Use high-quality deli meats from the counter, not pre-packaged slices, since fresh-cut versions have better texture and flavor that shine when chopped finely.
- Don’t skip the marinating step; those 5 to 10 minutes allow the vinaigrette to coat everything and begin seasoning the bread from the inside out.
- Make the filling up to 4 hours ahead and assemble with bread just before serving, or assemble the full sandwich and refrigerate up to 8 hours for maximum flavor development.
- Slice each sandwich with a serrated knife using a gentle sawing motion to avoid squishing the filling out the sides.
- Serve alongside marinated vegetables, olives, or a simple salad to round out the meal without overwhelming the sandwich itself.
Common Mistakes to Avoid
- Chopping ingredients too large means some bites get mostly bread and vinaigrette while others land a big chunk of meat; keep pieces uniform and small for consistent flavor in every mouthful.
- Using pre-sliced deli meats from the package results in thinner pieces that get lost in the filling rather than contributing texture; fresh-cut counter meats chop more pleasingly.
- Skipping the marinating step robs you of time for flavors to marry and for the filling to season itself; those 5 to 10 minutes genuinely matter.
- Assembling too far ahead without lettuce causes the bread to become soggy and fall apart; either assemble right before eating or use lettuce as a moisture barrier.
- Using too much vinaigrette turns the sandwich into a soggy mess; start with the amount listed and add only if the filling seems dry after the marinating period.
Serving Suggestions
This sandwich pairs wonderfully with simple sides that don’t compete for attention or add unnecessary heaviness to the meal. Consider what beverage and accompaniments round out your spread.
- Marinated Italian vegetables like peppers, mushrooms, or zucchini echo the sandwich’s bright, tangy flavors
- A crisp green salad with light vinaigrette dressing balances the richness of the meats and cheese
- Crispy oven-baked chips or a small handful of roasted nuts add textural contrast without stealing the spotlight
- Cold Italian white wine, sparkling water with lemon, or a crisp cola cuts through the richness perfectly
- Marinated olives or a small antipasto platter turns the meal into a casual but elevated lunch experience
Variations to Try
- Vegetarian Version: Replace the deli meats with extra roasted red peppers, marinated artichokes, sun-dried tomatoes, and crispy toasted breadcrumbs for bulk and crunch. The sandwich loses none of its Italian character and gains more textural variety.
- Spicy Italian Heat: Add sliced pepperoni, a pinch of red pepper flakes to the vinaigrette, and hot banana peppers instead of roasted reds. This version has more bite and works especially well for those who enjoy bold, peppery flavors.
- Pesto Variation: Stir 2 tablespoons of fresh basil pesto into the vinaigrette and reduce the oregano slightly. The herbaceous pesto deepens the Italian profile and adds a rich, complex layer.
- Mediterranean Twist: Swap the Italian deli meats for Greek options like feta cheese, kalamata olives, cucumber, and tomatoes, then use lemon juice and olive oil instead of vinegar. This transforms the sandwich into a Mediterranean-inspired creation with equally strong appeal.
- Caprese Version: Use just fresh mozzarella, ripe tomatoes, fresh basil, and balsamic vinegar with olive oil, creating a lighter, more delicate sandwich that celebrates simplicity.
Dietary Adaptations
- Gluten-Free: Substitute with gluten-free crusty bread or rolls; the filling itself contains no gluten, so this swap is straightforward and doesn’t affect flavor or texture noticeably.
- Dairy-Free: Skip the fresh mozzarella and use dairy-free cheese alternative if desired, though omitting it entirely keeps the sandwich lighter and lets the meats shine.
- Vegetarian: Remove all deli meats and double the roasted peppers, artichokes, and mushrooms; add white beans or crispy chickpeas for protein without sacrificing the Italian essence.
- Low-Carb or Keto: Skip the bread and serve the chopped mixture over lettuce as a salad, or use large lettuce leaves as wraps; the filling remains hearty and satisfying without the carb load.
Storage and Reheating
Refrigerator
Store the chopped filling and bread separately in airtight containers for up to 3 days, though the filling tastes best within the first 2 days. Assembled sandwiches wrapped tightly in foil or plastic wrap last 1 day in the fridge before the bread begins to soften excessively.
- Keep the filling in an airtight container on a lower shelf away from strong-smelling foods
- Store bread in a bread box or sealed bag to maintain crustiness
- Assemble sandwiches no more than a few hours before serving for the best texture
Freezer
The filling itself freezes well for up to 2 weeks, though the fresh vegetables lose some crispness upon thawing. Bread does not freeze well, so always use fresh bread after thawing the filling.
- Freeze the chopped filling in an airtight container or freezer bag, pressing out excess air
- Label with the date so you remember how long it has been frozen
- Do not freeze assembled sandwiches, as the bread becomes unpleasantly dense
Reheating
This sandwich is best served cold or at room temperature, so traditional reheating isn’t necessary. If you prefer warm ingredients, you can briefly warm the filling in a skillet before assembling.
- Remove from the fridge 10 to 15 minutes before serving to bring to room temperature and refresh flavors
- If reheating filling, warm gently in a skillet over medium heat for 3 to 4 minutes until just warm through
- Never microwave an assembled sandwich, as this creates soggy, uneven heating
Nutrition Information
| Nutrient | Amount |
|---|---|
| Calories | 520 |
| Total Fat | 28g |
| Saturated Fat | 9g |
| Carbohydrates | 42g |
| Fiber | 3g |
| Sugar | 5g |
| Protein | 24g |
| Sodium | 1240mg |
| Cholesterol | 62mg |
Nutritional values are approximate and based on 4 servings per loaf using standard grocery store ingredients. Actual values vary depending on specific brands and any ingredient substitutions you make.
Frequently Asked Questions
Can I make this sandwich without vinegar?
Yes, swap the vinegar for fresh lemon juice or lime juice for brightness without the wine vinegar flavor. The sandwich will taste slightly different but equally delicious with these acidic alternatives.
How far ahead can I make the filling?
The filling keeps well in the refrigerator for up to 3 days, though it tastes best within 2 days when vegetables retain their crispness. Making it the night before actually improves the flavor as ingredients meld overnight.
What’s the best way to prevent the bread from getting soggy?
Use a sturdy, crusty bread that can handle moisture, place lettuce leaves on the bread as a moisture barrier, or wait to assemble until just before eating. If you must assemble ahead, wrap tightly in foil to slow moisture transfer.
Can I use jarred roasted red peppers instead of fresh?
Absolutely, jarred roasted peppers are convenient and taste excellent in this sandwich. Simply drain well and chop them finely, as excess liquid from the jar will make the filling too wet.
Is this sandwich good for meal prep?
Yes, it’s one of the best meal prep sandwiches because it actually improves with time as flavors meld and vinaigrette soaks into the bread. Prepare the filling up to 3 days ahead, then assemble with fresh bread the morning you plan to eat it.
Final Thoughts
The chopped Italian sandwich transformed my weeknight lunch game by proving that the simplest recipes often deliver the most rewarding results. This sandwich tastes restaurant-quality but costs a fraction of what you’d spend at a deli, and it comes together in under 20 minutes.
Give this recipe a try and discover how chopping rather than stacking creates something genuinely better than traditional Italian subs. Your lunch box will thank you, and anyone lucky enough to share one will be asking for the recipe.
Chopped Italian Sandwich
Ingredients
Equipment
Method
- Gather all ingredients and chop meats, cheese, and vegetables into uniform 1/4-inch pieces.
- In a small bowl, whisk together olive oil, red wine vinegar, dried oregano, garlic powder, salt, and pepper until emulsified.
- Place chopped meats, mozzarella, roasted red peppers, red onion, cherry tomatoes, artichoke hearts, olives, basil, and parsley into a large mixing bowl.
- Pour the vinaigrette over the mixture and toss gently with a wooden spoon or salad tongs until everything is evenly coated.
- Let the filling rest for 5–10 minutes so flavors meld.
- Slice the Italian loaf or rolls lengthwise; if desired, line the bottom with lettuce leaves.
- Spoon the marinated filling evenly onto the bread, close the sandwich, and press gently to compress.
- Cut into individual portions with a serrated knife and serve immediately, or wrap tightly in foil and refrigerate for up to 8 hours for enhanced flavor.