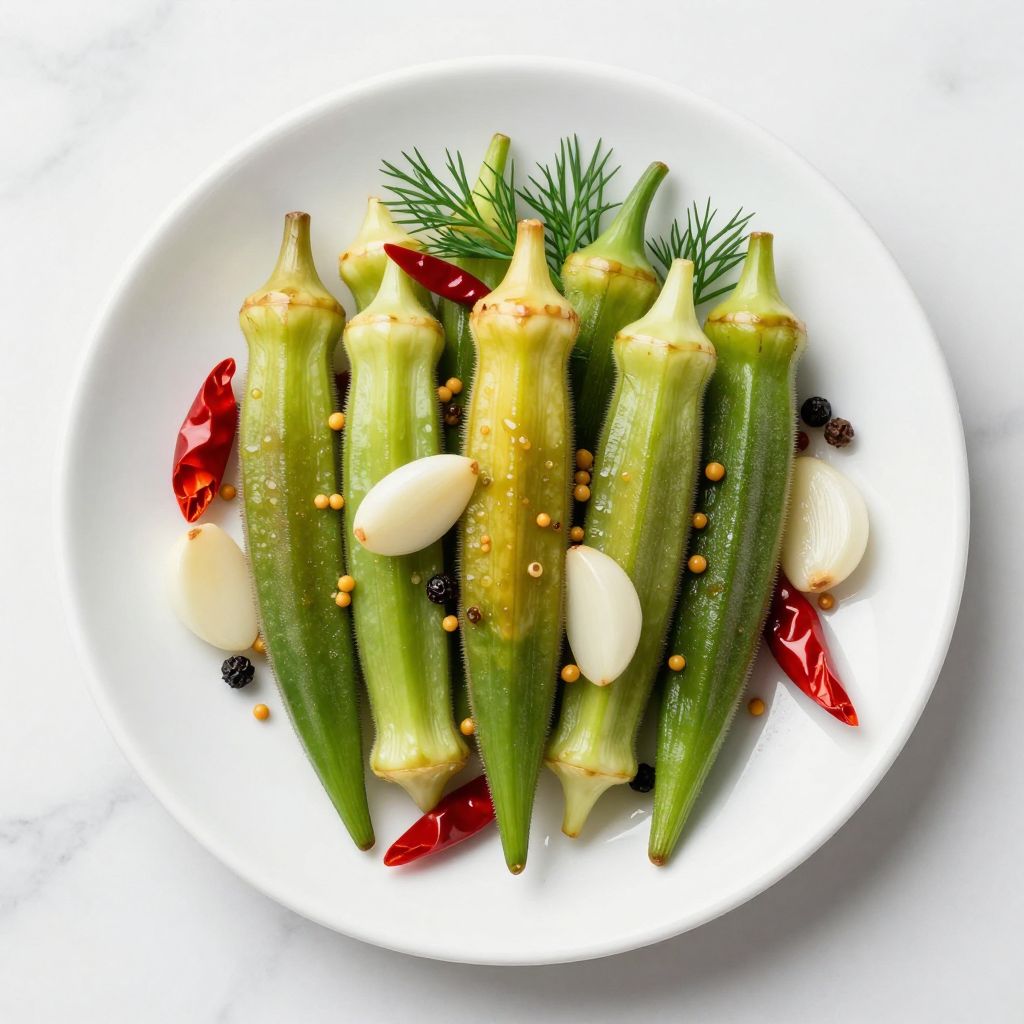
Pickled okra is a crisp, tangy condiment that transforms humble okra into an addictive snack or side dish. Made with fresh okra, vinegar, garlic, and spices, this recipe delivers satisfying crunch and bold flavor in just a few minutes of prep.
If you’ve never tried homemade pickled okra, you’re missing out on one of the easiest pantry staples to make at home. The beauty of this recipe lies in its simplicity and endless customization options.
Why You’ll Love This Recipe
Pickled okra checks every box for a great condiment: it’s crunchy, flavorful, and lasts for weeks in your fridge. You’ll find yourself reaching for it at every meal.
- Ready in under 30 minutes with minimal hands-on time
- Stays crisp and delicious for up to two months
- Naturally low-calorie and pairs with almost any savory dish
- Perfect for charcuterie boards, cocktails, or straight from the jar
- Customizable heat level and flavor profile to suit your taste
My Experience Making This Recipe
I first made pickled okra on a whim after discovering fresh okra at my farmer’s market, skeptical that I could make something restaurant-quality at home. The moment I cracked open that first jar three days later and bit into a perfectly crisp spear, I was hooked.
My family now requests it constantly, and I’ve made batch after batch with different spice combinations. The garlic perfumes your kitchen while the jars cool, and watching the okra transform from raw to perfectly tangy is genuinely satisfying.
Friends always ask for the recipe after trying it, and I love that I can have it ready in the time it takes to boil water and sterilize jars. It’s become my go-to hostess gift.
Recipe Overview
- Recipe Name: Pickled Okra
- Servings: Makes 4 to 6 jars (about 2 quarts total)
- Prep Time: 15 minutes
- Cook Time: 10 minutes
- Total Time: 25 minutes (plus 3 days for pickling)
- Course: Condiment, Appetizer
- Cuisine: American, Southern
- Calories per Serving: 12 per spear
Equipment You Will Need
- Large pot for boiling water
- Sterilized glass jars with lids (quart-sized)
- Small saucepan for brine
- Measuring cups and spoons
- Knife and cutting board
- Jar lifter or kitchen tongs
- Funnel (optional but helpful)
- Clean kitchen towels
Ingredients for Pickled Okra
- 2 pounds fresh okra, stems trimmed to about 1/4 inch
- 4 cups apple cider vinegar or white vinegar
- 2 cups water
- 4 tablespoons pickling salt or non-iodized salt
- 8 cloves fresh garlic, peeled and halved
- 4 dried red chili peppers or 2 teaspoons red pepper flakes
- 2 teaspoons yellow mustard seeds
- 2 teaspoons black peppercorns
- 4 fresh dill sprigs or 2 teaspoons dried dill
- 2 teaspoons coriander seeds
Ingredient Notes and Substitutions
- Fresh okra: Young, tender okra under 4 inches long stays crispest. If okra is older, you risk mushiness no matter the technique. Substitute with green beans if okra is unavailable, though texture differs.
- Apple cider vinegar: Its mild acidity and subtle sweetness balance the pickling perfectly. White vinegar works but tastes harsher; rice vinegar creates a softer flavor.
- Pickling salt: Non-iodized salt prevents cloudiness and preserves crunch. Table salt contains anti-caking agents that cloud the brine; kosher salt works but use 5 tablespoons instead of 4.
- Garlic: Fresh cloves deliver sharper flavor than jarred minced garlic. You can skip garlic entirely if you dislike it, but it’s essential for depth.
- Dill: Fresh dill provides bright herbaceousness that dried dill cannot match. Fresh is worth seeking out, but dried works in a pinch at half the amount.
How to Make Pickled Okra
Step 1: Prep and Wash the Okra
Rinse fresh okra under cool running water and rub gently with a clean cloth to remove any fuzzy coating. Trim the stem end to about 1/4 inch, being careful not to cut into the body, since opening the pod allows brine to seep in and can make the okra mushy.
Step 2: Sterilize Your Jars
Place clean glass jars and lids in a large pot of boiling water for 10 minutes to sterilize them. Sterilization kills bacteria and helps your pickled okra last longer without spoiling.
Step 3: Prepare the Brine Ingredients
Measure out the vinegar, water, and salt into a small saucepan and set over high heat. Gather the garlic, chili peppers, mustard seeds, peppercorns, dill, and coriander seeds in a small bowl so they’re ready to distribute.
Step 4: Heat the Brine
Bring the vinegar mixture to a rolling boil, stirring occasionally to ensure the salt dissolves completely. Dissolved salt distributes evenly and prevents crystallization at the bottom of your jars.
Step 5: Remove Jars and Pack the Okra
Carefully remove sterilized jars from boiling water using a jar lifter or tongs and set them upright on a clean kitchen towel. Stand the trimmed okra upright in each jar, packing them snugly but not so tight that they break.
Step 6: Distribute Seasonings
Divide the garlic halves, chili peppers, mustard seeds, peppercorns, dill, and coriander seeds evenly among the jars, layering them around the okra. These aromatics infuse flavor throughout the brine and look beautiful through the glass.
Step 7: Pour the Hot Brine
Carefully pour the hot brine into each jar, leaving about 1/2 inch of space at the top. Hot brine creates an airtight seal as jars cool and helps preserve the okra longer.
Step 8: Seal and Cool
Immediately cap each jar tightly and set them on a clean towel away from drafts. As they cool, you should hear a satisfying “pop” as the lids seal; if a jar doesn’t seal after 12 hours, refrigerate it and use it first.
Pro Tip: Don’t skip trimming the okra stem to exactly 1/4 inch; any longer and it takes up valuable jar space, and any shorter risks splitting the pod and making everything mushy.
Tips for the Best Pickled Okra
- Use the freshest okra available and make pickled okra within one day of purchase for maximum crispness. Older okra begins losing moisture and becomes soft regardless of pickling method.
- Pack okra snugly but vertically to maximize jar space and keep pieces submerged under brine throughout storage. Okra that floats above the brine can develop mold or off-flavors.
- Let pickled okra sit for at least three days before opening a jar; the flavors meld and deepen significantly during this time. Impatient sampling at day two will disappoint you.
- Store jars in a cool, dark place like a pantry or basement rather than on a sunny shelf. Sunlight degrades color and can affect flavor over time.
- Taste one piece from each batch to confirm it matches your desired spice level and heat. Adjust chili pepper quantity in future batches if you prefer milder or spicier results.
- Save the brine after eating the okra and use it to pickle fresh vegetables, dress salads, or add brightness to cocktails.
Common Mistakes to Avoid
- Using iodized table salt clouds the brine and can create a metallic taste; stick with pickling salt or kosher salt only.
- Overcooking the okra before pickling turns it into mush; this recipe uses raw okra, and the vinegar does the work of tenderizing it gently.
- Trimming the stem too short or cutting into the pod body allows brine inside and creates waterlogged, soft pieces instead of crisp ones.
- Neglecting to sterilize jars properly can introduce bacteria and cause spoilage or foodborne illness; don’t skip this step.
- Leaving too much headspace in jars (more than 1/2 inch) prevents proper sealing and reduces shelf life in the pantry.
Serving Suggestions
Pickled okra works as a standalone snack straight from the jar, a bright condiment for sandwiches and tacos, or a show-stopping addition to charcuterie boards. Its crisp texture and tangy bite elevate almost any savory application.
- Serve chilled as an appetizer with ranch dip or hummus
- Add to charcuterie boards alongside cured meats and cheeses
- Use as a spicy stirrer for bloody marys or dirty martinis
- Layer into sandwiches and wraps for crunch and acidity
- Chop and add to grain bowls or salads for textural contrast
Variations to Try
- Spicy Korean-Style: Replace dill with 1 tablespoon gochugaru (Korean chili flakes) and add 2 teaspoons sesame seeds. The result is spicy, nutty, and utterly addictive alongside rice or noodles.
- Herb Garden: Swap dill for a mix of fresh tarragon, thyme, and oregano for a more sophisticated flavor profile. This version pairs beautifully with roasted chicken or fish.
- Garlic Lover’s Version: Increase garlic to 12 cloves and add 1 tablespoon of garlic powder to the brine. The result is intensely savory and perfect for garlic enthusiasts.
- Mild and Sweet: Reduce chili pepper to 1/2 teaspoon red pepper flakes and add 2 tablespoons honey to the brine. This version appeals to those who prefer sweetness over heat.
- Turmeric Golden: Add 1 tablespoon ground turmeric and 1 teaspoon black peppercorns for anti-inflammatory properties and earthy flavor. This variation looks stunning and tastes complex.
Dietary Adaptations
- Gluten-Free: This recipe is naturally gluten-free as written; all ingredients contain no gluten. No changes needed.
- Dairy-Free: Pickled okra is entirely dairy-free; serve with dairy-free dips or enjoy straight from the jar.
- Vegan: This recipe is fully vegan since it contains no animal products whatsoever. Serve at vegan charcuterie boards or with plant-based dips.
- Low-Carb and Keto: Pickled okra is extremely low-carb at about 2 grams net carbs per spear, making it ideal for keto diets. Enjoy freely as a snack or condiment.
- Low-Sodium: Reduce pickling salt to 2 tablespoons if you need lower sodium; the okra will be softer and less crisp but still delicious.
Storage and Reheating
Refrigerator
Sealed jars stored in a cool pantry last up to two months unopened. Once opened, consume within three to four weeks and always keep the jar refrigerated.
- Store in a cool, dark pantry away from direct sunlight
- After opening, transfer to refrigerator and ensure okra stays submerged in brine
- Check for off-odors or cloudiness before eating; discard if anything seems wrong
Freezer
Freezing is not recommended since the pickling brine and okra texture change dramatically upon thawing. The okra becomes mushy and loses the crispness that makes it special.
Reheating
Pickled okra is meant to be served cold straight from the jar and never requires reheating. If you accidentally warm it, chill it back down in ice water before eating for best texture.
Nutrition Information
| Nutrient | Amount |
|---|---|
| Calories | 12 |
| Total Fat | 0.1 g |
| Saturated Fat | 0 g |
| Carbohydrates | 2.7 g |
| Fiber | 1.2 g |
| Sugar | 0.4 g |
| Protein | 0.8 g |
| Sodium | 285 mg |
| Cholesterol | 0 mg |
Nutrition values are approximate per spear. Actual values depend on jar size and how tightly you pack the okra.
Frequently Asked Questions
Can I use frozen okra for this recipe?
Frozen okra will not produce the crisp texture you want; thawing breaks down cell walls and results in soft, mushy pickled okra. Always use fresh, firm okra for the best results.
How long does pickled okra last once opened?
An opened jar stays fresh in the refrigerator for three to four weeks as long as the okra remains submerged in brine. Discard if you notice mold, cloudiness, or off-smells.
Can I reduce the salt in the brine?
You can reduce salt to 2 tablespoons, but the okra will be softer and the preserving power weakens. The higher salt content is what keeps okra crisp and prevents spoilage.
Why is my pickled okra soft instead of crisp?
Soft okra comes from using older pods or cutting the stem too short and splitting the pod open. Always select young, tender okra and trim stems carefully without piercing the pod.
Can I reuse the brine to pickle new batches?
You can reuse brine once to pickle a fresh batch, though flavor will be slightly less vibrant. Discard after the second use and make a fresh batch for best results.
Final Thoughts
Making pickled okra at home is one of the most rewarding kitchen projects you can tackle, delivering restaurant-quality results with minimal effort. Once you’ve made your first jar, you’ll find yourself experimenting with different spices and sharing jars with everyone you know.
Give this recipe a try this week, and you’ll have crispy, tangy pickled okra ready for snacking, serving, or gifting within just a few days. Your pantry, your taste buds, and your friends will thank you.
Pickled Okra
Ingredients
Equipment
Method
- Rinse the okra under cool running water, gently rubbing to remove fuzz. Trim stems to 1⁄4 inch without piercing the pods.
- Place clean jars and lids in a large pot, cover with water, bring to a boil, and sterilize for 10 minutes.
- Combine vinegar, water, and pickling salt in a small saucepan. Bring to a rolling boil over high heat, stirring until salt dissolves, about 3 minutes.
- Using jar lifter or tongs, remove the hot jars, draining any water, and set them upright on a clean towel.
- Pack the trimmed okra vertically and snugly into the hot jars, leaving 1⁄2 inch headspace at the top.
- Divide garlic, dried chilies, mustard seeds, peppercorns, dill, and coriander seeds evenly among the jars, tucking them around the okra.
- Carefully pour the boiling brine over the okra until covered, still leaving 1⁄2 inch headspace.
- Wipe jar rims, apply lids, and tighten just until fingertip-tight. Let jars cool undisturbed; you should hear the lids seal with a pop as they cool.
- Allow the jars to pickle for at least 3 days in a cool, dark place before opening. Refrigerate after opening and consume within 3–4 weeks.