There’s something magical about cherry cheesecake that makes people forget their diets for just one bite. The creamy, tangy filling paired with bright, tart cherries creates a dessert that feels fancy enough for special occasions yet simple enough to pull off at home.
This recipe delivers bakery-quality results without the intimidating techniques or hard-to-find ingredients. You’ll have a show-stopping dessert ready in under three hours of total time.
Why You’ll Love This Recipe
This cherry cheesecake recipe strikes the perfect balance between effort and payoff. You get restaurant-quality flavor with straightforward, foolproof methods.
- No water bath required, making cleanup easy and stress minimal.
- Rich, creamy filling that stays smooth without cracks or weeping.
- Homemade cherry topping tastes fresher and brighter than canned versions.
- Impressive enough to serve at dinner parties or holiday gatherings.
- Freezes beautifully, letting you prepare it days ahead.
My Experience Making This Recipe
I first made this cheesecake for my sister’s birthday dinner, and I was honestly nervous about the results. The first time I pulled it from the oven, I held my breath waiting to see if it would crack, but the top emerged perfectly smooth and golden.
My family devoured it within minutes, and my sister asked for the recipe before she’d even finished her slice. Since then, I’ve made it at least a dozen times, tweaking nothing because the formula works perfectly every single time.
The cherry topping is where the real magic happens. When those warm, glossy cherries meet the cool cheesecake, you get this incredible contrast of temperatures and textures that keeps people coming back for seconds.
Recipe Overview
- Recipe Name: Cherry Cheesecake
- Servings: 12 servings
- Prep Time: 25 minutes
- Cook Time: 55 minutes
- Total Time: 3 hours (including cooling and chilling)
- Course: Dessert
- Cuisine: American
- Calories per Serving: 485
Equipment You Will Need
- 9-inch springform pan
- Food processor or blender
- Electric mixer or whisk
- Measuring cups and spoons
- Medium saucepan
- Rubber spatula
- Offset spatula or butter knife
- Oven thermometer (optional but helpful)
- Cooling rack
Ingredients for Cherry Cheesecake
For the Crust
- 2 cups graham cracker crumbs
- 6 tablespoons melted butter
- 2 tablespoons sugar
- 1/4 teaspoon salt
For the Filling
- 32 ounces cream cheese, room temperature
- 1 cup sugar
- 1/4 cup cornstarch
- 2 large eggs
- 1/2 cup sour cream
- 1/4 cup heavy cream
- 1 teaspoon vanilla extract
- 1/4 teaspoon salt
For the Cherry Topping
- 2 cups fresh or frozen cherries (pitted)
- 1/2 cup sugar
- 2 tablespoons cornstarch
- 2 tablespoons lemon juice
- 1/4 teaspoon almond extract (optional)
Ingredient Notes and Substitutions
- Cream cheese: Room temperature cream cheese blends smoothly without lumps, creating a silky texture. You can soften cold cream cheese by leaving it on the counter for 30 minutes or microwaving it in 10-second intervals.
- Cornstarch in filling: Cornstarch prevents the filling from cracking by reducing the amount of eggs needed and controlling moisture. All-purpose flour works as a substitute but may slightly alter the texture.
- Sour cream: Sour cream adds tang and prevents the cheesecake from tasting overly sweet. Greek yogurt provides a similar flavor but may result in a slightly denser cake.
- Fresh cherries: Fresh cherries offer bright flavor and beautiful color, but frozen cherries work equally well and are often cheaper. Canned cherries in syrup work in a pinch but drain and rinse them first.
- Graham cracker crust: You can substitute with digestive biscuits, vanilla wafers, or even Oreo cookies for different flavor profiles.
How to Make Cherry Cheesecake
Step 1: Prepare the Pan
Preheat your oven to 325 degrees Fahrenheit and position the rack in the lower third of your oven. A lower rack distributes heat more gently, preventing the top from browning too quickly before the inside sets.
Wrap the outside of your 9-inch springform pan with aluminum foil, covering the bottom and sides completely. This step prevents any butter from the crust from seeping into cracks during baking.
Step 2: Make the Crust
Combine graham cracker crumbs, melted butter, sugar, and salt in a medium bowl and mix until the texture resembles wet sand. The mixture should hold together when squeezed but still feel crumbly.
Press the mixture firmly into the bottom of your prepared springform pan using the bottom of a measuring cup. Create an even layer about 1/4 inch thick, working from the center outward.
Step 3: Toast the Crust
Bake the crust alone for 8 minutes until it turns light golden and smells fragrant. Toasting the crust adds depth and prevents it from tasting too raw and sandy in the finished cheesecake.
Remove the pan from the oven and set it aside while you prepare the filling. Let it cool for just a minute or two so the warm crust will help bind the filling slightly.
Step 4: Blend the Cream Cheese
Beat room-temperature cream cheese with an electric mixer on medium speed for 2 to 3 minutes until completely smooth and fluffy. Scrape down the sides of the bowl frequently to ensure no lumps remain hidden.
Lumpy cream cheese leads to a grainy texture in the finished cheesecake, so take time with this step. The mixture should look light and airy when finished.
Step 5: Add Sugar and Cornstarch
Whisk together sugar and cornstarch in a small bowl, breaking up any lumps of cornstarch with the back of a spoon. Mixing them together prevents the cornstarch from clumping when added to the wet mixture.
Gradually add this mixture to the cream cheese while mixing on low speed until just combined. Overmixing at this stage incorporates too much air, which causes cracks during baking.
Step 6: Incorporate Eggs and Dairy
Add eggs one at a time, mixing on low speed after each addition until just combined. Add them slowly and mix minimally, as overworking the batter after the eggs are added introduces excess air that will escape during cooling, causing cracks.
Gently fold in sour cream, heavy cream, vanilla extract, and salt using a rubber spatula. Fold rather than beat to keep the batter as dense and stable as possible.
Step 7: Bake the Cheesecake
Pour the filling over the toasted crust and smooth the top with an offset spatula or the back of a spoon. Bake for 50 to 55 minutes until the edges are set but the center still jiggles slightly when gently shaken, about a 2-inch circle in the very middle.
The residual heat will continue cooking the center after removal from the oven, so a little jiggle is correct. A completely still cheesecake will overbake and develop cracks.
Step 8: Cool Gradually
Turn off the oven and prop the door open about 4 inches using a wooden spoon or kitchen towel. Leave the cheesecake in the oven for 1 hour, which allows it to cool gradually and prevents sudden temperature shifts that cause cracks.
The gradual cooling lets the exterior set before the interior cools too quickly. This slow transition is your secret weapon against a cracked cheesecake.
Step 9: Chill the Cheesecake
Remove the cheesecake from the oven and let it cool completely on the counter for another hour. Transfer it to the refrigerator and chill for at least 4 hours, though overnight is ideal.
Chilling allows the filling to set properly and lets the flavors develop. A cold cheesecake also slices cleaner than a room-temperature one.
Step 10: Prepare the Cherry Topping
Combine fresh or frozen cherries, sugar, cornstarch, and lemon juice in a medium saucepan over medium heat. Stir occasionally until the mixture comes to a gentle simmer and thickens, about 5 to 7 minutes.
The cornstarch thickens the juices so the topping stays glossy rather than runny. The lemon juice brightens the cherry flavor and prevents the topping from tasting one-dimensional.
Step 11: Finish with Cherry Topping
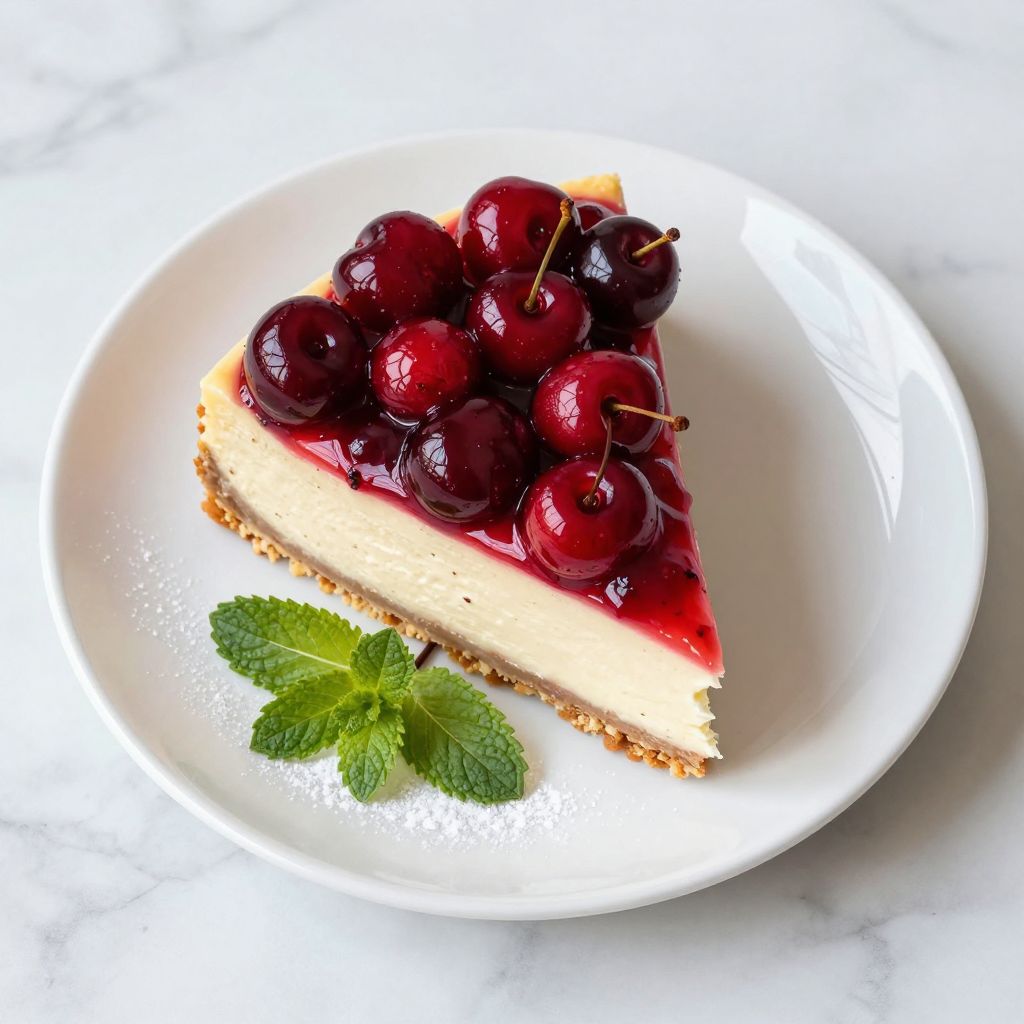
Remove the cherry mixture from heat and stir in almond extract if using. Let the topping cool to room temperature, then spread it evenly over the chilled cheesecake just before serving.
Adding the topping right before serving keeps the crust crispy and the cheesecake cold. A warm topping would soften the surface, and sitting too long makes the juices soak into the filling.
Pro Tip: Don’t skip the gradual cooling in the oven with the door propped open. This single step eliminates virtually all risk of cracks and is the difference between an okay cheesecake and a stunning one.
Tips for the Best Cherry Cheesecake
- Use a kitchen thermometer to confirm your oven is actually 325 degrees. Many home ovens run hot or cold, and accurate temperature prevents overbaking.
- Let all ingredients reach room temperature before mixing. Cold cream cheese, eggs, and dairy create lumps and require overmixing to combine.
- Don’t open the oven door during baking unless absolutely necessary. Each opening drops the temperature and disrupts the even baking process.
- For extra flavor, add a tablespoon of lemon zest to the filling or a pinch of cardamom to the cherry topping.
- Chill your springform pan in the freezer for 15 minutes before adding the crust. A cold pan helps the crust set faster.
- Use a hot, wet knife to slice the cheesecake between each cut, wiping the blade clean each time. This produces clean slices rather than rough, ragged edges.
Common Mistakes to Avoid
- Using cold cream cheese: Cold cream cheese doesn’t blend smoothly and leaves lumps throughout the filling, creating a grainy texture that screams homemade in the worst way.
- Overmixing after adding eggs: Too much mixing after eggs are added traps excess air, which escapes during cooling and causes dramatic cracks across the top.
- Skipping the gradual cooling: Removing the cheesecake directly to the counter or fridge allows the exterior to set while the interior is still hot, creating stress cracks.
- Baking at too high a temperature: High heat bakes the edges too quickly while the center remains underbaked, resulting in a soupy interior and cracked top.
- Overbaking the cheesecake: A completely still, completely set cheesecake is overbaked. The slight jiggle in the center tells you it’s perfectly done.
Serving Suggestions
Serve slices of cherry cheesecake cold or at room temperature depending on your preference. Cold slices are firmer and cleaner, while room temperature slices taste creamier and more flavorful.
- Dust slices with powdered sugar and a few fresh mint leaves for an elegant plating.
- Serve with a dollop of whipped cream and extra cherry sauce on the side.
- Pair with coffee or espresso for an afternoon treat or after-dinner dessert.
- Add a scoop of vanilla ice cream to warm slices for a sweet and tangy contrast.
- Serve alongside shortbread cookies for a full dessert board at gatherings.
Variations to Try
- Black Forest Cheesecake: Replace the cherry topping with chocolate-covered cherries and stir 2 tablespoons of cocoa powder into the filling for a decadent twist that echoes the classic Black Forest cake.
- No-Bake Version: Skip the baking step and refrigerate the filling in the crust overnight, then top with the cherry compote. This version is slightly fluffier but requires careful handling due to its delicate structure.
- Sour Cherry Cheesecake: Use sour or tart cherries in the topping instead of sweet ones, reducing sugar by 2 tablespoons for a more sophisticated, less sweet dessert.
- Chocolate Crust: Replace graham crackers with crushed chocolate cookies mixed with butter for a decadent crust that pairs beautifully with the cherry topping.
- Individual Cheesecake Cups: Divide the filling into small jars or cups with crushed graham cracker bases, bake in a water bath for 15 to 18 minutes, and top individually for elegant single servings.
Dietary Adaptations
- Gluten-Free: Use gluten-free graham crackers or crushed gluten-free cookies for the crust. The filling is already gluten-free, so this simple swap makes the entire dessert safe for those with gluten sensitivity.
- Dairy-Free: Substitute cream cheese with cashew-based cream cheese or silken tofu blended smooth, and use coconut cream instead of sour cream and heavy cream. The texture will be slightly less dense but still delicious and creamy.
- Vegan: Use vegan cream cheese and vegan sour cream, and replace eggs with a flax egg (1 tablespoon ground flaxseed mixed with 3 tablespoons water per egg). The result is comparable to traditional cheesecake but may need an extra 5 minutes of baking.
- Low-Carb/Keto: Swap sugar in both filling and topping for erythritol or allulose at a 1:1 ratio, and use a crushed nut-based crust instead of graham crackers. This version is dramatically lower in carbs with a similar taste profile.
Storage and Reheating
Refrigerator
Store the cheesecake covered with plastic wrap or in an airtight container for up to 5 days. The crust may soften slightly as it absorbs moisture, but the flavor actually deepens over a day or two.
- Add the cherry topping no more than 4 hours before serving for optimal texture.
- Cover the cheesecake loosely with foil if storing longer than 1 day to prevent it from absorbing odors.
Freezer
Freeze the cheesecake without the cherry topping for up to 3 months when well wrapped in plastic wrap and foil. The filling freezes beautifully and thaws without any texture changes.
- Thaw overnight in the refrigerator before serving, allowing slow warming that preserves texture.
- Prepare the cherry topping fresh after thawing for the brightest flavor.
Reheating
Serve cheesecake cold directly from the refrigerator or let it sit on the counter for 15 to 20 minutes for a creamier texture. Do not microwave or heat the cheesecake, as this damages the texture and can curdle the filling.
- Warm the cherry topping gently in a saucepan over low heat if it has been refrigerated.
Nutrition Information
| Nutrient | Amount |
|---|---|
| Calories | 485 |
| Total Fat | 28 g |
| Saturated Fat | 17 g |
| Carbohydrates | 52 g |
| Fiber | 1 g |
| Sugar | 42 g |
| Protein | 8 g |
| Sodium | 285 mg |
| Cholesterol | 95 mg |
Nutritional values are approximate and based on standard ingredient brands. Individual recipes may vary based on specific products used and portion sizes.
Frequently Asked Questions
Can I make this cheesecake without a springform pan?
Yes, use a regular 9-inch round cake pan lined with parchment paper that extends past the edges. After baking
Cherry Cheesecake
Ingredients
Equipment
Method
- Preheat oven to 325°F (163°C) and position the rack in the lower third. Wrap the outside of a 9-inch springform pan with aluminum foil.
- Combine graham cracker crumbs, melted butter, sugar, and salt until the mixture resembles wet sand. Press firmly into the pan bottom to form an even 1/4-inch crust.
- Bake the crust for 8 minutes, then place on a cooling rack while preparing the filling.
- Beat room-temperature cream cheese on medium speed for 2–3 minutes until smooth and fluffy, scraping the bowl often.
- Whisk sugar and cornstarch together, then mix into the cream cheese on low speed just until blended.
- Add eggs one at a time, mixing on low after each just until incorporated.
- Fold in sour cream, heavy cream, vanilla extract, and salt until the batter is smooth and dense.
- Pour filling over the warm crust, smooth the top, and bake for 50–55 minutes until edges are set and a 2-inch center circle still jiggles slightly.
- Turn off the oven, prop the door open 4 inches, and let the cheesecake cool inside for 1 hour.
- Remove to a rack, cool at room temperature 1 hour more, then refrigerate at least 4 hours or overnight.
- For the topping, combine cherries, sugar, cornstarch, and lemon juice in a saucepan over medium heat. Simmer, stirring, until thickened and glossy, 5–7 minutes; stir in almond extract if using and cool to room temperature.
- Spread the cooled cherry topping over the chilled cheesecake just before serving, slice with a hot, wet knife, and enjoy.