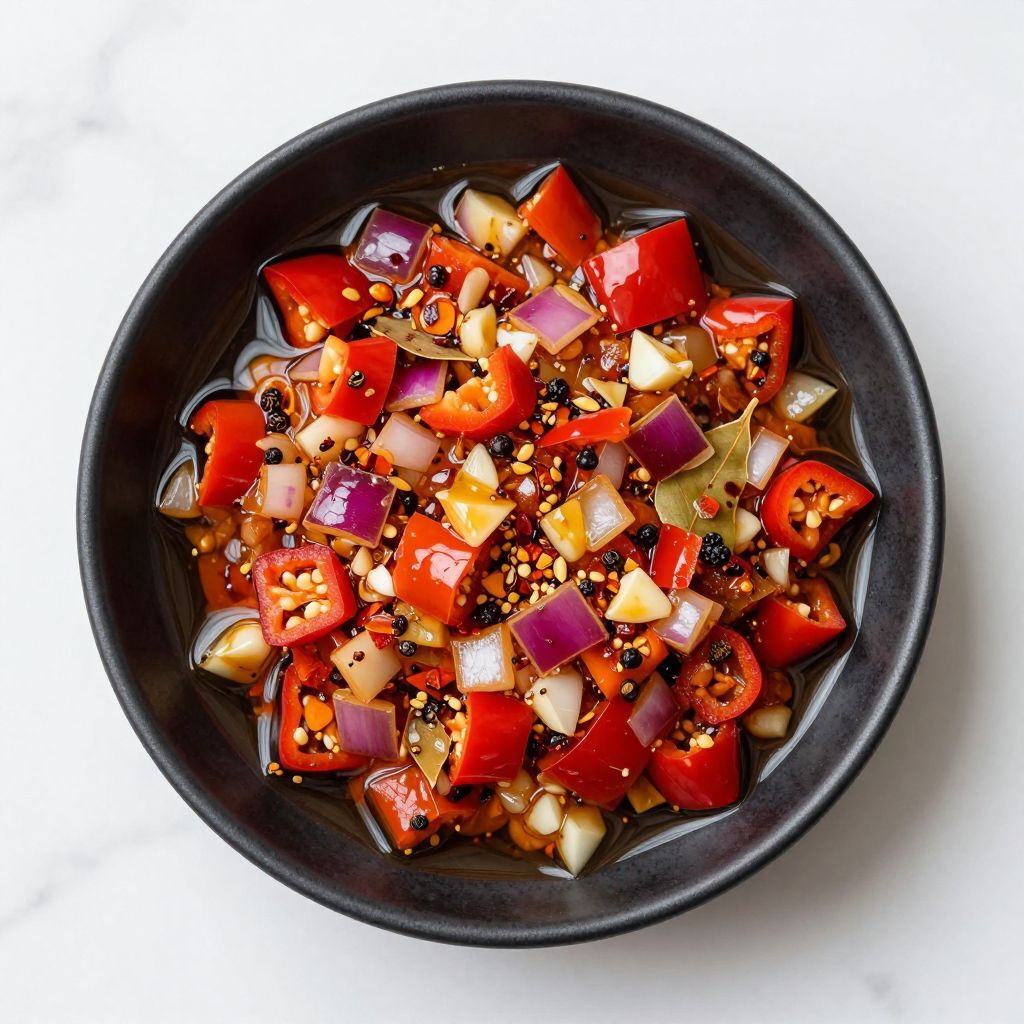
Ever wondered what fermented spider eye tastes like outside the world of Minecraft? This playful recipe transforms the legendary crafting ingredient into a real, edible treat that’s equal parts nostalgic and surprisingly delicious.
We’re building a tangy, spiced fermented condiment inspired by the game’s mystical spider eye using simple pantry staples and a few days of patience. Whether you’re a gamer looking to bring your favorite game into the kitchen or simply curious about creative fermentation projects, this recipe delivers charm and flavor in equal measure.
Why You’ll Love This Recipe
This recipe bridges gaming culture and real cooking in a way that feels both fun and genuinely tasty. You’ll create something unique that sparks conversation and satisfies curious taste buds.
- A playful nod to gaming culture that actually tastes great
- Simple fermentation technique that requires minimal equipment
- Versatile condiment works as a side, topping, or flavor boost
- Naturally probiotic and packed with depth from fermentation
- Perfect conversation starter at game nights or dinner parties
My Experience Making This Recipe
I first tackled this recipe as a joke between friends who play way too much Minecraft, but the results genuinely surprised me. The fermentation process transforms ordinary ingredients into something with real complexity and umami depth.
Watching the mixture bubble and develop over three days felt oddly meditative, and the final product was tangy, slightly spicy, and unexpectedly sophisticated. My test group devoured it straight from the jar and asked for the recipe, which felt like the ultimate validation.
The best part? You don’t need special equipment or expertise to pull it off. A mason jar and a little patience are all that stands between you and spider eye glory.
Recipe Overview
- Recipe Name: Fermented Spider Eye
- Servings: Makes approximately 2 cups
- Prep Time: 15 minutes
- Fermentation Time: 3 to 5 days
- Total Time: 3 to 5 days plus 15 minutes prep
- Course: Condiment
- Cuisine: Fusion/Gaming-Inspired
- Calories per Serving: 25 calories per 2-tablespoon serving
Equipment You Will Need
- One 32-ounce glass mason jar with lid
- Fine mesh strainer or cheesecloth
- Cutting board and sharp knife
- Measuring spoons and cups
- Small mixing bowl
- Wooden spoon for stirring
- Paper towels or coffee filters
Ingredients for Fermented Spider Eye
For the Base
- 2 cups diced red bell peppers (about 3 medium peppers, roughly chopped)
- 1 cup diced red onion (about 1 large onion)
- 1/2 cup fresh garlic cloves, minced (about 12 cloves)
- 3 tablespoons sea salt
- 1 tablespoon black peppercorns
- 1 teaspoon red pepper flakes
- 3 whole bay leaves
- 1 teaspoon whole cumin seeds
- 1/2 teaspoon whole coriander seeds
For the Brine
- 2 cups filtered water
- 2 tablespoons raw honey (optional, for feeding fermentation)
Ingredient Notes and Substitutions
- Red bell peppers provide the signature color and mild sweetness that balance the fermentation tang. Swap with orange or yellow peppers for less heat, or use a mix for complexity.
- Red onion adds sharpness and umami that deepens with fermentation. Yellow onions work fine but will produce a less visually striking result.
- Fresh garlic cloves contribute pungent, savory notes that mellow beautifully over time. Garlic powder cannot replace fresh garlic here, as you need the live enzymes for proper fermentation.
- Sea salt draws out vegetable juices and enables fermentation by preventing harmful bacteria. Non-iodized table salt works if sea salt is unavailable, but avoid iodized salt, which inhibits fermentation.
- Black peppercorns provide subtle heat and spice that remain consistent throughout fermentation. Ground black pepper will disperse unevenly and create a cloudy brine.
- Raw honey feeds beneficial bacteria and enhances depth, though some prefer fermentation without it for a sharper final product. Omit honey entirely if you prefer a more vinegary result.
How to Make Fermented Spider Eye
Step 1: Prepare Your Vegetables
Wash your red bell peppers, red onion, and garlic thoroughly under running water and pat completely dry with paper towels. Moisture remaining on the vegetables can dilute your brine and slow fermentation, so take a moment to dry them well.
Step 2: Dice Your Ingredients
Cut the peppers in half, remove the seeds and white pith, then dice into roughly 1/2-inch chunks. Peel and dice the onion into similar-sized pieces, then mince the garlic as finely as possible, which increases surface area and speeds fermentation.
Step 3: Sterilize Your Jar
Wash your mason jar with hot soapy water and rinse thoroughly, then fill it with boiling water and let it sit for 2 minutes to sterilize. Pour out the water and let the jar cool for a minute before use, since you want it clean but not too hot for your vegetables.
Step 4: Layer Your Ingredients
Place your diced peppers, onion, and garlic into the jar, then add the black peppercorns, bay leaves, cumin seeds, coriander seeds, and red pepper flakes. Layering creates more surface area for fermentation and distributes flavors evenly throughout the mixture.
Step 5: Create Your Brine
In a small bowl, combine the filtered water with 3 tablespoons of sea salt and stir until the salt fully dissolves. If using honey, add it now and stir until incorporated, which feeds the beneficial bacteria that drive fermentation.
Step 6: Pour the Brine
Carefully pour the salt brine over your vegetables in the jar until they are completely submerged, leaving about 1 inch of headspace at the top. Submerged vegetables prevent mold and ensure uniform fermentation, so make sure no pieces float above the liquid.
Step 7: Create Your Fermentation Seal
Place a piece of cheesecloth over the jar opening, then screw on the lid loosely so gases can escape but dust cannot enter. A loose lid allows carbon dioxide produced by fermentation to bubble out while keeping contaminants at bay.
Step 8: Begin Fermentation
Set the jar in a cool, dark spot away from direct sunlight, such as a kitchen cabinet or pantry shelf. Fermentation works best between 60 and 75 degrees Fahrenheit, so avoid placing it near heat sources or in cold environments.
Step 9: Monitor Your Progress
After 24 hours, you should see small bubbles rising through the brine, a sign that fermentation is underway. Stir gently with a clean wooden spoon once daily, pushing any floating vegetables back below the brine surface.
Step 10: Taste and Adjust
After 3 days, carefully open the jar and taste a small amount on a spoon. If you prefer more tang, let it ferment for 2 more days; if the flavor suits you, proceed to sealing and storage.
Pro Tip: Keep a piece of cheesecloth or a coffee filter under your jar lid during fermentation so gases escape easily without allowing mold spores to settle on your vegetables.
Tips for the Best Fermented Spider Eye
- Use filtered water rather than tap water, as chlorine can slow fermentation and harm beneficial bacteria. Boiling tap water for 5 minutes then cooling also works in a pinch.
- Taste your fermentation every 24 hours starting on day 2 so you catch your preferred level of tang before it becomes overly sour. Fermentation accelerates as it progresses, so the jump from day 3 to day 5 is significant.
- Keep your workspace clean and ensure all equipment is sanitized to minimize the risk of unwanted mold or bacteria. A simple hot water rinse works fine for daily stirring spoons.
- If white or kahm yeast (a harmless white film) forms on the surface, skim it off gently with a clean spoon. This is normal in fermentation and doesn’t ruin your batch, but removing it keeps flavors cleaner.
- Store fermented spider eye in the refrigerator after day 3 or 4 to slow fermentation and lock in your preferred flavor. Cold slows bacterial activity dramatically, so your jar will remain stable for months.
- Shake the jar gently every few days after it’s refrigerated to redistribute flavors and keep ingredients evenly coated with brine.
Common Mistakes to Avoid
- Using iodized salt: Iodine prevents beneficial bacteria from multiplying, which stops fermentation cold. Always reach for non-iodized sea salt or kosher salt.
- Fermenting in sunlight: Light degrades fermentation quality and can create off-flavors. Keep your jar in a dark cabinet or pantry at all times.
- Letting vegetables float above the brine: Exposed vegetables develop mold quickly because they lack the protective salt brine. Check daily and push floaters back down.
- Opening the jar too frequently: Each time you open it, you introduce oxygen and disturb the fermentation environment. Limit yourself to one gentle stir per day.
- Using chlorinated tap water: Chlorine kills the beneficial bacteria that make fermentation happen. Filtered or boiled water produces far superior results.
Serving Suggestions
Fermented spider eye works as a condiment, topping, or flavor booster across countless dishes and occasions. The tangy, complex flavor profile pairs beautifully with rich proteins, earthy grains, and fresh vegetables.
- Serve alongside grilled chicken, pork, or fish as a vibrant, probiotic side condiment
- Top tacos, nachos, or grain bowls for a punch of fermented tang and color
- Mix into cream cheese or Greek yogurt for a unique dip paired with crackers or fresh veggies
- Spoon over roasted vegetables or grain salads to brighten flavors with fermented depth
- Use as a topping for avocado toast or as a side for charcuterie and cheese boards
Variations to Try
- Smoky Spider Eye: Add 1 teaspoon of smoked paprika and 2 whole dried chipotle peppers to your spice blend for a deeper, smokier profile that pairs beautifully with grilled meats.
- Hot Spider Eye: Increase red pepper flakes to 2 teaspoons and add 1 or 2 fresh hot peppers (like serrano or jalapeno) for serious heat lovers seeking a fiery fermented condiment.
- Herbed Spider Eye: Include fresh dill, thyme, or oregano (1/2 teaspoon each, dried) in your spice blend for an herbaceous twist that works wonderfully with seafood and light proteins.
- Ginger Spider Eye: Add 2 tablespoons of fresh grated ginger to the brine for warming, peppery notes that complement Asian-inspired dishes and roasted vegetables.
- Mustard Seed Spider Eye: Stir in 2 tablespoons of yellow mustard seeds for tanginess and a slight bitterness that deepens the condiment’s complexity.
Dietary Adaptations
- Gluten-Free: This recipe is naturally gluten-free as written, using only vegetables, salt, spices, and water with no hidden gluten sources.
- Dairy-Free: The recipe contains no dairy products, making it safe for anyone avoiding milk and suitable for vegan diets.
- Vegan: Omit the optional honey if following a strict vegan diet, though fermentation works equally well without it, just with slightly sharper final flavors.
- Low-Carb/Keto: At only 25 calories and minimal carbohydrates per 2-tablespoon serving, this condiment fits perfectly into low-carb and keto meal plans.
- Paleo: Fermented vegetables are paleo-friendly, though check that your salt is pure with no additives, and skip the optional honey if strict paleo is your goal.
Storage and Reheating
Refrigerator
Transfer your finished fermented spider eye to a clean glass jar with a tight-fitting lid and refrigerate immediately after your final taste. Fermentation slows dramatically in cold temperatures, preserving your condiment for months.
- Lasts up to 6 months when stored properly in the refrigerator
- Flavors continue to deepen slowly even in cold storage
- Always use clean utensils when removing portions
Freezer
While fermented spider eye freezes acceptably, the texture of vegetables softens slightly upon thawing, and some fermented tang diminishes. Freezing works best if you plan to blend the condiment into sauces rather than serve it whole.
- Freezes for up to 3 months in airtight containers
- Best used in cooked dishes or blended sauces post-thaw
- Leave 1/2 inch headspace since fermented vegetables expand slightly when frozen
Reheating
Fermented spider eye is best served cold or at room temperature to preserve beneficial probiotics and bright, tangy flavors. Never heat this condiment above 118 degrees Fahrenheit, as excess heat destroys the live cultures that make fermentation special.
- Remove from refrigerator 15 minutes before serving for optimal flavor
- Stir gently before serving to redistribute settled vegetables and brine
- If using in hot dishes, add it after cooking finishes to preserve probiotic benefits
Nutrition Information
| Nutrient | Amount |
|---|---|
| Calories | 25 |
| Total Fat | 0.3g |
| Saturated Fat | 0g |
| Carbohydrates | 5.5g |
| Fiber | 0.8g |
| Sugar | 3.2g |
| Protein | 0.6g |
| Sodium | 580mg |
| Cholesterol | 0mg |
Nutritional values are estimates based on standard USDA data for fermented vegetables and reflect one 2-tablespoon serving. Values vary depending on specific ingredient weights and fermentation duration.
Frequently Asked Questions
Can I Speed Up Fermentation?
Fermentation thrives in warm temperatures between 70 and 75 degrees Fahrenheit, so placing your jar in a warmer spot speeds the process by 12 to 24 hours. Avoid heat above 80 degrees, which can produce off-flavors and kill beneficial bacteria.
What If My Jar Develops Mold?
If fuzzy mold appears on the surface, discard the entire batch, as mold indicates contamination that fermentation cannot overcome. White kahm yeast (a harmless film) is safe to skim off, but any fuzzy or colored growth signals a failed batch.
Can I Use a Different Type of Jar?
Glass jars work best because they don’t interact with salt or fermentation acids, but any glass or food-grade ceramic container with a lid works. Avoid plastic containers, which can leach chemicals when exposed to salt brine.
How Do I Know When Fermentation Is Complete?
Taste your fermentation daily starting on day 2 and ferment until you reach your preferred level of tang and flavor depth. Fermentation doesn’t have a fixed endpoint; it’s complete when your palate is satisfied.
Is This Fermentation Safe If I’ve Never Done It Before?
Fermentation is one of the safest food preservation methods when you follow basic guidelines like keeping vegetables submerged and using clean equipment. The salt brine creates an inhospitable environment for harmful pathogens while beneficial bacteria thrive.
Can I Adjust the Saltiness?
The 3 tablespoons of salt in 2 cups of water creates a standard 3% brine that’s proven safe and effective for fermentation. Reducing salt below 2.5% increases mold risk, while exceeding 3.5% slows fermentation unnecessarily.
Final Thoughts
Creating fermented spider eye brings together gaming nostalgia, culinary creativity, and genuine flavor in a way that surprises everyone who tries it. Whether you’re crafting it for a game night party or simply exploring fermentation as a hobby, this recipe rewards patience with a complex, probiotic-rich condiment that’s genuinely delicious.
The beauty of this project lies in its simplicity: basic vegetables, salt, spices, and time transform into something memorable and craveable. Give it a try, share it with friends who appreciate both gaming culture and good food, and discover why fermentation has captured hearts and palates for thousands of years.
Fermented Spider Eye
Ingredients
Equipment
Method
- Wash peppers, onion, and garlic thoroughly, then pat completely dry with paper towels.
- Dice red bell peppers into 1/2-inch chunks, dice red onion to a similar size, and mince garlic finely.
- Sterilize the 32-ounce mason jar by washing with hot soapy water, rinsing, filling with boiling water for 2 minutes, then draining and cooling briefly.
- Layer diced peppers, onion, and garlic in the jar; add black peppercorns, bay leaves, cumin seeds, coriander seeds, and red pepper flakes.
- In a small bowl, dissolve 3 tablespoons sea salt in 2 cups filtered water; stir in raw honey if using to create the brine.
- Pour brine over vegetables until fully submerged, leaving 1-inch headspace; ensure no pieces float above the liquid.
- Cover jar opening with cheesecloth, then screw the lid on loosely so gases can escape.
- Place jar in a cool, dark spot (60-75 °F) for 3–5 days; once daily, stir gently with a clean wooden spoon and press vegetables below the brine.
- Begin tasting on day 3; when desired tang is reached, replace cheesecloth with a tight lid and refrigerate to slow fermentation.