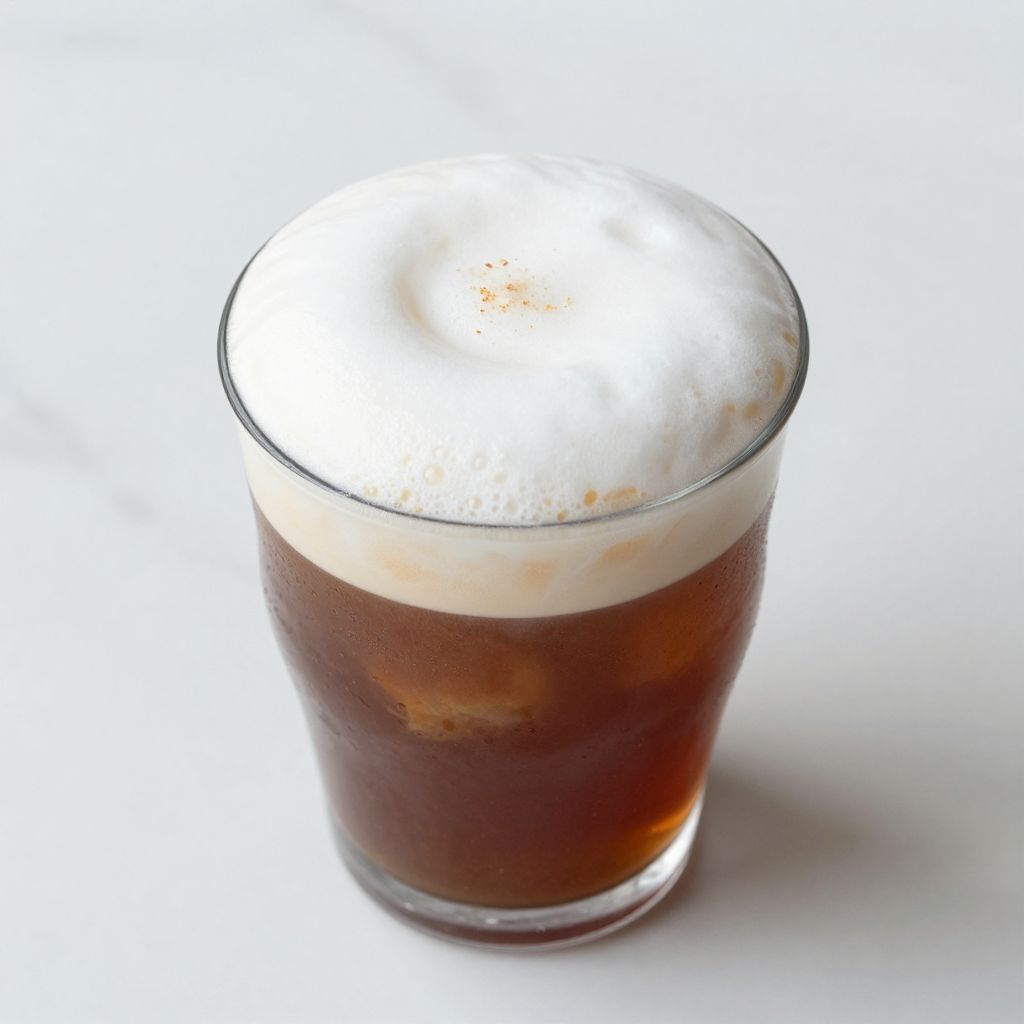
Cold foam is the silky, cloud-like topping that transforms your morning coffee into a café-quality drink at home. Made with just a few simple ingredients and an immersion blender, this recipe delivers barista-level results in under two minutes. Whether you’re making a classic cappuccino or experimenting with flavored variations, cold foam adds texture and elegance to any cold beverage.
The beauty of cold foam lies in its simplicity: milk, a touch of sweetener, and air create a luxurious layer that coffee shops charge extra for. Once you master the basic technique, you’ll understand why this topping has become essential to specialty coffee culture. Let’s walk through everything you need to know to make restaurant-quality cold foam every single time.
Why You’ll Love This Recipe
Cold foam elevates your daily coffee routine without requiring expensive equipment or barista training. You control the flavor, sweetness, and texture completely, which means endless customization possibilities for your taste preferences.
- Ready in under 2 minutes with zero waiting time
- Works with any milk type, from dairy to oat to almond
- Adds professional cafe quality to homemade cold coffee drinks
- Customizable with vanilla, cinnamon, caramel, or chocolate flavors
- Saves money compared to buying specialty coffee shop drinks
My Experience Making This Recipe
I discovered cold foam completely by accident while trying to salvage a failed latte at home. My immersion blender was already out for making soup, and I decided to experiment with frothing cold milk instead of heating it. The result was so good that I now make cold foam several times a week.
The first time I served it to my partner, she thought I’d bought it from a coffee shop. What impressed me most was how quickly the technique became second nature, like muscle memory after just three attempts. Now I keep an immersion blender dedicated to this task because it’s become my non-negotiable morning ritual.
The sensory experience is genuinely satisfying: watching the milk transform from liquid to airy foam in real-time feels like kitchen magic. My friends ask for my “secret” when they taste the difference it makes, and I love that I can show them how simple it really is.
Recipe Overview
- Recipe Name: Cold Foam
- Servings: Makes approximately 1 cup of foam (tops 2-3 drinks)
- Prep Time: 2 minutes
- Cook Time: 0 minutes
- Total Time: 2 minutes
- Course: Beverage Topping
- Cuisine: Modern Coffee Culture
- Calories per Serving: 20-40 calories (varies by milk type)
Equipment You Will Need
- Immersion blender (essential)
- Tall glass or container (at least 16 ounces)
- Measuring cups and spoons
- Spoon or small spatula for scooping foam
- Small whisk (optional backup method)
Ingredients for Cold Foam
- Whole milk or milk of choice: 1/2 cup (cold)
- Heavy cream or non-dairy creamer: 2 tablespoons (cold)
- Sweetener (sugar, honey, or maple syrup): 1/2 teaspoon
- Vanilla extract (optional): 1/4 teaspoon
- Salt: pinch
Ingredient Notes and Substitutions
- Whole milk provides richness and froths beautifully. Use 2% or skim milk if preferred, though the foam will be less stable. Non-dairy milks like oat or coconut work well and often froth better than dairy milk.
- Heavy cream stabilizes the foam and prevents it from deflating quickly. If unavailable, use extra whole milk, though the foam won’t hold as long. Non-dairy cream alternatives like coconut cream work in a pinch.
- Sweetener balances the bitterness of coffee in the finished drink. Honey and maple syrup dissolve less cleanly in cold foam than sugar, but add interesting flavor notes. Omit entirely if you prefer unsweetened foam.
- Vanilla extract adds subtle flavor complexity to plain foam. Skip it for a neutral topping, or swap it for almond, hazelnut, or Irish cream extracts for different profiles.
- Salt enhances milk sweetness and rounds out flavors. This tiny amount is optional but makes a noticeable difference in the final taste.
How to Make Cold Foam
Step 1: Gather Your Cold Ingredients
Pour your cold milk and heavy cream into a tall glass or container. Make sure all ingredients are cold straight from the refrigerator, as cold liquid froths more easily and holds foam longer than room-temperature milk.
Step 2: Add Sweetener and Vanilla
Sprinkle the sweetener and vanilla extract into the milk mixture. Stir these ingredients together for about 15 seconds to ensure even distribution before you begin blending.
Step 3: Position Your Immersion Blender
Place the immersion blender at the bottom of the glass, making sure the blade is fully submerged. This positioning is crucial because you’ll gradually move the blender upward to incorporate air into the milk.
Step 4: Start Blending at Low Speed
Turn on the immersion blender at low speed and keep it at the bottom of the glass for about 10-15 seconds. Low speed creates smaller, more stable bubbles compared to high speed, which produces larger bubbles that collapse quickly.
Step 5: Raise the Blender Gradually
Slowly move the immersion blender upward toward the surface of the milk over the next 15-20 seconds. This upward motion creates the characteristic foam layer by exposing more of the liquid to air and incorporating it into the mixture.
Step 6: Break the Surface Gently
Once the blender reaches near the surface, tilt it slightly so the blade creates a gentle whirlpool. You’re now primarily incorporating air into the milk, and you’ll see the foam layer growing above the liquid as you continue blending.
Step 7: Build Your Foam Layer
Continue blending for another 20-30 seconds, moving the blender in small circles just below the foam surface. You’ll feel increased resistance as the foam thickens, and you should see a thick, creamy layer forming on top of the liquid milk.
Step 8: Turn Off and Let It Settle
Stop the blender and let the foam sit for 5-10 seconds to stabilize slightly. The larger air bubbles will rise to the top, creating distinct layers: dense creamy foam on top and milky liquid on the bottom.
Step 9: Scoop and Serve
Use a spoon or small spatula to scoop the thick foam layer onto your cold coffee drink. Hold back the liquid with the spoon and let only the foam transfer to your cup, leaving the thin milk underneath for layering or discarding as preferred.
Pro Tip: The angle and speed of your immersion blender matters more than how long you blend; keep the blade just below the surface and move it in gentle circles for the silkiest foam every time.
Tips for the Best Cold Foam
- Use the coldest milk possible straight from the back of your refrigerator. Cold milk froths faster and creates more stable foam that lasts longer on your drink.
- Don’t skip the heavy cream or cream alternative, as it stabilizes the foam structure and prevents rapid collapse. Even 2 tablespoons makes a substantial difference in foam longevity.
- Keep your immersion blender blade just below the surface of the liquid for the final 20 seconds of blending. This is where the magic happens, and this technique creates the fluffy, cloud-like texture everyone loves.
- Taste your foam mixture before blending if you added sweetener, adjusting the flavor to your preference. You can always blend in a touch more vanilla or sweetener if needed, but you can’t remove it once blended.
- Make cold foam right before serving your drink rather than trying to prepare it in advance. Foam gradually deflates over 10-15 minutes, so timing it with your coffee ensures maximum texture and visual appeal.
- Experiment with different milk types and brands, as some froth better than others. Oat milk and barista-blend non-dairy options often create superior foam compared to standard skim milk.
Common Mistakes to Avoid
- Using warm or room-temperature milk results in poor foam stability and faster collapse. Always use refrigerated milk that’s been chilled for at least an hour.
- Blending at high speed from the start creates large, unstable bubbles that pop immediately. Start at low speed and increase gradually for finer, longer-lasting foam.
- Skipping the cream component leaves you with thin, weak foam that disappears into your drink. This small addition is essential for creating that signature barista-style texture.
- Over-blending past the point of foam formation doesn’t improve results; it actually starts breaking down the foam structure. Stop blending once you see a thick foam layer, typically after 45-60 seconds total.
- Keeping your immersion blender fully submerged the entire time prevents air incorporation and defeats the purpose. You need that final phase near the surface to create fluffy foam instead of just aerated milk.
Serving Suggestions
Cold foam transforms ordinary iced coffee into a specialty drink that rivals what you’d order at a café. The foam floats on top of chilled coffee, adding visual sophistication and a creamy texture with each sip.
- Classic iced americano topped with plain cold foam and a shot of espresso
- Iced vanilla latte with cinnamon-infused cold foam for a latte-like experience
- Cold brew coffee with chocolate-flavored foam made by adding cocoa powder to the milk mixture
- Iced caramel macchiato with salted cold foam for sweet and savory balance
- Nitro cold brew topped with vanilla cold foam for the ultimate coffee shop experience
Variations to Try
- Cinnamon Cold Foam: Add 1/4 teaspoon ground cinnamon to your milk mixture and blend as directed. The warm spice pairs beautifully with medium and dark roast coffees, adding depth without overpowering the coffee flavor.
- Chocolate Cold Foam: Mix 1 tablespoon unsweetened cocoa powder with your sweetener before adding to milk, ensuring it dissolves completely. This creates a rich, slightly sweet foam that feels indulgent atop cold brew or espresso-based drinks.
- Maple Cold Foam: Replace sugar with 1/2 teaspoon maple syrup and add a tiny pinch of sea salt. The maple adds earthy complexity that works particularly well with nutty coffee notes.
- Honey Cold Foam: Use 1/2 teaspoon raw honey instead of sugar and add an extra splash of vanilla extract. Honey creates a slightly sweeter, more luxurious foam with subtle floral notes that many people find irresistible.
- Brown Butter Cold Foam: Make brown butter by heating 1 tablespoon butter until the solids turn golden, then cool it completely before adding to your milk mixture. This sophisticated variation adds rich, nutty depth that elevates simple black coffee considerably.
Dietary Adaptations
- Gluten-Free: This recipe is naturally gluten-free when made with standard milk and cream. Verify that any flavoring extracts or additions are certified gluten-free if you have celiac disease.
- Dairy-Free: Substitute heavy cream with coconut cream or oat-based barista creamer, and use any cold plant-based milk. Oat milk consistently froths better than other non-dairy options and creates superior foam stability.
- Vegan: Use plant-based milk and coconut cream, and replace honey if used with agave or maple syrup. The foam works beautifully with vegan ingredients and tastes equally luxurious.
- Low-Carb/Keto: Use heavy cream as your primary liquid and skip added sweeteners, or use a sugar-free sweetener like monk fruit. This version becomes a nearly zero-carb topping that satisfies keto requirements perfectly.
Storage and Reheating
Refrigerator
Cold foam is best enjoyed fresh, but you can prepare the milk mixture in advance and store it in a sealed container for up to 24 hours. Blend and serve immediately when you’re ready to use it.
- Pre-mix your milk, cream, and sweetener in a bottle for quick blending each morning
- Store in an airtight container to prevent absorption of refrigerator odors
Freezer
Freezing cold foam itself doesn’t work well, as the foam structure collapses completely when thawed. However, you can freeze your prepared milk mixture for up to one week and thaw it overnight in the refrigerator before blending.
- Use ice cube trays to freeze small portions of your flavored milk mixture
- Thaw overnight in the refrigerator before blending for fresh foam
Reheating
Cold foam is designed for cold drinks and doesn’t work on hot coffee, as the foam instantly collapses from heat. If you want a topping for hot coffee, make traditional steamed milk foam instead using an espresso machine steam wand.
- Reserve cold foam exclusively for iced and cold coffee beverages
- Create hot foam using a milk frother for hot coffee drinks
Nutrition Information
| Nutrient | Amount |
|---|---|
| Calories | 35 |
| Total Fat | 2.5g |
| Saturated Fat | 1.5g |
| Carbohydrates | 2g |
| Fiber | 0g |
| Sugar | 1.5g |
| Protein | 2g |
| Sodium | 55mg |
| Cholesterol | 8mg |
Nutritional values are approximate and based on whole milk with added cream and sweetener. Values vary depending on your milk type and the amount of sweetener used.
Frequently Asked Questions
Can I make cold foam without an immersion blender?
Yes, you can use a small whisk and vigorous arm movement for 2-3 minutes, though the results won’t be quite as fluffy. A French press also works well: pour your milk mixture into the press, push the plunger up and down rapidly for 30-40 seconds, then pour the foam onto your drink.
Why isn’t my foam holding together?
Your milk is likely too warm or you’re missing the heavy cream component that stabilizes foam structure. Always use cold milk straight from the refrigerator and include at least 2 tablespoons of cream or cream alternative for proper stabilization.
Can I make cold foam several hours in advance?
Cold foam deflates within 10-15 minutes, so it’s best made right before serving. You can prepare your milk mixture in advance and blend it fresh when you’re ready for your drink.
Does the type of milk really make a difference?
Yes, different milk types froth differently. Oat milk and barista-blend non-dairy options froth better than standard skim milk, while whole milk creates the creamiest, most stable foam.
What if my foam is too thin and watery?
You likely need to blend longer or use more cream in your mixture. Add an extra tablespoon of heavy cream and blend for the full 50-60 seconds, focusing on the final phase near the surface where air incorporation happens.
Can I flavor my cold foam with anything besides vanilla?
Absolutely, you can add cinnamon, cocoa powder, maple syrup, honey, almond extract, or any flavoring you enjoy. Add flavorings before blending and adjust quantities to your taste preference.
Final Thoughts
Making cold foam at home transforms your morning coffee routine from ordinary to genuinely exciting. Once you experience the silky texture and visual elegance of professional-quality foam, you’ll wonder why you ever paid extra for it at coffee shops.
Your immersion blender is about to become one of your most valuable kitchen tools, doing double duty for soups, sauces, and now café-quality beverages. Start with the basic recipe, experiment with the variations, and discover which flavor combinations become your personal signature drink.
Cold Foam
Ingredients
Equipment
Method
- Pour the cold milk and heavy cream into a tall 16-ounce glass.
- Add sugar, vanilla extract (if using), and a pinch of salt; stir for about 15 seconds to dissolve and combine.
- Place the immersion blender at the bottom of the glass, ensuring the blade is fully submerged.
- Blend on low speed for 10–15 seconds, keeping the blade at the bottom to form fine, stable bubbles.
- Slowly raise the blender toward the surface over the next 15-20 seconds to incorporate air and build volume.
- When the blade nears the surface, tilt slightly and continue blending in gentle circles for 20–30 seconds until a thick, creamy foam forms.
- Turn off the blender and let the foam rest for 5–10 seconds to stabilize and separate from the liquid beneath.
- Scoop the dense foam layer with a spoon or spatula, holding back the liquid milk, and transfer it onto your iced coffee or cold brew.
- Serve immediately for best texture and appearance.