Elderberry syrup is a traditional immune-boosting remedy that tastes like liquid gold and works like a charm during cold and flu season. This simple recipe combines dried elderberries with honey, ginger, and warming spices to create a potent syrup you can take by the spoonful or drizzle over yogurt and oatmeal. Once you make a batch, you’ll wonder how you ever got through winter without it.
Why You’ll Love This Recipe
Homemade elderberry syrup beats store-bought versions on taste, cost, and ingredient transparency. You control exactly what goes into your bottle, and the process takes less than an hour.
- Packed with antioxidants from real elderberries and fresh ginger
- Naturally sweetened with raw honey for added immune support
- Costs a fraction of commercial versions
- Tastes delicious enough to enjoy straight from a spoon
- Keeps in the fridge for weeks, ready whenever you need it
My Experience Making This Recipe
I stumbled onto elderberry syrup during a particularly rough winter when colds seemed to rotate through my household every other week. My grandmother swore by the stuff, so I decided to try making a batch myself rather than ordering another overpriced bottle online.
The first time I simmered the berries and spices together, my kitchen smelled like a cozy winter apothecary. The deep purple syrup that emerged was so vibrant and inviting that my skeptical partner actually asked for a spoonful without me pushing it on him.
Three winters later, I still make this every October and keep bottles stashed in my pantry. My kids no longer fight me when cold season hits because they actually like taking their medicine.
Recipe Overview
- Recipe Name: Elderberry Syrup
- Servings: Makes about 16 ounces (32 servings)
- Prep Time: 10 minutes
- Cook Time: 30 minutes
- Total Time: 40 minutes (plus cooling)
- Course: Remedy/Wellness
- Cuisine: Herbal/Traditional
- Calories per Serving: 45
Equipment You Will Need
- Small saucepan (2-3 quart capacity)
- Measuring cups and spoons
- Wooden spoon for stirring
- Fine mesh strainer
- Cheesecloth or fine cotton cloth
- Glass jars with tight-fitting lids (for storage)
- Funnel (optional but helpful)
Ingredients for Elderberry Syrup
- Dried elderberries: 1 cup
- Filtered water: 3 cups
- Fresh ginger: 2 tablespoons, minced
- Cinnamon stick: 1 (about 3 inches)
- Whole cloves: 4 to 5
- Fresh thyme: 1 tablespoon (or 1 teaspoon dried)
- Raw honey: 3/4 cup
- Optional: Fresh lemon juice: 1 tablespoon
Ingredient Notes and Substitutions
- Dried elderberries: These are packed with anthocyanins, the antioxidants that make elderberry syrup immune-supportive. Fresh elderberries work too, but you’ll need about 2 cups and the final syrup will be thinner. Substitute with frozen elderberries if dried aren’t available.
- Raw honey: Raw honey contains enzymes and beneficial compounds that regular honey lacks. It also binds the ingredients together and adds antimicrobial properties. You can use regular honey if raw isn’t accessible, though you’ll lose some of the additional wellness benefits.
- Fresh ginger: Ginger adds warming spice and has its own anti-inflammatory effects. Substitute with 1 teaspoon of ground ginger if fresh isn’t on hand, though the syrup will be slightly less peppery.
- Cinnamon stick: Cinnamon adds depth and helps regulate blood sugar. A pinch of ground cinnamon works in a pinch, though stick cinnamon provides a cleaner flavor and can be easily removed.
- Fresh thyme: Thyme is a respiratory herb that complements elderberry beautifully. Leave it out if you don’t have it, or swap for a small pinch of oregano for a different herbaceous note.
How to Make Elderberry Syrup
Step 1: Measure and Prepare Your Berries
Pour your dried elderberries into a measuring cup to get exactly 1 cup. Rinse them quickly under cool water to remove any dust, then set them aside on a clean surface.
Step 2: Mince the Fresh Ginger
Peel a 2-inch piece of fresh ginger root with a spoon or small knife, then mince it finely into pieces about the size of a lentil. Mincing rather than slicing releases more of the ginger’s volatile oils and warming compounds into the syrup.
Step 3: Combine Water and Spices in the Saucepan
Pour 3 cups of filtered water into your saucepan and set it over medium-high heat. Add the cinnamon stick, cloves, and minced ginger, then bring the mixture to a gentle boil.
Step 4: Add the Elderberries
Once the water is boiling, add your prepared elderberries and fresh thyme. The berries will sink initially, so stir gently to make sure they’re submerged in the liquid.
Step 5: Simmer and Reduce
Lower the heat to medium-low and let the mixture simmer gently for 25 to 30 minutes. You want the liquid to reduce by roughly half, concentrating the elderberry flavor and creating a thicker final syrup after honey is added.
Step 6: Strain Out the Solids
Remove the pan from heat and let it cool for about 5 minutes so you don’t splash yourself with hot liquid. Pour the mixture through a fine mesh strainer lined with cheesecloth into a bowl, pressing gently on the berries to extract all the liquid without forcing pulp through.
Step 7: Measure the Strained Liquid
Once strained, you should have roughly 1.5 to 2 cups of liquid. Pour this into a measuring cup so you can calculate how much honey to add in the next step.
Step 8: Add Honey and Optional Lemon
Return the strained liquid to the saucepan and warm it over low heat just until it’s hot to the touch but not boiling. Remove from heat and stir in 3/4 cup of raw honey plus the optional lemon juice if using, stirring until the honey fully dissolves and integrates.
Step 9: Cool and Bottle
Let the syrup cool to room temperature, then pour it into clean glass jars with tight-fitting lids using a funnel for easy pouring. Store in the refrigerator where it will keep for 4 to 6 weeks.
Pro Tip: Never add honey to boiling liquid, as high heat destroys the beneficial enzymes and compounds that make raw honey special. Wait until the liquid cools slightly, then stir the honey in gently.
Tips for the Best Elderberry Syrup
- Use filtered water rather than tap water to avoid chlorine and impurities that might interfere with the delicate flavor.
- Don’t skip the cheesecloth when straining, as it catches fine particles and gives you a clear, smooth syrup rather than one with gritty sediment.
- If your berries didn’t reduce the liquid enough after simmering, return the strained liquid to the pan and simmer it uncovered for another 5 to 10 minutes to concentrate the flavor further.
- Taste the finished syrup and add a touch more honey if you prefer it sweeter, or a squeeze of lemon if it needs brightness.
- Store your jars in the coldest part of the fridge, not on the door where temperature fluctuates, to maximize shelf life.
- Shake the bottle gently before each use, as natural separation may occur over time.
Common Mistakes to Avoid
- Overheating the honey after adding it destroys the living enzymes and antimicrobial properties you’re after. Cool the liquid first, then stir in the honey off heat.
- Using regular dried elderberries from the bulk bin without checking the source or freshness leads to weak, flat-tasting syrup. Purchase from a reputable herb supplier with good turnover.
- Skipping the straining step or using an old colander instead of fine cheesecloth results in a gritty syrup with suspended particles that settle at the bottom.
- Not reducing the liquid enough before adding honey leaves you with a thin, watery syrup that doesn’t coat the spoon or pack enough flavor.
- Storing the syrup in clear bottles on an open shelf exposes it to light and temperature swings that degrade the color and potency over time.
Serving Suggestions
Elderberry syrup is versatile enough to enjoy in multiple ways throughout your day. Take it straight by the teaspoon, stir it into warm tea, or swirl it into breakfast foods for a naturally sweet boost.
- Mix a spoonful into a glass of warm water or herbal tea for a soothing winter drink
- Drizzle over plain yogurt with granola for a tangy, antioxidant-rich breakfast
- Swirl into oatmeal or porridge to add flavor and immune support without extra sugar
- Spoon it over ice cream or vanilla pudding as a healthier dessert topping
- Add a splash to sparkling water with fresh lemon for an herbal mocktail
Variations to Try
- Elderberry and Echinacea Syrup: Add 2 tablespoons of dried echinacea root during simmering for extra immune-boosting power. Echinacea adds an earthy note and pairs beautifully with elderberry’s tartness.
- Spiced Elderberry with Star Anise: Include 2 whole star anise pods in your spice blend instead of some of the cloves. This creates a licorice-forward version that tastes like a holiday spice blend.
- Elderberry and Turmeric Golden Syrup: Add 1 teaspoon of ground turmeric during simmering for golden color and anti-inflammatory benefits. Turmeric adds earthiness and makes the syrup warming rather than cooling.
- Citrus-Boosted Version: Add the zest of 1 orange and 1 tablespoon of fresh orange juice along with the lemon juice. This brightens the syrup and adds an uplifting quality perfect for spring immunity.
- Alcohol-Preserved Syrup: Replace half the honey with brandy or vodka for a version that keeps longer without refrigeration. This creates an herbal tincture-like product with a shelf life of several months.
Dietary Adaptations
- Vegan: Substitute raw honey with pure maple syrup or coconut nectar in equal amounts. The final syrup will have a different flavor profile but maintains the immune-supporting properties of the elderberries and spices.
- Low-Carb/Keto: Use monk fruit sweetener or erythritol instead of honey, using about half the amount since these sweeteners are more concentrated. The syrup will be less thick but suitable for low-carb diets.
- Gluten-Free: This recipe is naturally gluten-free as written, since elderberries, ginger, spices, and honey contain no gluten. Always verify that your dried elderberries came from a dedicated gluten-free facility if you have celiac disease.
- Paleo: This recipe is paleo-friendly as written, though you may want to use pure maple syrup instead of honey if following strict paleo guidelines that limit processed sweeteners.
Storage and Reheating
Refrigerator
Elderberry syrup keeps beautifully in the fridge for 4 to 6 weeks when stored in airtight glass jars. The cold temperature slows any natural fermentation and keeps the honey from crystallizing.
- Store in the coldest part of your fridge, away from the door
- Keep in dark glass bottles if possible to protect from light damage
- Shake gently before each use if separation occurs
Freezer
You can freeze elderberry syrup for up to a year if you want to preserve a large batch. Pour it into ice cube trays first, then transfer the frozen cubes to freezer bags for convenient portions.
- Freeze in small portions like ice cubes for easy single-serving use
- Label with the date so you use older batches first
- Thaw at room temperature or in warm water before using
Reheating
Since you typically consume elderberry syrup cold or at room temperature, reheating isn’t usually necessary. If you want to warm it for a hot drink, heat it gently over low heat or in hot water rather than in a microwave.
- Never microwave honey-based syrups, as microwaves heat unevenly and can destroy the beneficial compounds
- Warm over low heat in a small saucepan if you prefer warm syrup for tea
- Stir into already-hot beverages for a warm drink without heating the syrup separately
Nutrition Information
| Nutrient | Amount |
|---|---|
| Calories | 45 |
| Total Fat | 0g |
| Saturated Fat | 0g |
| Carbohydrates | 11g |
| Fiber | 0g |
| Sugar | 10g |
| Protein | 0g |
| Sodium | 2mg |
| Cholesterol | 0mg |
These values represent one serving (approximately 0.5 ounces or 1 tablespoon of finished syrup) and assume standard ingredient measurements. Individual nutrition may vary slightly based on the exact brands and varieties used in your batch.
Frequently Asked Questions
Can I use fresh elderberries instead of dried?
Fresh elderberries work, but you’ll need about 2 cups since they’re mostly water. Your finished syrup will be thinner and less concentrated in flavor, so you might want to extend the simmering time by 10 minutes to reduce it further.
How much syrup should I take daily?
A typical serving is 1 teaspoon to 1 tablespoon daily, adjusted based on your age and preference. Children usually take less (1/2 to 1 teaspoon), while adults can take up to 1 tablespoon once or twice daily during cold season.
Can I make this syrup without honey?
Yes, though honey serves both flavor and preservation purposes. Maple syrup, coconut nectar, or monk fruit sweetener all work, though you’ll need to use the syrup more quickly since it won’t preserve as long without honey’s antimicrobial properties.
What if my syrup turned out too thin?
Pour it back into the saucepan and simmer uncovered over low heat for another 5 to 10 minutes to reduce it further and thicken the consistency. You can always add more honey afterward if needed for sweetness and preservation.
Where do I buy dried elderberries?
Look for dried elderberries at health food stores, specialty tea shops, or online retailers that specialize in herbs and botanicals. Make sure you’re buying culinary-grade elderberries specifically, not ornamental varieties, and check that they come from a reputable supplier with good freshness and turnover.
Is elderberry syrup safe for children?
Elderberry syrup is generally safe for children over 1 year old in small doses. Children under 1 should not have honey due to botulism risk, so skip the honey or use an alternative sweetener if making syrup for babies.
Can I take elderberry syrup if I’m on medications?
Elderberry may interact with certain medications like immunosuppressants, so check with your doctor before using it if you take prescription drugs. Those with autoimmune conditions should also consult a healthcare provider before starting elderberry supplementation.
Final Thoughts
Making your own elderberry syrup transforms a simple wellness practice into an act of self-care that tastes delicious and costs just a fraction of what you’d pay for store-bought versions. Once you taste your homemade batch, you’ll never want to go back to commercial bottles.
This recipe is forgiving enough for first-timers but rewarding enough for anyone to return to year after year. Make a batch this month and discover why my family and I consider it an absolute winter essential.
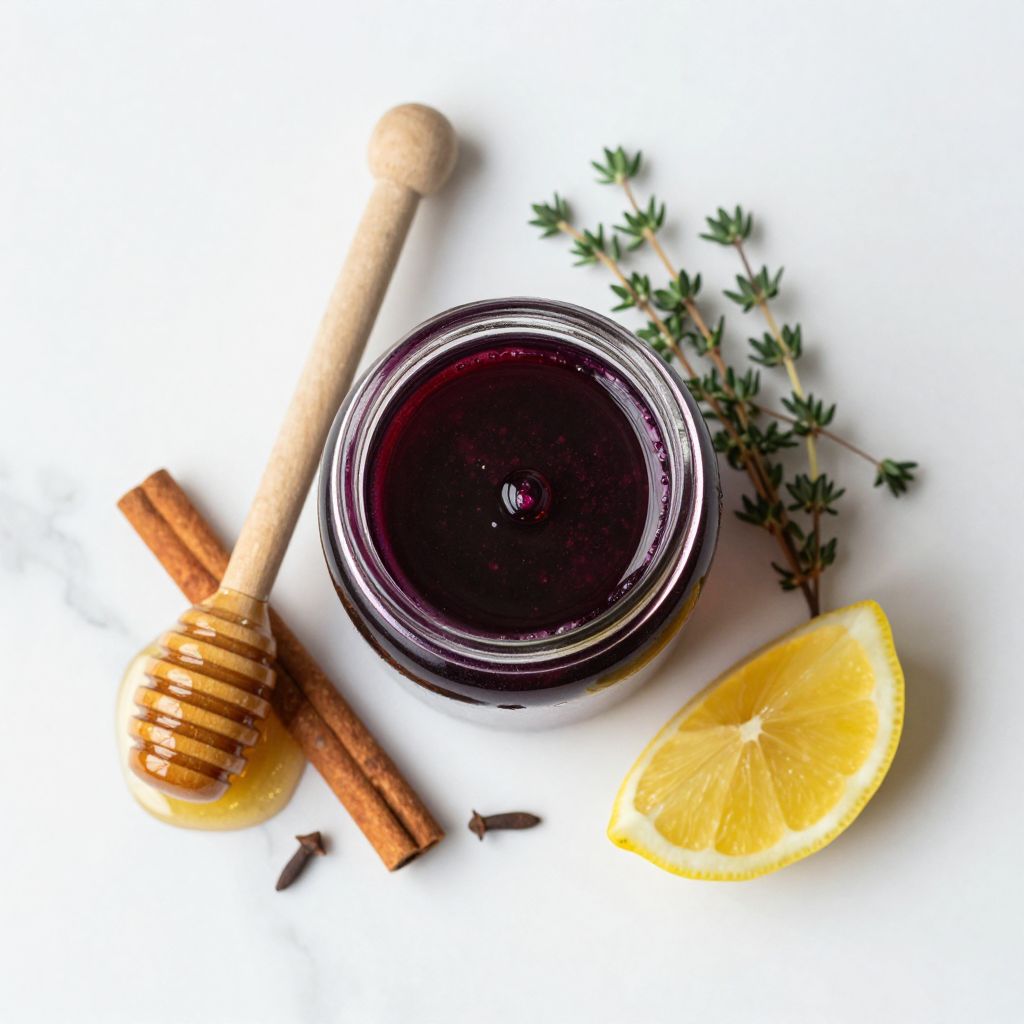
Elderberry Syrup
Ingredients
Equipment
Method
- Pour 1 cup dried elderberries into a measuring cup and rinse them quickly under cool water to remove any dust, then set aside.
- Peel a 2-inch piece of fresh ginger root and mince it finely into pieces about the size of a lentil.
- Pour 3 cups of filtered water into your saucepan and set it over medium-high heat. Add the cinnamon stick, cloves, and minced ginger, then bring the mixture to a gentle boil.
- Once the water is boiling, add the prepared elderberries and fresh thyme. Stir gently to make sure they're submerged in the liquid.
- Lower the heat to medium-low and let the mixture simmer gently for 25 to 30 minutes. The liquid should reduce by roughly half.
- Remove the pan from heat and let it cool for about 5 minutes. Pour the mixture through a fine mesh strainer lined with cheesecloth into a bowl, pressing gently on the berries to extract all the liquid.
- Pour the strained liquid into a measuring cup. You should have roughly 1.5 to 2 cups of liquid.
- Return the strained liquid to the saucepan and warm it over low heat just until it's hot to the touch but not boiling. Remove from heat and stir in 3/4 cup of raw honey plus the optional lemon juice, stirring until the honey fully dissolves.
- Let the syrup cool to room temperature, then pour it into clean glass jars with tight-fitting lids using a funnel. Store in the refrigerator where it will keep for 4 to 6 weeks.